Usage
The armor system in TFC+ is completely different than vanilla Minecraft.
When a player is hit, a weighted random roll is made to choose a body part (feet, legs, torso, arms, or head) to take the hit.
Feet and head have lowest chance to be hit and torso has the greatest.
If the player has no armor on that body part they will take the full amount of damage.
If the body part has armor (or clothing with armor stats), a face of the selected body part is chosen.
The face is chosen based on the angle of attack. Ex: an attack from above is more likely to strike the top face of the body part.
The armor's coverage is checked to see if the attack will connect with armor or bypass it.
If the attack lands on the armor, the damage will be reduced according to the armor's stats and then passed to the next layer of clothing/armor (if any) beneath.
This process is repeated until the damage is either reduced to 0 or it reaches the player.
The tool tip shows Armor Threshold. Pressing Shift will show detailed stats, including Body Part Coverage (for both the selected item and a sum for all armor on that body part) and Armor Rating for the selected Item.
Coverage
Armor rarely covers 100% of a player's body, so even if a body part has armor equipped, there's a chance that a hit might not connect with the armor on that body part.
An overall percentage of coverage is shown to the player in the tool tip, but Body Part Coverage is modeled more extensively behind the scenes.
Each armor is given a coverage map for the player's body parts and each weapon or mob is given a unique Damage Shape.
When coverage is checked, a random pixel on the face of the player's body part is selected and the Damage Shape is centered on that pixel.
The Damage Shape is compared with the coverage map to see if it collides with the armor coverage. If it completely avoids the covered area, the attack is treated as if the body part were unarmored. Weapons with smaller Damage Shapes (ex: Arrows, Javelins) are more likely to find gaps in coverage while larger Damage Shapes (ex: Mace, Sword) are more likely to collide with the armor.
If the hit collides with the armor, the damage is blocked according to the armor's stats.
Partial collisions are possible (ex: half the Damage Shape collides with your armor) and will result in the armor blocking at a reduced Armor Threshold.
Hits on the edge of a body part may wrap around to another side. Ex: a hit that strikes the edge of a player's face may check for armor coverage on the side of his head as well.
Armor Rating
Armor does not block 100% of damage (unless the incoming amount is small enough to round to 0). Instead, a percentage of incoming damage will be blocked depending on the Damage Type (Crushing, Piercing, and Slashing). The percentages are based on the material the armor is made of and are not affected by the durability of the armor.
Damage Threshold
This is the maximum amount of incoming damage a piece of armor can block from a hit.
If the Armor Threshold is not reached, the armor will block (Armor Rating)% of incoming damage, then convert the unblocked damage into Crushing and pass it to the next layer, and will lose no durability.
If the Armor Threshold is reached, all remaining damage passes to the next layer unchanged and the armor loses durability.
Armor Threshold is reduced as durability decreases, so low durability armor will offer less protection.
Damage Shape
Each attack has a shape to it, represented as a pattern on a 8x8 pixel grid. The shape of an attack greatly effects its interaction with armor. A small, focused Damage Shape is more likely to either completely miss or completely collide with the player's armor. A wide attack is more likely to have the armor's coverage partially collide with the Damage Shape, which will still block the attack, but at a reduced Damage Threshold depending on the degree of collision.
Obtaining
Clothing and Leather Armor
- Main article: Clothing
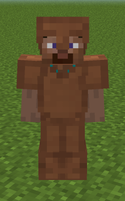
Clothing is used primarily to manage Body Temperature, but it does provide light armor. Leather gives a small amount of cold resistance but has more protection than most other clothing. Clothing and Leather Armor are crafted by cutting pieces of Cloth or Leather and sewing them together.
Metal Armor
Metal Sheets and Metal Double Sheets are the base components of metal armor, which is smithed at an Anvil.
| Work Double Ingot = Metal Sheet
|
Weld 2 Metal Sheets = Double Sheet
|
|
|
|
Smithing
Making metal armor is done in three steps on an anvil.
- First is to work out the basic shape selecting the plan for that specific armor piece.
- Second is to weld more metal to the basic shape of the armor.
- Finally you work the piece to seal all the seams and make it into a usable armor section.
Unfinished metal armor can be recycled back into molten metal in a Crucible, or in a Forge that has ceramic molds in the side slots.
Helmet
|
Chestplate
|
| Work Sheet = "Unf. Helmet Stage 1"
|
Work Double Sheet = "Unf. Chest. Stage 1"
|
|
|
|
| Weld "Unf. Helmet Stage 1" + Sheet = "Unf. Helmet Stage 2"
|
Weld "Unf. Chest. Stage 1" + Double Sheet = "Unf. Chest. Stage 2"
|
|
|
|
| Work "Unf. Helmet Stage 2" = Helmet
|
Work "Unf. Chest. Stage 2" = Chestplate
|
|
|
|
Greaves
|
Boots
|
| Work Double Sheet = "Unf. Greaves Stage 1"
|
Work Sheet = "Unf. Boots Stage 1"
|
|
|
|
| Weld "Unf. Greaves Stage 1" + Sheet = "Unf. Greaves Stage 2"
|
Weld "Unf. Boots Stage 1" + Sheet = "Unf. Boots Stage 2"
|
|
|
|
| Work "Unf. Greaves Stage 2" = Greaves
|
Work "Unf. Boots Stage 2" = Boots
|
|
|
|
Tiers
|
|
This page needs to be updated for the newest version of TFC+. Armor Tiers are not relevant for damage calculations in current version.
|
| Tier 0
|
Tier 1
|
Tier 2
|
| Leather
|
Copper
|
Bismuth Bronze
|
Black Bronze
|
Bronze
|
|
|
|
|
|
| Tier 3
|
Tier 4
|
Tier 5
|
Tier 6
|
| Wrought Iron
|
Steel
|
Black Steel
|
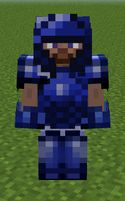
Blue Steel
|
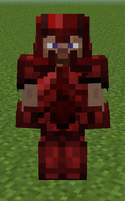
Red Steel
|
|
|
|
|
|
Damage Type Protection
|
|
This page needs to be updated for the newest version of TFC+. The data below may not be accurate in the current version.
|
- Main article: Damage Type
The damage type protection on a piece of armor can be viewed by pressing ⇧ Shift and hovering over the item to read the tool-tip. These numbers are used in the calculation for decreasing the amount of damage taken (1,000/(1,000 + Armor Rating)). For example: Copper armor has a piercing rating of 400. 1,000/1,400 is about 70%, so a piercing attack which would normally do 100 damage would only do 70 damage if the area is protected with copper armor.
| Tier
|
Armor
|
Piercing
|
Slashing
|
Crushing
|
| 0
|
 Straw Straw
|
25 |
25 |
25
|
| 0
|
 Wolf Fur Wolf Fur
|
200 |
250 |
250
|
| 0
|
 Bear Fur Bear Fur
|
250 |
300 |
300
|
| 0
|
 Silk Silk
|
100 |
100 |
75
|
| 0
|
 Cotton Cotton
|
40 |
40 |
14
|
| 0
|
 Linen Linen
|
40 |
40 |
15
|
| 0
|
 Wool Wool
|
50 |
50 |
25
|
| 0
|
 Leather Leather
|
150 |
200 |
200
|
| 1
|
 Copper Copper
|
400 |
400 |
250
|
| 2
|
 Bismuth Bronze Bismuth Bronze
|
600 |
400 |
330
|
 Black Bronze Black Bronze
|
400 |
600 |
330
|
 Bronze Bronze
|
500 |
500 |
330
|
| 3
|
 Wrought Iron Wrought Iron
|
800 |
800 |
528
|
| 4
|
 Steel Steel
|
1000 |
1200 |
660
|
| 5
|
 Black Steel Black Steel
|
2000 |
1800 |
1320
|
| 6
|
 Blue Steel Blue Steel
|
2500 |
2000 |
2000
|
 Red Steel Red Steel
|
2000 |
2500 |
2000
|
Note that all armor offers zero resistance to General Damage.
History
| Beta |
|---|
| v2 Build 13 | Added Armor. |
|---|
| Build 67 | All armor durability increased. |
|---|
| 77.0 | Removed the decorative features from the armors. |
|---|
| Added armor/damage types. |
| Armor takes damage at a reduced amount, based upon the damage received. |
| 79.4 | Unfinished metal armor is smeltable back into liquid metal. |
|---|
| 82.0 | Armor values added to Clothing |
|---|


.png)
.png)
.png)
.png)
.png)
.png)
.png)
.png)
.png)
.png)