User:Kreicus/Temp: Difference between revisions
No edit summary |
No edit summary |
||
| Line 1: | Line 1: | ||
== | == Obtaining == | ||
{| | === Leather Armor === | ||
{{main|Leather}} | |||
To begin crafting Leather Armor, right click with a piece of Leather in hand, and a knife in your hotbar. This will open up an interface similar to that of the knapping interface. | |||
Just as in Vanilla, Leather Armor can be dyed different colors by placing it in a crafting grid with some dye. | |||
{| cellspacing="10" | |||
|{{Grid/Knapping | |||
|A1= Leather Block |B1= Leather Block |C1= Leather Block |D1= Leather Block |E1= Leather Block | |||
|A2= Leather Block |B2= |C2= |D2= |E2= Leather Block | |||
|A3= Leather Block |B3= |C3= |D3= |E3= Leather Block | |||
|A4= |B4= |C4= |D4= |E4= | |||
|A5= |B5= |C5= |D5= |E5= | |||
|Output= Leather Helmet | |||
|}} | |||
|{{Grid/Knapping | |||
|A1= Leather Block |B1= |C1= |D1= |E1= Leather Block | |||
|A2= Leather Block |B2= Leather Block |C2= Leather Block |D2= Leather Block |E2= Leather Block | |||
|A3= Leather Block |B3= Leather Block |C3= Leather Block |D3= Leather Block |E3= Leather Block | |||
|A4= Leather Block |B4= Leather Block |C4= Leather Block |D4= Leather Block |E4= Leather Block | |||
|A5= Leather Block |B5= Leather Block |C5= Leather Block |D5= Leather Block |E5= Leather Block | |||
|Output= Leather Chest | |||
|}} | |||
|- | |- | ||
|{{ | |{{Grid/Knapping | ||
|{{ | |A1= Leather Block |B1= Leather Block |C1= Leather Block |D1= Leather Block |E1= Leather Block | ||
| | |A2= Leather Block |B2= Leather Block |C2= Leather Block |D2= Leather Block |E2= Leather Block | ||
| | |A3= Leather Block |B3= Leather Block |C3= |D3= Leather Block |E3= Leather Block | ||
| | |A4= Leather Block |B4= Leather Block |C4= |D4= Leather Block |E4= Leather Block | ||
|A5= Leather Block |B5= Leather Block |C5= |D5= Leather Block |E5= Leather Block | |||
|Output= Leather Leggings | |||
|}} | |||
|{{Grid/Knapping | |||
|A1= Leather Block |B1= Leather Block |C1= |D1= |E1= | |||
|A2= Leather Block |B2= Leather Block |C2= |D2= |E2= | |||
|A3= Leather Block |B3= Leather Block |C3= |D3= |E3= | |||
|A4= Leather Block |B4= Leather Block |C4= Leather Block |D4= Leather Block |E4= | |||
|A5= Leather Block |B5= Leather Block |C5= Leather Block |D5= Leather Block |E5= Leather Block | |||
|Output= Leather Boots | |||
|}} | |||
|} | |} | ||
=== Metal Armor === | |||
[[Metal Sheet]]s and [[Metal Double Sheet]]s are the base components of metal armor. | |||
{| | {| cellspacing="10" | ||
! | ! Work Double Ingot = Metal Sheet | ||
|- | ! Weld 2 Metal Sheets = Double Sheet | ||
|{{ | |-align="center" | ||
| | |{{Grid/Anvil | ||
| | |A1= Steel Ingot 2x ; |B1= ; Steel Sheet |C1= Steel Sheet | ||
|{{ | |Tool= Stone Hammer |Flux= | ||
| | }} | ||
| | |{{Grid/Anvil | ||
|A2= Steel Sheet ; |B2= Steel Sheet ; | |||
|A3= ; Steel Sheet 2x | |||
|Tool= Stone Hammer |Flux= Flux ; | |||
}} | |||
|} | |} | ||
== | ==== Smithing ==== | ||
Making metal armor is done in three steps on an anvil. | |||
*First is to work out the basic shape selecting the plan for that specific armor piece. | |||
*Second is to weld more metal to the basic shape of the armor. | |||
*Finally you work the piece to seal all the seams and make it into a usable armor section. | |||
''Unfinished metal armor can be recycled back into molten metal in a Crucible, or in a Forge that has ceramic molds in the side slots.'' | |||
{| | {| cellspacing="10" | ||
|<h5>Helmet</h5> | |||
|<h5>Chestplate</h5> | |||
|- | |- | ||
|{{ | ! Work Sheet = "Unf. Helmet Stage 1" | ||
|{{ | ! Work Double Sheet = "Unf. Chest. Stage 1" | ||
|{{ | |- | ||
|{{ | |{{Grid/Anvil | ||
|{{ | |A1= Steel Sheet ; |B1= ; Steel Helmet |C1= Steel Helmet | ||
|Tool= Stone Hammer | |||
}} | |||
|{{Grid/Anvil | |||
|A1= Steel Sheet 2x ; |B1= ; Steel Chestplate |C1= Steel Chestplate | |||
|Tool= Stone Hammer | |||
}} | |||
|- | |||
! Weld "Unf. Helmet Stage 1" + Sheet = "Unf. Helmet Stage 2" | |||
! Weld "Unf. Chest. Stage 1" + Double Sheet = "Unf. Chest. Stage 2" | |||
|- | |||
|{{Grid/Anvil | |||
|A2= Steel Helmet ; |B2= Steel Sheet ; | |||
|A3= ; Steel Helmet | |||
|Tool= Stone Hammer |Flux=Flux ; | |||
}} | |||
|{{Grid/Anvil | |||
|A2= Steel Chestplate ; |B2= Steel Sheet 2x ; | |||
|A3= ; Steel Chestplate | |||
|Tool= Stone Hammer |Flux=Flux ; | |||
}} | |||
|- | |||
! Work "Unf. Helmet Stage 2" = Helmet | |||
! Work "Unf. Chest. Stage 2" = Chestplate | |||
|- | |||
|{{Grid/Anvil | |||
|A1= Steel Helmet ; |B1= ; Steel Helmet |C1= Steel Helmet | |||
|Tool= Stone Hammer | |||
}} | |||
|{{Grid/Anvil | |||
|A1= Steel Chestplate ; |B1= ; Steel Chestplate |C1= Steel Chestplate | |||
|Tool= Stone Hammer | |||
}} | |||
|} | |} | ||
{| cellspacing="10" | |||
|<h5>Greaves</h5> | |||
|<h5>Boots</h5> | |||
{| | |- | ||
! | ! Work Double Sheet = "Unf. Greaves Stage 1" | ||
! Work Sheet = "Unf. Boots Stage 1" | |||
|- | |||
|{{Grid/Anvil | |||
|A1= Steel Sheet 2x ; |B1= ; Steel Greaves |C1= Steel Greaves | |||
|Tool= Stone Hammer | |||
}} | |||
|{{Grid/Anvil | |||
|A1= Steel Sheet ; |B1= ; Steel Boots |C1= Steel Boots | |||
|Tool= Stone Hammer | |||
}} | |||
|- | |||
! Weld "Unf. Greaves Stage 1" + Sheet = "Unf. Greaves Stage 2" | |||
! Weld "Unf. Boots Stage 1" + Sheet = "Unf. Boots Stage 2" | |||
|- | |||
|{{Grid/Anvil | |||
|A2= Steel Greaves ; |B2= Steel Sheet ; | |||
|A3= ; Steel Greaves | |||
|Tool= Stone Hammer |Flux=Flux ; | |||
}} | |||
|{{Grid/Anvil | |||
|A2= Steel Boots ; |B2= Steel Sheet ; | |||
|A3= ; Steel Boots | |||
|Tool= Stone Hammer |Flux=Flux ; | |||
}} | |||
|- | |||
! Work "Unf. Greaves Stage 2" = Greaves | |||
! Work "Unf. Boots Stage 2" = Boots | |||
|- | |- | ||
|{{ | |{{Grid/Anvil | ||
| | |A1= Steel Greaves ; |B1= ; Steel Greaves |C1= Steel Greaves | ||
| | |Tool= Stone Hammer | ||
|{{ | }} | ||
| | |{{Grid/Anvil | ||
| | |A1= Steel Boots ; |B1= ; Steel Boots |C1= Steel Boots | ||
|Tool= Stone Hammer | |||
}} | |||
|} | |} | ||
== | == Usage == | ||
The armor system in TerraFirmaCraft is completely different from vanilla Minecraft. When an entity takes damage, a slot is chosen at random for the damage to be dealt to. The feet and head are least likely to be hit, followed by the legs, and finally the chest which is most likely to be hit. If the entity is wearing armor in that slot, the damage dealt will depend on the tier of the armor, and how well it protects against that specific [[Damage Type]]. If the entity is not wearing any armor in that slot, they will take the full amount of damage. ''For example: If a player is wearing only a helmet, and takes a hit to the chest, they will take the same amount of damage as if they weren't wearing a helmet.'' The feet and head are also especially vulnerable, in that an unprotected hit to the head will do critical damage (75% extra), and an unprotected hit to the feet will result in a slowness debuff. The amount of durability damage that a piece of armor takes when being hit is dependent on the amount of damage dealt to the player after the protection is applied. | |||
{| class="wikitable" | === Tiers === | ||
{| class="wikitable" border="1" | |||
|- | |- | ||
| | !colspan=1|Tier 0 | ||
| | !Tier 1 | ||
!colspan=3|Tier 2 | |||
|- | |||
!Leather | |||
!Copper | |||
!Bismuth Bronze | |||
!Black Bronze | |||
!Bronze | |||
|- | |||
|[[File:Armor (Leather).png|125px]] | |||
|[[File:Armor (Copper).png|125px]] | |||
|[[File:Armor (Bismuth Bronze).png|125px]] | |||
|[[File:Armor (Black Bronze).png|125px]] | |||
|[[File:Armor (Bronze).png|125px]]<br> | |||
|- | |||
!Tier 3 | |||
!Tier 4 | |||
!Tier 5 | |||
!colspan=2|Tier 6 | |||
|- | |||
!Wrought Iron | |||
!Steel | |||
!Black Steel | |||
!Blue Steel | |||
!Red Steel | |||
|- | |||
|[[File:Armor (Wrought Iron).png|125px]] | |||
|[[File:Armor (Steel).png|125px]] | |||
|[[File:Armor (Black Steel).png|125px]] | |||
|[[File:Armor (Blue Steel).png|125px]] | |||
|[[File:Armor (Red Steel).png|125px]] | |||
|} | |} | ||
=== Damage Type Protection === | |||
The | {{main|Damage Type}} | ||
{| class="wikitable" | The damage type protection on a piece of armor can be viewed by pressing {{key|Shift}} and hovering over the item to read the tool-tip. These numbers are used in the calculation for decreasing the amount of damage taken (1,000/(1,000 + Armor Rating)). ''For example: Copper armor has a piercing rating of 400. 1,000/1,400 is about 70%, so a piercing attack which would normally do 100 damage would only do 70 damage if the area is protected with copper armor.'' | ||
! | {| class="wikitable sortable" style="text-align:right" | ||
! scope="col"| Tier | |||
! scope="col"| Armor | |||
! scope="col"| Piercing | |||
! scope="col"| Slashing | |||
! scope="col"| Crushing | |||
|- | |||
! 0 | |||
|align="left"| {{GridImage|Leather Chest}} Leather | |||
| 200 || 250 || 300 | |||
|- | |||
! 1 | |||
|align="left"| {{GridImage|Copper Chestplate}} Copper | |||
| 400 || 400 || 250 | |||
|- | |||
!rowspan=3| 2 | |||
|align="left"| {{GridImage|Bismuth Bronze Chestplate}} Bismuth Bronze | |||
| 600 || 400 || 330 | |||
|- | |||
|align="left"| {{GridImage|Black Bronze Chestplate}} Black Bronze | |||
| 400 || 600 || 330 | |||
|- | |||
|align="left"| {{GridImage|Bronze Chestplate}} Bronze | |||
| 500 || 500 || 330 | |||
|- | |- | ||
|{{GridImage| | ! 3 | ||
|align="left"| {{GridImage|Wrought Iron Chestplate}} Wrought Iron | |||
| 800 || 800 || 528 | |||
|- | |||
! 4 | |||
|align="left"| {{GridImage|Steel Chestplate}} Steel | |||
| 1000 || 1200 || 660 | |||
|- | |||
! 5 | |||
|align="left"| {{GridImage|Black Steel Chestplate}} Black Steel | |||
| 2000 || 1800 || 1320 | |||
|- | |||
!rowspan=2| 6 | |||
|align="left"| {{GridImage|Blue Steel Chestplate}} Blue Steel | |||
| 2500 || 2000 || 2000 | |||
|- | |||
|align="left"| {{GridImage|Red Steel Chestplate}} Red Steel | |||
| 2000 || 2500 || 2000 | |||
|} | |} | ||
''Note that all armor offers zero resistance to [[Damage Type#General|General Damage]].'' | |||
== History == | == History == | ||
{{History|b}} | {{History|b}} | ||
{{History|| | {{History||v2 Build 13|Added Armor.}} | ||
{{History|| | {{History||Build 67|All armor durability increased.}} | ||
{{History|| | {{History||77.0|Removed the decorative features from the armors.|Added armor/damage types.|Armor takes damage at a reduced amount, based upon the damage received.}} | ||
{{History|foot}} | {{History|foot}} | ||
{{Blocks}} | {{Blocks}} | ||
Revision as of 03:46, 8 October 2014
Obtaining
Leather Armor
- Main article: Leather
To begin crafting Leather Armor, right click with a piece of Leather in hand, and a knife in your hotbar. This will open up an interface similar to that of the knapping interface.
Just as in Vanilla, Leather Armor can be dyed different colors by placing it in a crafting grid with some dye.
|
|
| ||||||||||||||||||||||||||||||||||||||||||||||||||||||
|
|
|
Metal Armor
Metal Sheets and Metal Double Sheets are the base components of metal armor.
| Work Double Ingot = Metal Sheet | Weld 2 Metal Sheets = Double Sheet | ||||||||||||||||||||||||||||||||||||||||||||||||||||||||||||||||||||||||||||||||||||||||||||||||||||
|---|---|---|---|---|---|---|---|---|---|---|---|---|---|---|---|---|---|---|---|---|---|---|---|---|---|---|---|---|---|---|---|---|---|---|---|---|---|---|---|---|---|---|---|---|---|---|---|---|---|---|---|---|---|---|---|---|---|---|---|---|---|---|---|---|---|---|---|---|---|---|---|---|---|---|---|---|---|---|---|---|---|---|---|---|---|---|---|---|---|---|---|---|---|---|---|---|---|---|---|---|---|
|
| ||||||||||||||||||||||||||||||||||||||||||||||||||||||||||||||||||||||||||||||||||||||||||||||||||||
Smithing
Making metal armor is done in three steps on an anvil.
- First is to work out the basic shape selecting the plan for that specific armor piece.
- Second is to weld more metal to the basic shape of the armor.
- Finally you work the piece to seal all the seams and make it into a usable armor section.
Unfinished metal armor can be recycled back into molten metal in a Crucible, or in a Forge that has ceramic molds in the side slots.
Greaves |
Boots | ||||||||||||||||||||||||||||||||||||||||||||||||||||||||||||||||||||||||||||||||||||||||||||||||||||
| Work Double Sheet = "Unf. Greaves Stage 1" | Work Sheet = "Unf. Boots Stage 1" | ||||||||||||||||||||||||||||||||||||||||||||||||||||||||||||||||||||||||||||||||||||||||||||||||||||
|---|---|---|---|---|---|---|---|---|---|---|---|---|---|---|---|---|---|---|---|---|---|---|---|---|---|---|---|---|---|---|---|---|---|---|---|---|---|---|---|---|---|---|---|---|---|---|---|---|---|---|---|---|---|---|---|---|---|---|---|---|---|---|---|---|---|---|---|---|---|---|---|---|---|---|---|---|---|---|---|---|---|---|---|---|---|---|---|---|---|---|---|---|---|---|---|---|---|---|---|---|---|
|
| ||||||||||||||||||||||||||||||||||||||||||||||||||||||||||||||||||||||||||||||||||||||||||||||||||||
| Weld "Unf. Greaves Stage 1" + Sheet = "Unf. Greaves Stage 2" | Weld "Unf. Boots Stage 1" + Sheet = "Unf. Boots Stage 2" | ||||||||||||||||||||||||||||||||||||||||||||||||||||||||||||||||||||||||||||||||||||||||||||||||||||
|
| ||||||||||||||||||||||||||||||||||||||||||||||||||||||||||||||||||||||||||||||||||||||||||||||||||||
| Work "Unf. Greaves Stage 2" = Greaves | Work "Unf. Boots Stage 2" = Boots | ||||||||||||||||||||||||||||||||||||||||||||||||||||||||||||||||||||||||||||||||||||||||||||||||||||
|
| ||||||||||||||||||||||||||||||||||||||||||||||||||||||||||||||||||||||||||||||||||||||||||||||||||||
Usage
The armor system in TerraFirmaCraft is completely different from vanilla Minecraft. When an entity takes damage, a slot is chosen at random for the damage to be dealt to. The feet and head are least likely to be hit, followed by the legs, and finally the chest which is most likely to be hit. If the entity is wearing armor in that slot, the damage dealt will depend on the tier of the armor, and how well it protects against that specific Damage Type. If the entity is not wearing any armor in that slot, they will take the full amount of damage. For example: If a player is wearing only a helmet, and takes a hit to the chest, they will take the same amount of damage as if they weren't wearing a helmet. The feet and head are also especially vulnerable, in that an unprotected hit to the head will do critical damage (75% extra), and an unprotected hit to the feet will result in a slowness debuff. The amount of durability damage that a piece of armor takes when being hit is dependent on the amount of damage dealt to the player after the protection is applied.
Tiers
| Tier 0 | Tier 1 | Tier 2 | ||
|---|---|---|---|---|
| Leather | Copper | Bismuth Bronze | Black Bronze | Bronze |
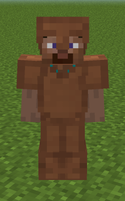
|
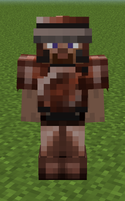
|
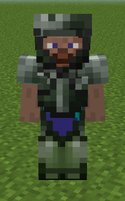
|
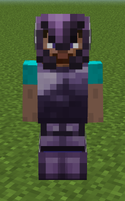
|
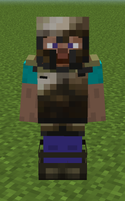 |
| Tier 3 | Tier 4 | Tier 5 | Tier 6 | |
| Wrought Iron | Steel | Black Steel | Blue Steel | Red Steel |
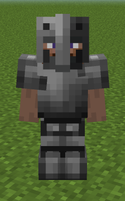
|
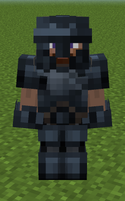
|
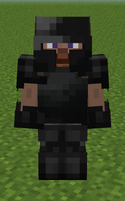
|
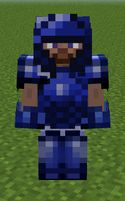
|
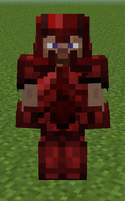
|
Damage Type Protection
- Main article: Damage Type
The damage type protection on a piece of armor can be viewed by pressing ⇧ Shift and hovering over the item to read the tool-tip. These numbers are used in the calculation for decreasing the amount of damage taken (1,000/(1,000 + Armor Rating)). For example: Copper armor has a piercing rating of 400. 1,000/1,400 is about 70%, so a piercing attack which would normally do 100 damage would only do 70 damage if the area is protected with copper armor.
| Tier | Armor | Piercing | Slashing | Crushing |
|---|---|---|---|---|
| 0 | 200 | 250 | 300 | |
| 1 | 400 | 400 | 250 | |
| 2 | 600 | 400 | 330 | |
| 400 | 600 | 330 | ||
| 500 | 500 | 330 | ||
| 3 | 800 | 800 | 528 | |
| 4 | 1000 | 1200 | 660 | |
| 5 | 2000 | 1800 | 1320 | |
| 6 | 2500 | 2000 | 2000 | |
| 2000 | 2500 | 2000 |
Note that all armor offers zero resistance to General Damage.
History
| Beta | ||
|---|---|---|
| v2 Build 13 | Added Armor. | |
| Build 67 | All armor durability increased. | |
| 77.0 | Removed the decorative features from the armors. | |
| Added armor/damage types. | ||
| Armor takes damage at a reduced amount, based upon the damage received. | ||
| Construction | Barrels • Blueprints • Bricks • Firepit • Plank Blocks • Protection Meter • Quern • Smooth Stone • Straw & Hide Bed • Support Beams • Straw Block • Glassworking • Plaster of Paris • Mud • Teepee • Kiln • Smoke Rack • Roads • Roof • Rope Ladder • Containers |
|---|---|
| Environment | Altitude • The Player • Wound • Calendar • Cobblestone • Logs • Mobs • Saplings • Seasons • Stone • Seashell • Temperature • Body Temperature • Clothes • Trees • Biome • Regions |
| Food | Agriculture • Animal Husbandry • Berries • Fruit Trees • Alcohol • Beekeeping • Fishing • Shellfish |
| Materials | Charcoal • Coal • Double Ingots • Double Sheets • Flux • Gems • Gunpowder • Hides • Fur • Wool • Cloth • Ingots • Leather • Lumber • Minerals • Pottery • Redstone/Powders • Sheets • Sticks • Straw • Unshaped Metal |
| Metalworking | Alloys • Anvils • Armor • Bellows • Blast Furnace • Bloomery • Tool Molds • Crucible • Forge • Gold Pan • Metals • Ores • Sluice • Mechanisms |
| Tools & Weapons | Arrows • Axe • Buckets • Chisel • Firestarter • Flint & Steel • Hammer • Hoe • Javelin • Knife • Mace • Pickaxe • Prospector's Pick • Saw • Shovel • Sword • Sling • Scythe • Shears • Spindle • Trowel • Wooden Staff • Musical Instruments |
| Modpacks | Telomerase |


