Difference between revisions of "Stone-Age Guide/ja"
(Created page with "== TFC+!へようこそ! == right Terrafirmacraft+ は、Minecraftを"サバイバルのあるべき姿"に再構築し、リアリティを高...") |
|||
| (334 intermediate revisions by the same user not shown) | |||
| Line 1: | Line 1: | ||
<languages /> | <languages /> | ||
| − | == TFC+ | + | == TFC+へようこそ! == |
[[File:Flowchart.png|500px|right]] | [[File:Flowchart.png|500px|right]] | ||
| − | + | TerraFirmaCraft+ は、Minecraftを"サバイバルのあるべき姿"に再構築し、リアリティを高めることに重点を置いています。バニラでは複雑さやディテールが足りないと感じている熟練プレイヤーや、バニラでは味わえない高いリアリズムを求める人に向いています。 | |
| − | + | ここでは、TFC+とバニラの違いに焦点を当てて、始めたての頃に何をすべきかを解説しています。既にオリジナルのTerraFirmaCraftをプレイしたことのあるプレイヤーは、[[Differences from TFC|TFCとの違い]]を参照してください。なにか問題や質問がある場合は、[https://discord.gg/GhqaFgQ Discord]や[https://reddit.com/r/TFCPlus Subreddit]へ連絡してください。 | |
| − | + | TFC+は多少翻訳されてはいますが、まだまだ未完成です。翻訳を手伝いたい場合は、[[Translation|翻訳]] ページを参照してください。 | |
| − | + | このガイドでは、Terrafirmacraft+をインストールしていることを前提としています。 | |
| + | インストールしていない場合は、[[Installation|インストール]]ページを参照してください。 | ||
| − | == | + | == 開始直後について == |
| − | === | + | === HUDとステータス情報 === |
| − | + | 新しくワールドを始めると、HUDがバニラとは違うデザインになっているのに気が付くでしょう。このセクションではTFC+のHUDに映っている様々なゲージや項目について解説します。 | |
| − | ==== | + | ==== 体力 ==== |
[[File:HealthBar.png|link=]] | [[File:HealthBar.png|link=]] | ||
| − | + | 初めに目につくバニラとの違いは体力ゲージです。TFC+ではハートの代わりに、HPが赤いゲージで表示されます。HPは最大1000からスタートしますが、これは栄養状態やレベルなどの様々な要因によって変化します。満腹ゲージが25%以上であれば、時間と共にゆっくりと回復していきます。完全に満腹になってもすぐに回復はしません。温泉に入ったり、[[Wound#Sterile Bandages|滅菌包帯]]を使用することで治癒を早めることができます。 | |
| − | + | また、プレイヤーはたびたび[[#Wounds and Medicine|怪我]]を負い、様々なデメリットを受けます。一度に20%以上のダメージを受けた場合にのみ怪我を負います。骨折したままだと動きが遅くなり、放置していると徐々にダメージを受けます。骨折は打撃系のダメージや落下ダメージによって、刺し傷は刺突系のダメージに、切り傷は斬撃系のダメージによって発生します。傷を治療するには[[#Wounds and Medicine|医療]]の項目を参照してください。 | |
| − | ==== | + | ==== 空腹 ==== |
[[File:HungerBar.png|link=]] | [[File:HungerBar.png|link=]] | ||
| − | + | 満腹度はバニラの骨付き肉の代わりに緑色のゲージで表します。 | |
| − | + | 食べ物それぞれに「満腹度」が設定されていたバニラとは異なり、TFC+の空腹システムは食べ物の重さを参照します(肉も魚も野菜も、食べる重さが同じなら回復する満腹度も一緒です)。TFC+では、オンスという帝国単位の値を使用しています。もっとも、この値は現実や他のゲームの値とは関係ありませんので、混乱するようなら「~口分」や「~個分」として考えてください。TFC+では食べ物は1スタック160オンスまで重ねられます。 | |
| − | + | プレイヤーは動かなくても数日の間に徐々にお腹が減っていきます。満腹度が一定以下になるとその間「採掘速度低下」や「弱体化」などのデメリットを受け始めます。満腹ゲージが枯渇するとやがて飢え始め、あっという間に死んでしまいます。 | |
| − | ==== | + | ==== 喉の渇き ==== |
[[File:FreshwaterPond.png|thumb|150px|Freshwater pond]] | [[File:FreshwaterPond.png|thumb|150px|Freshwater pond]] | ||
[[File:ThirstBar.png|link=]] | [[File:ThirstBar.png|link=]] | ||
| − | + | TFC+では「喉の渇き・潤い」の概念を導入しています。潤い度は青いゲージで表されています。プレイヤーは時間と共に徐々に喉が渇いていき、やがて「移動速度低下」や「弱体化」のような効果を受け、完全に脱水状態になると熱中症になります。空腹と同様、プレイヤーが動いていなくてもゆっくり喉が渇いていきます。プレイヤーは水場にある新鮮な水しか飲むことができません。そのため、この世界で生き伸びるためには新鮮で飲める水を見つけることが必須です。 | |
| + | 海水と違い、飲める水場にはガマやスイレンの葉があるのでそれを目印にするとよいでしょう。 | ||
| − | + | 新鮮な水の下のブロックを {{key|[[File:Rmb.png|link=]]右クリック}}することで水を飲むことができます。押し続ければ完全に喉が潤うまで飲み続けられます。 | |
| + | '''(また、現在「他のワールドのホットバーでアイテムを選択していると水が飲めない」というバグが発生しています。他のワールドでも手に何も持っていない状態にしてminecraftを再起動すれば飲めるようになります)''' | ||
| − | + | ゲーム序盤の大きな目的として、長距離探索のために真水を持ち運ぶこと、そしてそのための陶器の水差しを作成する必要があります。 | |
| − | ==== | + | ==== 経験値 ==== |
| − | + | レベルシステムはそのまま人生経験を表し、レベルが高いほどプレイヤーの最大HPや喉の潤い度、[[alcohol|アルコール]]耐性を増加させます。それにより更に大きいダメージに耐えたり、水を飲まずに長く生き延びたり、より多くのアルコールを飲んだりすることができます。 | |
| − | + | バニラと違ってエンチャントや道具の修理がないので、死んだりしない限り経験値は減りません。 | |
| − | ==== | + | ==== 体温 ==== |
[[File:Body Temperature Bar.png|right|link=]] | [[File:Body Temperature Bar.png|right|link=]] | ||
| − | + | 体温は画面右下の温度計で表されます。体温計の緑の部分は過ごしやすい気温の範囲を示しています。プレイヤーの体温は季節や地域の気候、特定のブロックによって影響を受けます。体温が高すぎたり低すぎたりすると、「移動速度低下」や「採掘速度低下」などのデメリットを受けることになり、そして体を冷ますため汗をかいたり、温めるためにカロリーを消費するので空腹感や喉の渇きを早く感じるようになります。また藁のベッドで眠ることもできなくなります。 | |
| − | + | 体温は主に[[#藁|衣服]]で調整します。また[[#藁ぶき屋根|屋根]]の下や日陰に入って日差しを遮ったり、洞窟の中にいたりすることでも体温調節を行うことができます。 | |
| − | + | TFC+のインベントリには4つのタブがあります。バニラのインベントリのようにアイテムを保持したりクラフトしたりする「インベントリタブ」、プレイヤーの各スキルの熟練度を表示する「スキルタブ」、時間や季節、曜日を表示する「時間タブ」、そしてプレイヤーが健康維持のために最低限食べなければならない栄養素を5つのカテゴリーに分けて表示する「栄養タブ」です。 | |
| − | + | ||
| − | + | バニラとは異なり、全てのクラフトはインベントリタブで直接行われます。初めは2x2のグリッドから始めますが、後に作業台を使って3x3に拡張することができます。作業台は実際に置いて使うブロックではなく、3x3グリッドを解放するための特殊なアイテムです。 | |
{{Grid/Inventory Table}} | {{Grid/Inventory Table}} | ||
| − | === | + | === サバイバル一日目:道具・光・衣服 === |
| − | + | 初日の目標は、夜営の準備ととにかく生き延びることです。自分の周りを見渡して、どんな資源があるか確認してください。草や低木、岩が地平線まで伸びる平原であれば、金属片や動物をかなり簡単に見つけることができるかもしれません。海岸沿いであれば、海藻や真水は簡単に確保できるでしょう。深い熱帯雨林の真っただ中にいるならば、粘土や淡水、木材が豊富に見つかることでしょう。 | |
| − | ==== | + | ====できないこと==== |
| − | + | バニラの時のように木を殴っても木材が手に入らないことに気づくかもしれません。これはTFC+のスキルツリーがバニラと全く異なる構造をしているためです。TFC+には木の道具は存在しないので、頑張って木を殴り倒しても時間の無駄です。鋸がなければ作業台や板を作ることができず、そしてそれは金属から作るしかありません。 | |
| + | そのため、最初の道具は木材ではなく[[knapping|石]]で作られることになります。 | ||
| − | + | 現実とTFC+には木のツルハシや石のツルハシなどは存在しません。初めの内は鉱石を掘って採掘したりはできず、その代わりに鉱石片を拾って金属製の道具を作ります。まずはより多くの鉱石を得るためにツルハシを作ることになるでしょう。 | |
| − | + | TFC+では[[sand|砂]]、[[grave|砂利]]、[[stone|石]]、[[cobblestone|丸石]]は重力の影響を受けるため、土を掘る事はお勧めしません。バニラと異なり、重力の影響を受けたブロックは真下だけでなく横に滑り落ちることもできます。そのためこれらのブロックで家を作ることはできません。 | |
| − | + | バニラのminecraftに慣れているプレイヤーなら、どうやってTFC+でアイテムを保管するのか疑問に思うかもしれません。板を作れるのは金属製のツールを作れるようになった後ですので、初めの内は[[#Straw|藁かご]]、[[#Pottery|陶製の容器]]、[[#Pottery|陶製の大型容器]]、[[#Sewing|生皮鞄]]のような代替品を使うことになります。 | |
| − | + | TFC+では無暗に走り回ると余計に飢えと渇きが進むのでオススメしません。代わりに木の杖を使うことで、走行の半分の速さで動くことができます。木の杖については後述します。 | |
| − | + | TFC+の松明は可燃性のブロックに火をつけます。松明を使う前に、周囲の草や低木、落ち葉などの可燃性のブロックを取り払っておくことをお勧めします。拠点で明かりをつけるには後述する焚火を使用します。ゲームが進めば、後により安全な光源である[[Candle|ロウソク]]を作ることができます。 | |
| − | ==== | + | ==== 石と棒 ==== |
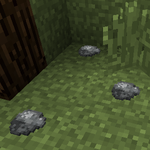
[[File:RockGen.png|link=|thumb|right|150px|Some [[rock]]s laying on the ground.]] | [[File:RockGen.png|link=|thumb|right|150px|Some [[rock]]s laying on the ground.]] | ||
{| | {| | ||
| Line 101: | Line 104: | ||
|} | |} | ||
| − | + | TFC+でまず最初にやるべきことは、木を殴るのではなく地面に散らばっている石や棒切れを集めることです。石が十数個もあれば最初の数日間を生き延びるには十分でしょう。 | |
| − | + | その際、時々鉱石の小片を見つけるかもしれません。その時は'''拾った場所をメモしておく'''ことをお勧めします。後で必ず役に立つ時が来ます。 | |
| − | + | 棒は木の下や岸辺の地面に散らばっています。落ち葉を浚ったり、低木を壊すことでも得られます。 | |
| − | ==== | + | ==== ナッピング ==== |
| − | [[ | + | [[ナッピング]]とは、2つの[[石]]を使って石の[[道具]]のツールヘッドを作ることです。2つ以上の石を持って{{key|[[File:Rmb.png|link=]]右クリック}}すると、ナッピングインターフェイスが開きます。 |
{{Knapping | {{Knapping | ||
| Line 119: | Line 122: | ||
}} | }} | ||
| − | + | ナッピングインターフェースは5x5のグリッドで表されます。グリッドの中の四角い部分をクリックして石の一部を削ります。間違ってクリックしてしまうとやり直しは利かず、最初からやり直すことになります。特定の形を作ると右側にツールヘッドが表示され、これを[[棒]]とクラフトして取り付ける事で、石のツールを作ることができます。叩いている間に石の破片が出てくることがありますが、後々これを使って矢を作ることができます。 | |
| − | ''Tip: | + | ''Tip: いくつかのツールは、以下に示すものとは異なる形で作る事もできますので、気軽に試してみてください。'' |
{| | {| | ||
|- style="vertical-align:top;" | |- style="vertical-align:top;" | ||
| style="width: 200pt; padding-right: 10px"|{{Recipe/Stone Knife Blade}} | | style="width: 200pt; padding-right: 10px"|{{Recipe/Stone Knife Blade}} | ||
| − | + | ナイフは小型の武器であり、同時に便利な道具でもあります。ナイフを使えば、海藻を集めたり、毛皮や動物の皮を革や衣服に変えたり、穀物を穀類に加工したり、食べ物の腐敗を取り除くことができます。ナイフには「刺突」と「斬撃」の2つの攻撃モードがあり、それぞれ与えるダメージの種類が異なります。(特にスケルトンに対して刺突属性の攻撃は無効なので注意しましょう)。これらはデフォルトで{{{key|M}}}キーを押すことで切り替えることができます。ナイフは鏡写しになるよう石を削ると、一度に2本作ることができます。 | |
| style="width: 200pt; padding-right: 10px"|{{Recipe/Stone Axe Head}} | | style="width: 200pt; padding-right: 10px"|{{Recipe/Stone Axe Head}} | ||
| − | + | 斧は木を伐採するのに便利な道具です。また攻撃力の高い斬撃武器としても活躍します。 | |
| style="width: 200pt; padding-right: 10px"|{{Recipe/Stone Shovel Head}} | | style="width: 200pt; padding-right: 10px"|{{Recipe/Stone Shovel Head}} | ||
| − | + | シャベルは、土、粘土、砂利、砂を集めるための道具です。また打突属性の武器として使用できます。 | |
|} | |} | ||
| − | '' | + | '''Tip:柄をつけた石の道具はスタックできませんが、ツールヘッドは32個までスタックできます。夜、モンスターから隠れている時に石を叩いて予備のツールヘッドを何個か作っておくとよいでしょう。そして日中に道具が壊れてしまった時、棒と組み合わせれば素早く道具を補充できます。''' |
| − | + | ツールの柄は[[stick|棒]]だけでなく、[[bone|骨]]を代用することもできます。 | |
| + | あなたが動物の解体に精通した狩人なら、こちらを使うのもいいでしょう。 | ||
{| cellspacing=10 | {| cellspacing=10 | ||
|{{Recipe/Stone Knife}} | |{{Recipe/Stone Knife}} | ||
| Line 143: | Line 147: | ||
|} | |} | ||
| − | ==== | + | ==== 樹木 ==== |
{| | {| | ||
|{{GridImage|Log (Acacia)}} | |{{GridImage|Log (Acacia)}} | ||
| Line 164: | Line 168: | ||
|} | |} | ||
| − | + | 斧で樹木を切り倒すことで木材を集めることができます。木の下部から切り倒すと、それより上の木全体が丸太や棒となってドロップします。斧に木全体を切り倒せる程の耐久がない場合、その耐久に見合うだけのブロックが木の上部から順に切り倒されます。 | |
| − | + | 樹木には森林や草原に生えるような普通のサイズの丸太を落とすものと、原木を落とす大木の2種類があります。原木は普通の大きさまで割ることができますが、原木は希少な上建材としても使えるので、火急の用がない場合は取っておきましょう。 | |
| − | + | 丸太は{{key|shift}}+ {{key|[[File:Rmb.png|link=]]右クリック}}で地面に置いて丸太の山に格納できます。丸太の山を設置するには普通のサイズの丸太しか使えませんが、すでに設置された丸太の山の中に原木を積むことはできます。 | |
| − | + | 丸太はナイフで長い木の棒に加工することができ、長い木の棒を半分に折って棒を作ることができます。 | |
{{Recipe/Pole}} | {{Recipe/Pole}} | ||
{{Grid/Inventory Table|A1=Pole|Output=Stick,2}} | {{Grid/Inventory Table|A1=Pole|Output=Stick,2}} | ||
| − | + | 樹木をナイフで右クリックすると[[Resin|樹脂]]が手に入ります。これを使って「木の杖」や「簡易包帯」などのアイテムを作ることができます。木の杖は樹脂と長い木の棒を組み合わせて作られ、持っていると歩行時に15%の移動速度上昇効果が発生します。これにより走行の半分の速度で動くことができます。TFC+では走り回るとあっという間にお腹が空いて喉が渇いてしまうので、できる限り木の杖を使うことをお勧めします。簡易包帯はプレイヤーが出血系の怪我をしたときに使います。詳細は[[#傷と薬|傷と薬]]の項目へ。 | |
{{Recipe/Wooden Staff}} | {{Recipe/Wooden Staff}} | ||
| − | ==== | + | ==== 武器 ==== |
| − | + | 野生動物を狩ったり、夜に湧くモンスターから身を守るためには武器が必要です。ゲーム序盤は石器や木の槍や木の杖を使う事になるでしょう。TFC+ではダメージにそれぞれ属性があり、「斬撃」「刺突」「打撃」の3種類に分かれています。斬撃はエンダーマンとゾンビに有効で、刺突は熊・クリーパー・エンダーマン・狼に、打撃はエンダーマンとスケルトンに効果を発揮します。 | |
| + | 反対に耐性もあり、ゾンビやクリーパーに打撃は効きづらく、そしてスケルトンは斬撃を軽減し、刺突を無効化します。 | ||
| + | 斧は斬撃、槍とジャベリンは刺突、シャベルとハンマーは打撃属性を与えます。ナイフには「刺す」「斬る」の2つのモードがあり(デフォルトで{{key|M}}キーで切り替え)、それぞれ「刺突」と「斬撃」のダメージを与えます。 | ||
{| cellspacing=10 | {| cellspacing=10 | ||
| Line 188: | Line 194: | ||
|} | |} | ||
| − | + | ジャベリンは作成に竿を使用する必要がありますが、ハンマーは普通のツールのように棒や骨で作れます。 | |
| − | + | 木の槍はジャベリンの下位互換です。長い木の棒とナイフを組み合わせて作ります。 | |
{{Recipe/Wooden Spear}} | {{Recipe/Wooden Spear}} | ||
| − | + | 木の槍とジャベリンは投げる度に自動的にインベントリからメインハンドに補充されます。 | |
| − | ==== | + | ==== 狩猟と採集 ==== |
| − | + | 長く生き延びるためには、食料と水場の確保は不可欠です。海水は飲めず、飲めるのは真水だけです。(真水を見つけて飲む方法は[[#喉の渇き]]のセクションで説明されています。) | |
| − | ===== | + | ===== 海藻 ===== |
| − | + | 海岸近くにいる場合、序盤の食料源として海藻はうってつけです。ナイフを持って海藻の下のブロックを{{key|[[File:Rmb.png|link=]]右クリック}}することで収穫できます。海藻を数枚手に入れたら、インベントリを開き海藻にカーソルを合わせて{{key|S}}を押してみてください。複数の海藻を一度にスタックすることができます。クラフトグリッドでまとめることもできます。 | |
| − | ===== | + | ===== 肉 ===== |
| − | + | 岸辺が近場にない場合、次善の食料源は肉です。動物は世界各地に群れをなしていますが、見つけたからといってすぐに攻撃してはいけません。TFC+では動物は中立モブであり、プレイヤーが攻撃するとすぐに反撃してきます。体力もバニラに比べて格段に上がっているので、準備は入念にしておきましょう。 | |
| − | '' | + | '''注意:動物を甘く見てはいけません! 彼らは凄まじい攻撃力とノックバックを秘めています。バニラのような人畜無害な生物ではありません。''' |
| − | + | 動物を狩る場合は、幾らかの木の槍かジャベリンを準備して、距離を十全に取ってください。そして{{key|[[File:Rmb.png|link=]]右クリック}}を長押しして槍を構え、連続で投げ続けてください。'''槍で直接殴って攻撃するのはオススメしません。投げるよりも遥かに少ないダメージしか与えられません。反撃にも十分注意してください。'''TFC+では、動物は体重と同じ量の肉を落とします。そのため大型の動物はかなりの量の肉を落とすことになります。数スタックもあれば数日は持つので(それ以上持ってても腐る場合が殆どです)、全部使い切ろうと躍起になる必要はありません。ただし[[Raw Hide|生皮]]や[[Sinew|腱]]は必ず拾っておきましょう。 | |
| − | + | もし怪我を負った場合は[[#Wounds and Medicine|怪我]]のセクションにジャンプして適切な処置を施してください。 | |
| − | ===== | + | ===== 採集 ===== |
[[File:WildRye.png|thumb|150px|A wild patch of [[rye]].]] | [[File:WildRye.png|thumb|150px|A wild patch of [[rye]].]] | ||
{| | {| | ||
| Line 258: | Line 264: | ||
|} | |} | ||
| − | [[Agriculture|Crops]] | + | [[Agriculture|Crops]]は春から晩夏までの[[season|季節]]間にランダムに生えてきます。毎年その季節に再生するので、機会を失ってもまた再チャレンジしましょう。完全に成熟していない作物を収穫すると種しか得られないので、[[food|食料]]が欲しい場合はしっかり成熟するまで待ちましょう。 |
| − | + | 果樹やベリーの茂みは野生に自生していることがあります。果実を収穫するには、実が生っているテクスチャの葉ブロックを{{key|[[File:Rmb.png|link=]]右クリック}}してください。ベリーの茂みは摘み取って別の場所に設置することもできます。 | |
| − | + | こういった安定した食料源を見つけるのは難しいかもしれません。バニラではバイオーム毎に資源が生成されますが、TFC+では約1000ブロック離れた場合によってのみ気候が変わるので、バニラよりもずっと広いエリアを探索しなければなりません。バニラでキノコバイオームや荒野バイオームを探そうとしていると想像してみてください。――もしこれらの食料源が見つからない時は、見つかるまで各地を転々としながら生活するのもよいでしょう。身の丈に合った生活をすれば、それでも十分生き延びる事は可能です。 | |
| − | + | 穀物はナイフで脱穀する必要があります。穀物を脱穀すると余った茎が[[Straw|藁]]になります。 | |
{{Grid/Inventory Table | {{Grid/Inventory Table | ||
| Line 272: | Line 278: | ||
}} | }} | ||
| − | + | 落ち葉を掃くと得られるキノコは、ナイフで切ると食べられるようになります。生で食べても大丈夫なのは茶色いキノコだけで、赤いキノコは加熱しないと中ってしまいます。 | |
| − | '' | + | '''注:間違っても果樹の葉は毟ってはいけません! 再生にかなりの時間がかかってしまいます。''' |
| − | + | 種は畑に[[#Agriculture|植えて育てる]]ことができ、安定した食料源となることでしょう。 | |
| − | + | 食料を大量に持っている場合は、それらを一まとめにスタックすることができます。スタックを一緒にクラフトするか、スタックの上にカーソルを置いて{{{key|S}}}キーを押してまとめる事ができます。食べ物は現実世界のように時間が経つにつれて腐っていきます。ナイフを所持していて、{{{key|E}}}でインベントリを開いている状態で{{key|D}}キーを押すと自動で食料の腐敗した部分を取り除く事ができます。食料を長持ちさせるには、相応の保存加工をする必要があります。保存方法については後述します。 | |
| − | ===== | + | ===== 養蜂 ===== |
| − | + | ||
| − | + | 野生の蜂の巣は時折樹上に生成されます。蜂の巣からはハニカムを得られ、ハニカムからは蜂蜜や蝋を得られます。また、更に多くの蜂蜜を得るために人工的な蜂の巣を作る事もできます。 | |
| − | + | 蜂の巣を見つけても直接触ってはいけません。蜂の巣を開けようとしたり壊したりすると、蜂が怒ってプレイヤーを刺してきます。蜂を落ち着かせて蜂の巣を開くには、蜂の巣の下で火を焚く必要があります。野生の蜂の巣には、[[肥えたハニカム]]があります。そのまま中の蜂蜜を採集する事もできますが、人工的な蜂の巣を作るための土台にもできます。蜂の巣からハニカムを取り除くと、蜂の巣は崩れ、幾つかの空のハニカムをドロップします。これは後で溶かして[[Candle|ロウソク]]の材料である蝋にする事ができます。 | |
{{Recipe/Honey Bowl}} | {{Recipe/Honey Bowl}} | ||
| − | + | ハチミツを掬うボウルを作る方法については後述しますが、養蜂箱を作る過程については[[Beekeeping|養蜂]]の記事を参照してください。 | |
| − | ==== | + | ==== 焚き火 ==== |
{{main|Firepit}} | {{main|Firepit}} | ||
| − | + | 夜になれば、[[松明]]を作るための[[焚き火]]を作り、集めた食料を調理して食べられるようにしたいと思うでしょう。必要なものは少なくとも5本の[[棒]]と、燃料として使うための[[丸太]]と、必要に応じて[[藁]]です。 | |
| − | + | まず、クラフトグリッドに2本の棒を斜めに入れて火起こし器を作ります。 | |
{{Recipe/Firestarter}} | {{Recipe/Firestarter}} | ||
| − | + | 火起こし器ができたら、デフォルトで {{key|Q}}で3本以上の棒を地面や不燃性ブロックの上に投げます。棒が全て同じブロックの上にスタックされていることを確認してください。最初の数回は火が付かないかもしれません。お好みで藁を入れると、より火が付きやすくなります。焚き火が出来たら、素早く丸太などの燃料を入れます。火起こし器は、後に弓と一緒にクラフトすることでより高い着火性と耐久性を持つ弓火起こし器にアップグレードすることができます。 | |
| − | + | 焚き火が消えたら、燃料を追加して火起こし器を手に持ち、{{key|[[File:Rmb.png|link=]]右クリック}}して再点火する必要があります。再点火は必ず成功します。 | |
| − | + | 焚き火を起こせるようになったら、松明をいくつか作っておくことをオススメします。消えた松明を持って火のついた焚き火を{{key|[[File:Rmb.png|link=]]右クリック}}すると簡単に火を灯す事ができます。同じように設置されている明かりの付いた松明も、消えた松明に火を灯せます。 | |
{{Recipe/Torch}} | {{Recipe/Torch}} | ||
| − | '' | + | '''注意!:松明は火やマグマのような延焼効果を持ちます。拠点が木や藁で出来ている場合、その近くに置いてはいけません。代わりに焚き火で照らし、後で[[#ロウソク]]にアップグレードしましょう。屋外に置く際も、松明周りの葉や木、低木、落ち葉などは取り除きましょう。''' |
| − | ==== | + | ==== 藁 ==== |
| − | + | ナイフで草を刈ると藁が手に入ります。藁は拠点の建材や物をしまっておくかご、衣類、[[#Wounds and Medicine|包帯、当て木]]、寝具などに利用できるので、ゲーム序盤では非常に役に立つアイテムです。 | |
| − | + | 藁はナッピングと似たインターフェイスを使って編むことができます。藁を編むには5枚以上のの藁を持った状態で適当なブロックを{{key|[[File:Rmb.png|link=]]右クリック}}します。 | |
{| | {| | ||
|- style="vertical-align:top;" | |- style="vertical-align:top;" | ||
| style="width: 200pt; padding-right: 10px"|{{Recipe/Straw Basket}} | | style="width: 200pt; padding-right: 10px"|{{Recipe/Straw Basket}} | ||
| − | + | 藁かごには9個までものを入れられます。壊されると中のものをドロップします。 | |
| style="width: 200pt; padding-right: 10px"|{{Recipe/Grass Cloak}} | | style="width: 200pt; padding-right: 10px"|{{Recipe/Grass Cloak}} | ||
| − | + | 藁コートはそれなりに防寒効果があります。寒い地域にスポーンした時にはとても役に立つでしょう。 | |
| − | | style="width: 200pt; padding-right: 10px"|{{Recipe/Straw Hat}} | + | | style="width: 200pt; padding-right: 10px"|{{Recipe/Straw Hat}}麦わら帽子は直射日光を遮り、少しだけ暑さに耐性を与えてくれます。 |
| − | + | ||
|- style="vertical-align:top;" | |- style="vertical-align:top;" | ||
| style="width: 200pt; padding-right: 10px"|{{Recipe/Grass Shirt}} | | style="width: 200pt; padding-right: 10px"|{{Recipe/Grass Shirt}} | ||
| − | + | 藁シャツは若干の耐暑効果があります。 | |
| style="width: 200pt; padding-right: 10px"|{{Recipe/Grass Skirt}} | | style="width: 200pt; padding-right: 10px"|{{Recipe/Grass Skirt}} | ||
| − | + | 藁スカートは若干の耐暑効果があります。 | |
| style="width: 200pt; padding-right: 10px"|{{Recipe/Grass Sandals}} | | style="width: 200pt; padding-right: 10px"|{{Recipe/Grass Sandals}} | ||
| − | + | 藁サンダルは砂の上を歩く時に少しだけ速くなります。 | |
|} | |} | ||
| − | + | 藁は[[Straw Block|ふきわら]]に加工することができ、夜間の一時的な拠点を作るのに便利です。 | |
{{Recipe/Straw Block}} | {{Recipe/Straw Block}} | ||
| − | '' | + | '''注意!:プレイヤーとMobはふきわらをそのまますり抜けてしまいます。ふきわらを使って安全な場所に壁や柱を建てる事はできません。モンスターはふきわら越しにプレイヤーを発見する事はできませんが、既に発見された状態でモンスターから逃げ隠れても彼らはふきわらを素通りして襲い掛かってきます。''' |
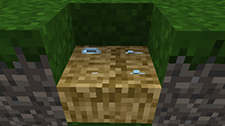
[[File:HideBedCreation.png|thumb|150px|Creating a [[Straw & Hide Bed]].]] | [[File:HideBedCreation.png|thumb|150px|Creating a [[Straw & Hide Bed]].]] | ||
| − | + | [[皮|大きい生皮]]を持っている場合、2つのふきわらを並べてその上に皮を{{key|[[File:Rmb.png|link=]]右クリック}}で敷くことで、藁と生皮のベッドを作ることができます。その際ベッドの頭か足側に立って敷いて下さい。向きが合わないとベッドが作れません。これで夜に眠る事ができます。暑すぎたり寒すぎたりすると寝心地が悪くて眠れなくなるので、その場合は服を着て体温を調節してください。 | |
| − | + | もしあなたがここまで来れた時――おめでとうございます! あなたはTFC+のサバイバル一日目を生き延び、危険な夜をやり過ごす手段を手に入れました。TFC+ではモンスターのスポーン数が激増しているので、夜にうろついているのはよくありません。近くに[[粘土]]があれば、火を焚く事をお勧めします。あなたはもう長期的な生存のための方法を探求できます。さらには銅器時代へ歩を進めることすらも……。 | |
| − | == | + | == 一日目を終えて == |
| − | + | 初日を超えた日々は、生存のためにより多くの食料や道具を確保する事に重きを置くとよいでしょう。そのためにもいち早く石器時代を離れ、様々な金属製ツールを作れる銅器時代へ突入し、この厳しい世界を生き延びるさらなる足掛かりとして下さい。 | |
| − | === | + | === 季節と環境 === |
| − | + | バニラにおけるバイオームの代わりに、TFC+には気候システムを導入しています。[[Rainfall|降雨量]]、標高、赤道からの距離、時間帯によって、その地域にどんな種類の動物、植物、地形が発生するかを決定しています。プレイヤーは常に初夏の北半球にスポーンします。 | |
| − | + | TFC+はMinecraftに四季を追加します。季節は周囲の気温や動物の行動、夜明けや日没時刻に影響を与えます。寒い冬には収穫されていない作物は種に戻り、木々は葉を落とし、常緑ではない新しい苗木は成長を止めます。春になると、草や花、石、苗木などが再生します。夏になると、世界中のいたるところで作物がランダムに生え始め、その実や種を収穫できるようになります。秋には、木々の葉が紅く染まり、気温が下がり始めます。あなたは四季を迎えるにあたって相応の準備をしなければなりません。日差しの照る熱帯にいる場合は避暑のための建造物を建て、冬の厳しい冷帯にいるなら暖かい服を縫って冬の寒さに備える……。季節と環境が与える試練に人の知恵と知識をもって立ち向かいましょう。 | |
| − | + | 赤道付近の地域は高温多湿な傾向があり、北、または南へ行くにつれ熱帯、温帯、亜寒帯、そして27000ブロック進むと最終的に極地へ辿りつきます。 | |
| − | + | 河川はバイオームの境界に沿って生成され、バニラのものよりも遥かに大きいるかに大きいです。川底には粘土質の堆積物があり、粘土の手に入りにくい乾燥地域でスポーンした時には役に立つ事でしょう。 | |
| − | + | TFC+では地方の概念も導入されています。地方とはその地域に生成される木や植物、動物の種類を決めるものです。例えば、ササゲはアフリカ地方でしか見つかりません。そして地方の端に沿って、巨大な山脈が築かれます。 | |
| − | === | + | === 陶器 === |
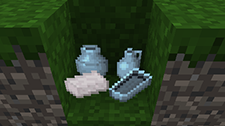
[[File:Clay Deposit.png|thumb|150px|Clay deposit on a hillside with goldenrod flowers.]] | [[File:Clay Deposit.png|thumb|150px|Clay deposit on a hillside with goldenrod flowers.]] | ||
| − | + | 粘土は世界中の池の近くや川底で発生します。粘土の上でしか咲かない黄色いアキノキリンソウの花により、遠くからでも土との見分けがつきます。シャベルで掘って粘土を採取し、それを成形して焼き物にすることができます。陶器の作成はTFC+での大きな進歩であり、淡水を運んだり[[#Mud|泥]]を作ったり、容器や[[#Gold Pan|選鉱皿]]を作ったりすることができます。 | |
| − | + | 粘土は藁や小石と同じく、アイテムを形成するためのナッピングインターフェースを持っています。粘土を5個以上手に持って{{key|[[File:Rmb.png|link=]]右クリック}}で開きます。 | |
{{Grid/Knapping | {{Grid/Knapping | ||
| Line 374: | Line 378: | ||
|- style="vertical-align:top;" | |- style="vertical-align:top;" | ||
| style="width: 200pt; padding-right: 10px"|{{Recipe/Clay Jug}} | | style="width: 200pt; padding-right: 10px"|{{Recipe/Clay Jug}} | ||
| − | + | 水差しを持ち淡水源に向かって{{key|[[File:Rmb.png|link=]]右クリック}}で水を汲むことができます。水の入った水差しを手に持って{{key|[[File:Rmb.png|link=]]右クリック}}を長押しして水を飲むことができます。 | |
| style="width: 200pt; padding-right: 10px"|{{Recipe/Clay Vessel}} | | style="width: 200pt; padding-right: 10px"|{{Recipe/Clay Vessel}} | ||
| − | + | 容器には4スロット分のインベントリがあり、小物を収納することができます。銅器時代への進行には欠かせません。この容器では食べ物は穀物のみ収納することができます。 | |
| style="width: 200pt; padding-right: 10px"|{{Recipe/Clay Bucket}} | | style="width: 200pt; padding-right: 10px"|{{Recipe/Clay Bucket}} | ||
| − | + | バケツは[[Mud|泥]]を作るための水を汲むのに必要です。 | |
|- style="vertical-align:top;" | |- style="vertical-align:top;" | ||
| style="width: 200pt; padding-right: 10px"|{{Recipe/Clay Bowl}} | | style="width: 200pt; padding-right: 10px"|{{Recipe/Clay Bowl}} | ||
| − | + | 陶製のボウルは[[Food#Preparation|サラダ]]や[[#Gold Pan|選鉱皿]]の作成に使用できます。 | |
| style="width: 200pt; padding-right: 10px"|{{Recipe/Clay Large Vessel}} | | style="width: 200pt; padding-right: 10px"|{{Recipe/Clay Large Vessel}} | ||
| − | + | 大きい容器はゲーム序盤での[[Barrel|樽]]の役割を果たします。液体の他に9つのアイテムを入れることができ、密封後は背中に背負って運ぶことができます。アイテムを溶かすために焚き火に取り付けることができます(例:空のハニカムを蝋に変える)。[[Still|蒸留器]]にもなります。 | |
|} | |} | ||
| − | + | 粘土でアイテムの型を作ったら、それを焼成しなければなりません。そのためには穴窯を作る必要があります。 | |
| − | ==== | + | ==== 穴窯 ==== |
| − | + | 穴窯を作るには、地面に穴を掘って底に{{key|Shift}} + {{key|[[File:Rmb.png|link=]]右クリック}}で焼きたいアイテムを置きます。そしてその上で{{key|[[File:Rmb.png|link=]]右クリック}}で藁を8本、丸太を8本敷きます。 | |
| − | <gallery mode="packed" caption=" | + | <gallery mode="packed" caption="下の写真では分かりやすいように周囲のブロックが取り除かれています。実際に作る際は周囲のブロックはしっかり埋めて下さい。" widths=225px> |
| − | File:PitKiln_items_cross.png|{{key|Shift}}+{{key| | + | File:PitKiln_items_cross.png|{{key|Shift}}+{{key|[[File:Rmb.png|link=]]右クリック}}でアイテムを穴窯の底に置く |
| − | File:PitKiln_straw_cross.png| | + | File:PitKiln_straw_cross.png|藁が敷かれた状態 |
| − | File:PitKiln_logs_cross.png| | + | File:PitKiln_logs_cross.png|丸太が敷かれ完成した状態 |
</gallery> | </gallery> | ||
| − | |||
| − | + | 穴窯は[[#Firepit|火起こし器]]か松明をアイテムとしてドロップしてやつことで火をつけることができるようになりました。松明で火をつけると火花が弾け、近くの可燃性ブロックを燃やしてしまいます。穴窯を作る場所は気を付けてください。 | |
| − | === | + | 穴窯の完成には8時間かかります。完成したら、{{key|Shift}} + {{key|[[File:Rmb.png|link=]]右クリック}}でアイテムを取り出せます。これでようやくアイテムを使えるようになりました |
| + | |||
| + | === 縫製 === | ||
[[File:Sewing Example.png|thumb|right|The Sewing GUI]] | [[File:Sewing Example.png|thumb|right|The Sewing GUI]] | ||
| − | + | 縫製により、アイテムをたくさん持ち歩くための生皮のバッグを作ったり、毛皮で上等な服を作ることができます。 | |
| − | + | 裁縫には骨の針が必要です。骨を手に持って石系のブロックを殴ることで作れます。ただ必ずしも骨の針になるわけではないので、何本か用意しておくことをおすすめします。骨の針ができたら、糸や腱(動物を倒した時に出る糸のようなもの)を通すことができます。 | |
{{Recipe/Threaded Bone Needle}} | {{Recipe/Threaded Bone Needle}} | ||
| − | + | 革や布を手に持って{{key|[[File:Rmb.png|link=]]右クリック}}で服のパーツにカットすることができます。ナイフと糸を通した骨の針を用意し、服のパーツを手に持って{{key|[[File:Rmb.png|link=]]右クリック}}で縫製のGUIを表示させます。スロットに必要な服のパーツを入れると服の画像が表示されます。糸を通した骨の針で画像の赤い線をなぞることで服を縫います。縫い過ぎた時はナイフで{{key|[[File:Rmb.png|link=]]右クリック}}することで糸を切ることができます。赤い部分が完全になくなったら、服が完成して出力スロットに出てきます。 | |
| − | + | 例えば生皮のバッグは生皮をカットして二つの生皮のバッグのパーツを作り、それを縫うことで作れます。 | |
{{Recipe/Bag Piece Hide}} | {{Recipe/Bag Piece Hide}} | ||
| Line 419: | Line 424: | ||
{{Recipe/Hide Bag}} | {{Recipe/Hide Bag}} | ||
| − | === | + | === 怪我と薬 === |
| − | + | [[Wound|怪我]]は「切り傷」「出血」「刺し傷」「骨折」のステータス効果で表されます。これらを受けた時は[[Wound#Medicine|医療器具]]で治療することができます。切り傷や刺し傷は包帯を使って治療するか、あるいは自然治癒に任せることもできます。しかし骨折は放置しても治りません。骨折したまま怪我を負うとさらに重症化してしまうので、当て木やギプスを使う必要があります。 | |
| − | + | [[#Straw|藁]]と[[#Wood|樹脂]]で簡易包帯を作れます。包帯を作ったら、それを手に持って{{key|[[File:Rmb.png|link=]]右クリック}}を長押ししてください。傷が治癒するまでの時間が短縮され、軽度な傷の治療には十分耐えうるでしょう。 | |
{{Recipe/Primitive Bandage}} | {{Recipe/Primitive Bandage}} | ||
| − | + | 当て木は棒と[[String|糸]]を組み合わせることで作れます。また糸を用意できなくても、ゲーム序盤の救済措置として藁を編んで作れる藁ひもが実装されているのでご安心ください。包帯と同じように、{{key|[[File:Rmb.png|link=]]右クリック}}長押しで治療します。軽度の骨折であれば一つで十分でしょう。また骨折による移動速度の低下は[[Wooden Staff|木の杖]]で緩和することができます。 | |
{{Recipe/Straw Cordage}} | {{Recipe/Straw Cordage}} | ||
| Line 432: | Line 437: | ||
{{Recipe/Wooden Staff}} | {{Recipe/Wooden Staff}} | ||
| − | + | インベントリのステータス効果パネルを見て怪我の治り具合を確認できます。 | |
| − | + | 各医療アイテムは対応する怪我を一種類治すだけなので、もし刺し傷と切り傷を同時に負った場合は、包帯が2つ以上必要なことに注意してください。 | |
| − | === | + | === 収納 === |
| − | + | そろそろインベントリがアイテムでいっぱいになっているのではないでしょうか。バニラと違い、TFC+ではチェストを作るには金属製のノコギリが必要です。ゲーム序盤でアイテムを保管するには他の手段に頼る必要があります。 | |
| − | + | 最も簡単に作れる収納アイテムの一つが[[#Straw|藁かご]]です。固体のアイテムを9つのスロットに入れることができますが、液体を入れることはできません。陶製の器や大きな陶製の器は[[#Pottery|粘土]]で作ることができます。大きな陶製の容器は固体のアイテムを9スロット入れるられる他、液体を入れることができます。陶器の容器は小さなアイテムを4つ入れることができ、楽に持ち運べます。大きすぎるアイテムは入れられません。生皮のバッグは6スロット入れることができます。 | |
| − | === | + | === 拠点 === |
| − | + | 道具や食べ物、そして水を確保した後は、夜を安全に過ごすための拠点が必要になってくるでしょう。 | |
| − | ==== | + | ==== 場所選び ==== |
| − | + | 拠点として最適なのは[[#Pottery|水差し]]で飲める真水と [[#Hunting and Foraging|食料]]を確保できる地点です。 | |
| + | ワールドをあちこち探索して最適な場所を見つけましょう。 | ||
| − | ===== | + | ===== 石と金属 ===== |
{{InfoTable/CopperOre}} | {{InfoTable/CopperOre}} | ||
| − | + | 地表には鉱石の欠片が落ちていることがあります。その下(最大35ブロック)にはその鉱石の鉱脈があります。この欠片があった地点を覚えておけば、後々採掘する際にアクセスしやすくなります。 | |
| − | + | 石の中には特に有用な種類のものがあります。[[Flux|フラックスストーン]]はその代表格です。これは[[Quern|石臼]]で挽くことで融剤にすることができます。融剤は金属の溶接に必要です。また砂利や砂、小石などフラックスストーン種からできたものであればなんでも融剤にすることができます。苦灰岩産の砂(チップにDolomiteとある)が砂浜にあった時などは、フラックスストーン探しに奔走しなくて済みます。 | |
{{InfoTable/Flux Stone}} | {{InfoTable/Flux Stone}} | ||
| − | + | 融剤作りのために貝殻を集めたり遠出をしていると時間がかかってしまうので、フラックスストーンの産地近くに定住することをおすすめします。 | |
| − | ===== | + | ===== 樹木 ===== |
| − | + | 樹は木炭の材料として、また建築や工芸品の材料として重要な資源です。近くに樹がない場合乾燥した地域にいるということになり、粘土を見つけることすら苦労するかもしれません。 | |
| − | ===== | + | ===== 粘土 ===== |
| − | + | 粘土は屋根瓦の材料になったり、道具やインゴットの型になったりします。重要な資源なので、粘土の産出しにくい乾燥した地域に定住するのはあまりおすすめしません。 | |
| − | ===== | + | ===== 水 ===== |
| − | + | TFC+では赤鋼のバケツでないと水源ブロックを置くことができません。そのため、淡水と海水の両方を入手できる地点を覚えておくことが重要になります。真水は飲むことができ、一部のクラフトに使います。また長期的な食料源となる農場を作るためにも必要です。海水は食べ物を貯蔵するためのブライン液にすることができます。 | |
| − | ===== | + | ===== 気候 ===== |
| − | + | 寒冷地では冬の備えをする必要があります。冬には作物は育たず、衣服で体温を保たなければなりません。反対に熱帯域では夏の暑さを凌がなければなりません。それぞれの気候に適応するための服を作る必要があるでしょう。 | |
| − | + | ==== 泥 ==== | |
| − | ==== | + | 詳しくは[[Mud|泥]]を参照 |
| − | + | TFC+では土と藁を水で混ぜて泥を作ることができます。泥から作られたブロックはしっかりしていて重力の影響を受けないので、ゲーム序盤の建材として非常に便利です。 | |
| − | + | ||
| − | + | 泥を作るにはまず[[#Pottery|セラミックバケツ]]を焼成して水を汲み、土や藁を1対1の割合で地面に落とし、その上に{{key|[[File:Rmb.png|link=]]右クリック}}で水をかけると作ることができます。 | |
| − | ===== {{GridImage|Mudbrick}} | + | ===== {{GridImage|Mudbrick}} 泥レンガ ===== |
| − | + | 泥レンガはインベントリで直接泥をクラフトすることで作れます。 | |
{{Recipe/Mud Brick}} | {{Recipe/Mud Brick}} | ||
| − | + | 泥レンガは使用する前にまず乾燥させる必要があります。手に持って{{key|[[File:Rmb.png|link=]]右クリック}}することで地面に置き、そこが天日に晒されていれば乾燥させることができます。泥レンガが乾いたら、それをクラフトして泥レンガブロックを作ることができます。 | |
{{Recipe/Mudbrick}} | {{Recipe/Mudbrick}} | ||
| − | + | 注意点として、泥レンガは水に弱く、雨が降ると土に戻ってしまいます。そのため[[#Roofing|藁葺き屋根]]のようなブロックを上に置いて雨から守る必要があります。 | |
| + | '''84.0以降、泥レンガブロックは雨で土に戻らなくなりました。そのため安心して建築することができます。''' | ||
| − | ===== {{GridImage|Wattle and Daub}} | + | ===== {{GridImage|Wattle and Daub}} 小舞壁 ===== |
| − | + | 小舞壁も泥を使った建築材料です。泥レンガと違って雨にも溶けません。 | |
| − | + | 小舞壁を作るにはまず泥を塗るための小舞を作ることから始めます。 | |
| − | {{Recipe/Wattle}} | + | {{{Recipe/Wattle}}}。 |
| − | + | そしてブロックを配置したい場所に小舞を配置します。泥をもって{{key|[[File:Rmb.png|link=]]右クリック}}することで小舞が小舞壁になります。 | |
| − | ==== | + | ==== まとめた丸太 ==== |
| − | + | 通常の丸太4本をまとめた丸太にクラフトすることができます。これはインベントリの省スペースだけでなく、丸太小屋を作るための建材にもなります。 | |
{{Recipe/Stacked Logs}} | {{Recipe/Stacked Logs}} | ||
| − | ==== | + | ==== 丸太の山 ==== |
| − | + | 丸太を{{key|[[File:Rmb.png|link=]]右クリック}}で地面に置く丸太の山も一応建材にできます。しかし下の段の山が満杯にならないとその上に新しく置くことはできないので効率は良くありません。 | |
| − | ==== | + | ==== 屋根 ==== |
| − | + | 建物の屋根を作りくなるかもしれません。TFC+にはプレイヤーを外気から守る機能を備えた、斜面を持った特殊な屋根ブロックがあります。序盤は藁ブロック2つと棒でできた[[#Roofing|藁葺き屋根]]を作れます。屋根はまとめた丸太などの固体ブロックに取り付けられます。 | |
{{Recipe/Thatch Roof}} | {{Recipe/Thatch Roof}} | ||
| − | === | + | === 農業 === |
| − | + | 農業を行うことで長期的な食料源を確保することができます。TFC+の農業はバニラからいくらか変更されています。まず農地は上で飛び跳ねても上にブロックが乗っても土に戻りません。そして養分システムが追加されています。作物の成長には養分が必要です。草ブロックは耕せば養分をたっぷり含んだ農地になりますが、土ブロックには栄養がありません。何か月か休耕して養分を回復する必要があります。作物によって必要な養分は異なります。プレイヤーの農業スキルによって農地の養分や、それぞれの作物が必要とする養分を確認することができます。作物は徐々に養分を消費していくので、収穫のたびに作物を植える場所を入れ替える(転作)ことをおすすめします。農地への給水は真水のみ使えます。そして作物と降雨量によって、植えられる水からの距離が異なります。 | |
| − | + | 作物は食用の種類の他に、繊維作物と染色作物があります。リュウゼツラン、綿、亜麻、ジュートなどは繊維にすることができます。アカネ、モクセイソウ、アイは衣類を染色するための液体染料の作成に使用されています。 | |
| − | + | 石製のクワは土を耕して農地にしたり、給水状況を確認したり、作物が収穫に適しているかどうかを確認したりすることができます。これらはツールモード切替キー(デフォルト:{{key|M}}キー)を使ってモードを変えることで確認できます。農業スキルが十分に高ければ、金属製のクワを使って農地の栄養状態も確認できるようになります。 | |
{{Recipe/Stone Hoe Head}} | {{Recipe/Stone Hoe Head}} | ||
| − | + | 他の道具と同じように、クワも棒や骨に取り付ける必要があります。 | |
| − | [[File:Hoe Mode Toolbar.png]] - | + | [[File:Hoe Mode Toolbar.png]] - モード表示 |
| − | [[File:Toolmode_1-1.png]] ''' | + | [[File:Toolmode_1-1.png]] '''耕作''' - 一般的な使い方。土を耕して農地にすることができます。 |
| − | [[File:Toolmode_1-3.png]] ''' | + | [[File:Toolmode_1-3.png]] '''給水''' - 対象の農地を「黒:給水なし」、「青:給水あり」のハイライトで表示します。給水量(降水量と水からの距離)によって青色の濃淡が変わります。 |
| − | [[File:Toolmode_1-4.png]] ''' | + | [[File:Toolmode_1-4.png]] '''収穫''' - 完熟した作物を緑で、成長中の作物を赤で表示します。 |
| − | + | 作物の種は野生の植物から[[採集]]することで入手できます。種を手に入れたら、種を持って{{key|[[File:Rmb.png|link=]]右クリック}}で農地に植えることができます。作物が育ちきるまでゲーム内で数ヶ月かかります。収穫具合が分からない場合、クワの収穫モードで成熟しているかどうか確認できます。 | |
| − | === | + | === 畜産 === |
| − | + | 詳細は[[Animal Husbandry|畜産]]を参照 | |
| − | + | 長期的な肉の供給源として、または羊毛、乳、皮を得るために動物を飼いならし、飼育することができます。詳しくは[[Animal Husbandry|畜産]]のページを参照してください。 | |
| − | == | + | == その他 == |
| − | + | このガイドで説明しているのはほんの基本的なことだけです。TFC+には他にもたくさんのことができます。例えば…… | |
| − | * | + | * 引火しない光源である[[Candle|ロウソク]]を作る。 |
| − | * [[Glassworking]] | + | * 割れない水差しを作るための[[Glassworking|ガラス細工]]を行う。ガラス瓶を作るために使う吹管は、焚き火の火勢を強めるために使うこともできます。 |
| − | * [[Alcohol]] | + | * 酢や経験値を得るための[[Alcohol|酒]]を作る。 |
| − | * [[Leather| | + | * 生皮を革に変えるための[[Leather|革細工]]。 |
| − | * | + | * 大量の陶器を焼成するための[[Walk-in Kiln|焼成窯]]を建築する。 |
| − | * | + | * [[Roof|屋根]]のアップグレード。 |
| − | * | + | * [[Musical Instruments|楽器]]を作る・演奏する。 |
| − | * | + | * 建物に[[Plaster of Paris|漆喰]]を塗る。 |
| − | * [[Metalworking Guide| | + | * 本格的な[[Metalworking Guide|冶金]]。 |
| − | * | + | * [[Protection Meter|プロテクションメーター]]を作って周囲のスポーンプロテクションの量を測定する。 |
| − | * | + | * 馬に乗るための[[Saddle|サドル]]を作る。 |
| − | * | + | * 素早く歩くための[[Wooden Staff|木の杖]]を作る。 |
| − | * | + | * [[Bow|弓]]などのより強い[[Weapon|武器]]を作る。 |
| − | * | + | * 金属製のノコギリで木の板を作り、樽、チェストなどの木製アイテムを作る。 |
| − | * | + | * [[Loom|織機]]で[[Cloth|布]]を織り、快適な[[Clothing|衣服]]を作って冬や夏を乗り切る。 |
| − | * | + | * ジュートやリュウゼツランの繊維で、穀物以外の食べ物を保存できる[[Burlap Sack|黄麻袋]]を作る。 |
| − | * | + | * ジャベリンと矢を多く携行できる[[Quiver|矢筒]]を作る。 |
| − | * | + | * 弓をより強力な[[Composite Bow|合成弓]]にアップグレードする。 |
| − | * | + | * 蜂蜜やロウを得るために[[Beekeeping|養蜂]]を行う。 |
| − | == | + | == 石器時代からの卒業 == |
| − | + | おめでとうございます! あなたはもはや石器時代の終わりまで辿りついていることでしょう。次の目的は、銅を溶かしてツルハシを鋳造し、さらにより多くの銅を採掘し、金属製のツールを鍛造する金床を作ることです。もしあなたが[[場所選び]]ガイドに従って拠点を作っていれば、近くに銅の鉱脈があるはずです。[[Metalworking Guide|金属加工ガイド]]のページに飛び、ワクワクの銅器時代へ繰り出しましょう。 | |
{{Blocks}} | {{Blocks}} | ||
Latest revision as of 10:39, 19 February 2021
Contents
TFC+へようこそ!

TerraFirmaCraft+ は、Minecraftを"サバイバルのあるべき姿"に再構築し、リアリティを高めることに重点を置いています。バニラでは複雑さやディテールが足りないと感じている熟練プレイヤーや、バニラでは味わえない高いリアリズムを求める人に向いています。
ここでは、TFC+とバニラの違いに焦点を当てて、始めたての頃に何をすべきかを解説しています。既にオリジナルのTerraFirmaCraftをプレイしたことのあるプレイヤーは、TFCとの違いを参照してください。なにか問題や質問がある場合は、[https://discord.gg/GhqaFgQ Discord]や[https://reddit.com/r/TFCPlus Subreddit]へ連絡してください。
TFC+は多少翻訳されてはいますが、まだまだ未完成です。翻訳を手伝いたい場合は、翻訳 ページを参照してください。
このガイドでは、Terrafirmacraft+をインストールしていることを前提としています。 インストールしていない場合は、インストールページを参照してください。
開始直後について
HUDとステータス情報
新しくワールドを始めると、HUDがバニラとは違うデザインになっているのに気が付くでしょう。このセクションではTFC+のHUDに映っている様々なゲージや項目について解説します。
体力
![]()
初めに目につくバニラとの違いは体力ゲージです。TFC+ではハートの代わりに、HPが赤いゲージで表示されます。HPは最大1000からスタートしますが、これは栄養状態やレベルなどの様々な要因によって変化します。満腹ゲージが25%以上であれば、時間と共にゆっくりと回復していきます。完全に満腹になってもすぐに回復はしません。温泉に入ったり、滅菌包帯を使用することで治癒を早めることができます。
また、プレイヤーはたびたび怪我を負い、様々なデメリットを受けます。一度に20%以上のダメージを受けた場合にのみ怪我を負います。骨折したままだと動きが遅くなり、放置していると徐々にダメージを受けます。骨折は打撃系のダメージや落下ダメージによって、刺し傷は刺突系のダメージに、切り傷は斬撃系のダメージによって発生します。傷を治療するには医療の項目を参照してください。
空腹
![]()
満腹度はバニラの骨付き肉の代わりに緑色のゲージで表します。
食べ物それぞれに「満腹度」が設定されていたバニラとは異なり、TFC+の空腹システムは食べ物の重さを参照します(肉も魚も野菜も、食べる重さが同じなら回復する満腹度も一緒です)。TFC+では、オンスという帝国単位の値を使用しています。もっとも、この値は現実や他のゲームの値とは関係ありませんので、混乱するようなら「~口分」や「~個分」として考えてください。TFC+では食べ物は1スタック160オンスまで重ねられます。
プレイヤーは動かなくても数日の間に徐々にお腹が減っていきます。満腹度が一定以下になるとその間「採掘速度低下」や「弱体化」などのデメリットを受け始めます。満腹ゲージが枯渇するとやがて飢え始め、あっという間に死んでしまいます。
喉の渇き

![]()
TFC+では「喉の渇き・潤い」の概念を導入しています。潤い度は青いゲージで表されています。プレイヤーは時間と共に徐々に喉が渇いていき、やがて「移動速度低下」や「弱体化」のような効果を受け、完全に脱水状態になると熱中症になります。空腹と同様、プレイヤーが動いていなくてもゆっくり喉が渇いていきます。プレイヤーは水場にある新鮮な水しか飲むことができません。そのため、この世界で生き伸びるためには新鮮で飲める水を見つけることが必須です。 海水と違い、飲める水場にはガマやスイレンの葉があるのでそれを目印にするとよいでしょう。
新鮮な水の下のブロックを ![]() 右クリックすることで水を飲むことができます。押し続ければ完全に喉が潤うまで飲み続けられます。
(また、現在「他のワールドのホットバーでアイテムを選択していると水が飲めない」というバグが発生しています。他のワールドでも手に何も持っていない状態にしてminecraftを再起動すれば飲めるようになります)
右クリックすることで水を飲むことができます。押し続ければ完全に喉が潤うまで飲み続けられます。
(また、現在「他のワールドのホットバーでアイテムを選択していると水が飲めない」というバグが発生しています。他のワールドでも手に何も持っていない状態にしてminecraftを再起動すれば飲めるようになります)
ゲーム序盤の大きな目的として、長距離探索のために真水を持ち運ぶこと、そしてそのための陶器の水差しを作成する必要があります。
経験値
レベルシステムはそのまま人生経験を表し、レベルが高いほどプレイヤーの最大HPや喉の潤い度、アルコール耐性を増加させます。それにより更に大きいダメージに耐えたり、水を飲まずに長く生き延びたり、より多くのアルコールを飲んだりすることができます。
バニラと違ってエンチャントや道具の修理がないので、死んだりしない限り経験値は減りません。
体温
体温は画面右下の温度計で表されます。体温計の緑の部分は過ごしやすい気温の範囲を示しています。プレイヤーの体温は季節や地域の気候、特定のブロックによって影響を受けます。体温が高すぎたり低すぎたりすると、「移動速度低下」や「採掘速度低下」などのデメリットを受けることになり、そして体を冷ますため汗をかいたり、温めるためにカロリーを消費するので空腹感や喉の渇きを早く感じるようになります。また藁のベッドで眠ることもできなくなります。
体温は主に衣服で調整します。また屋根の下や日陰に入って日差しを遮ったり、洞窟の中にいたりすることでも体温調節を行うことができます。
TFC+のインベントリには4つのタブがあります。バニラのインベントリのようにアイテムを保持したりクラフトしたりする「インベントリタブ」、プレイヤーの各スキルの熟練度を表示する「スキルタブ」、時間や季節、曜日を表示する「時間タブ」、そしてプレイヤーが健康維持のために最低限食べなければならない栄養素を5つのカテゴリーに分けて表示する「栄養タブ」です。
バニラとは異なり、全てのクラフトはインベントリタブで直接行われます。初めは2x2のグリッドから始めますが、後に作業台を使って3x3に拡張することができます。作業台は実際に置いて使うブロックではなく、3x3グリッドを解放するための特殊なアイテムです。
| | |||
サバイバル一日目:道具・光・衣服
初日の目標は、夜営の準備ととにかく生き延びることです。自分の周りを見渡して、どんな資源があるか確認してください。草や低木、岩が地平線まで伸びる平原であれば、金属片や動物をかなり簡単に見つけることができるかもしれません。海岸沿いであれば、海藻や真水は簡単に確保できるでしょう。深い熱帯雨林の真っただ中にいるならば、粘土や淡水、木材が豊富に見つかることでしょう。
できないこと
バニラの時のように木を殴っても木材が手に入らないことに気づくかもしれません。これはTFC+のスキルツリーがバニラと全く異なる構造をしているためです。TFC+には木の道具は存在しないので、頑張って木を殴り倒しても時間の無駄です。鋸がなければ作業台や板を作ることができず、そしてそれは金属から作るしかありません。 そのため、最初の道具は木材ではなく石で作られることになります。
現実とTFC+には木のツルハシや石のツルハシなどは存在しません。初めの内は鉱石を掘って採掘したりはできず、その代わりに鉱石片を拾って金属製の道具を作ります。まずはより多くの鉱石を得るためにツルハシを作ることになるでしょう。
TFC+では砂、砂利、石、丸石は重力の影響を受けるため、土を掘る事はお勧めしません。バニラと異なり、重力の影響を受けたブロックは真下だけでなく横に滑り落ちることもできます。そのためこれらのブロックで家を作ることはできません。
バニラのminecraftに慣れているプレイヤーなら、どうやってTFC+でアイテムを保管するのか疑問に思うかもしれません。板を作れるのは金属製のツールを作れるようになった後ですので、初めの内は藁かご、陶製の容器、陶製の大型容器、生皮鞄のような代替品を使うことになります。
TFC+では無暗に走り回ると余計に飢えと渇きが進むのでオススメしません。代わりに木の杖を使うことで、走行の半分の速さで動くことができます。木の杖については後述します。
TFC+の松明は可燃性のブロックに火をつけます。松明を使う前に、周囲の草や低木、落ち葉などの可燃性のブロックを取り払っておくことをお勧めします。拠点で明かりをつけるには後述する焚火を使用します。ゲームが進めば、後により安全な光源であるロウソクを作ることができます。
石と棒
TFC+でまず最初にやるべきことは、木を殴るのではなく地面に散らばっている石や棒切れを集めることです。石が十数個もあれば最初の数日間を生き延びるには十分でしょう。
その際、時々鉱石の小片を見つけるかもしれません。その時は拾った場所をメモしておくことをお勧めします。後で必ず役に立つ時が来ます。
棒は木の下や岸辺の地面に散らばっています。落ち葉を浚ったり、低木を壊すことでも得られます。
ナッピング
ナッピングとは、2つの石を使って石の道具のツールヘッドを作ることです。2つ以上の石を持って![]() 右クリックすると、ナッピングインターフェイスが開きます。
右クリックすると、ナッピングインターフェイスが開きます。
| |
||||||
ナッピングインターフェースは5x5のグリッドで表されます。グリッドの中の四角い部分をクリックして石の一部を削ります。間違ってクリックしてしまうとやり直しは利かず、最初からやり直すことになります。特定の形を作ると右側にツールヘッドが表示され、これを棒とクラフトして取り付ける事で、石のツールを作ることができます。叩いている間に石の破片が出てくることがありますが、後々これを使って矢を作ることができます。
Tip: いくつかのツールは、以下に示すものとは異なる形で作る事もできますので、気軽に試してみてください。
ナイフは小型の武器であり、同時に便利な道具でもあります。ナイフを使えば、海藻を集めたり、毛皮や動物の皮を革や衣服に変えたり、穀物を穀類に加工したり、食べ物の腐敗を取り除くことができます。ナイフには「刺突」と「斬撃」の2つの攻撃モードがあり、それぞれ与えるダメージの種類が異なります。(特にスケルトンに対して刺突属性の攻撃は無効なので注意しましょう)。これらはデフォルトでMキーを押すことで切り替えることができます。ナイフは鏡写しになるよう石を削ると、一度に2本作ることができます。 |
斧は木を伐採するのに便利な道具です。また攻撃力の高い斬撃武器としても活躍します。 |
シャベルは、土、粘土、砂利、砂を集めるための道具です。また打突属性の武器として使用できます。 |
Tip:柄をつけた石の道具はスタックできませんが、ツールヘッドは32個までスタックできます。夜、モンスターから隠れている時に石を叩いて予備のツールヘッドを何個か作っておくとよいでしょう。そして日中に道具が壊れてしまった時、棒と組み合わせれば素早く道具を補充できます。
ツールの柄は棒だけでなく、骨を代用することもできます。 あなたが動物の解体に精通した狩人なら、こちらを使うのもいいでしょう。
|
|
|
樹木
斧で樹木を切り倒すことで木材を集めることができます。木の下部から切り倒すと、それより上の木全体が丸太や棒となってドロップします。斧に木全体を切り倒せる程の耐久がない場合、その耐久に見合うだけのブロックが木の上部から順に切り倒されます。
樹木には森林や草原に生えるような普通のサイズの丸太を落とすものと、原木を落とす大木の2種類があります。原木は普通の大きさまで割ることができますが、原木は希少な上建材としても使えるので、火急の用がない場合は取っておきましょう。
丸太は⇧ Shift+ ![]() 右クリックで地面に置いて丸太の山に格納できます。丸太の山を設置するには普通のサイズの丸太しか使えませんが、すでに設置された丸太の山の中に原木を積むことはできます。
右クリックで地面に置いて丸太の山に格納できます。丸太の山を設置するには普通のサイズの丸太しか使えませんが、すでに設置された丸太の山の中に原木を積むことはできます。
丸太はナイフで長い木の棒に加工することができ、長い木の棒を半分に折って棒を作ることができます。
| |
| ||
| | |||
| | |||
| |
| ||
| | |||
樹木をナイフで右クリックすると樹脂が手に入ります。これを使って「木の杖」や「簡易包帯」などのアイテムを作ることができます。木の杖は樹脂と長い木の棒を組み合わせて作られ、持っていると歩行時に15%の移動速度上昇効果が発生します。これにより走行の半分の速度で動くことができます。TFC+では走り回るとあっという間にお腹が空いて喉が渇いてしまうので、できる限り木の杖を使うことをお勧めします。簡易包帯はプレイヤーが出血系の怪我をしたときに使います。詳細は傷と薬の項目へ。
| |
| ||
| | |||
| | |||
武器
野生動物を狩ったり、夜に湧くモンスターから身を守るためには武器が必要です。ゲーム序盤は石器や木の槍や木の杖を使う事になるでしょう。TFC+ではダメージにそれぞれ属性があり、「斬撃」「刺突」「打撃」の3種類に分かれています。斬撃はエンダーマンとゾンビに有効で、刺突は熊・クリーパー・エンダーマン・狼に、打撃はエンダーマンとスケルトンに効果を発揮します。 反対に耐性もあり、ゾンビやクリーパーに打撃は効きづらく、そしてスケルトンは斬撃を軽減し、刺突を無効化します。 斧は斬撃、槍とジャベリンは刺突、シャベルとハンマーは打撃属性を与えます。ナイフには「刺す」「斬る」の2つのモードがあり(デフォルトでMキーで切り替え)、それぞれ「刺突」と「斬撃」のダメージを与えます。
|
|
ジャベリンは作成に竿を使用する必要がありますが、ハンマーは普通のツールのように棒や骨で作れます。
木の槍はジャベリンの下位互換です。長い木の棒とナイフを組み合わせて作ります。
| |
| ||
| | |||
| | |||
木の槍とジャベリンは投げる度に自動的にインベントリからメインハンドに補充されます。
狩猟と採集
長く生き延びるためには、食料と水場の確保は不可欠です。海水は飲めず、飲めるのは真水だけです。(真水を見つけて飲む方法は#喉の渇きのセクションで説明されています。)
海藻
海岸近くにいる場合、序盤の食料源として海藻はうってつけです。ナイフを持って海藻の下のブロックを![]() 右クリックすることで収穫できます。海藻を数枚手に入れたら、インベントリを開き海藻にカーソルを合わせてSを押してみてください。複数の海藻を一度にスタックすることができます。クラフトグリッドでまとめることもできます。
右クリックすることで収穫できます。海藻を数枚手に入れたら、インベントリを開き海藻にカーソルを合わせてSを押してみてください。複数の海藻を一度にスタックすることができます。クラフトグリッドでまとめることもできます。
肉
岸辺が近場にない場合、次善の食料源は肉です。動物は世界各地に群れをなしていますが、見つけたからといってすぐに攻撃してはいけません。TFC+では動物は中立モブであり、プレイヤーが攻撃するとすぐに反撃してきます。体力もバニラに比べて格段に上がっているので、準備は入念にしておきましょう。
注意:動物を甘く見てはいけません! 彼らは凄まじい攻撃力とノックバックを秘めています。バニラのような人畜無害な生物ではありません。
動物を狩る場合は、幾らかの木の槍かジャベリンを準備して、距離を十全に取ってください。そして![]() 右クリックを長押しして槍を構え、連続で投げ続けてください。槍で直接殴って攻撃するのはオススメしません。投げるよりも遥かに少ないダメージしか与えられません。反撃にも十分注意してください。TFC+では、動物は体重と同じ量の肉を落とします。そのため大型の動物はかなりの量の肉を落とすことになります。数スタックもあれば数日は持つので(それ以上持ってても腐る場合が殆どです)、全部使い切ろうと躍起になる必要はありません。ただし生皮や腱は必ず拾っておきましょう。
右クリックを長押しして槍を構え、連続で投げ続けてください。槍で直接殴って攻撃するのはオススメしません。投げるよりも遥かに少ないダメージしか与えられません。反撃にも十分注意してください。TFC+では、動物は体重と同じ量の肉を落とします。そのため大型の動物はかなりの量の肉を落とすことになります。数スタックもあれば数日は持つので(それ以上持ってても腐る場合が殆どです)、全部使い切ろうと躍起になる必要はありません。ただし生皮や腱は必ず拾っておきましょう。
もし怪我を負った場合は怪我のセクションにジャンプして適切な処置を施してください。
採集

Cropsは春から晩夏までの季節間にランダムに生えてきます。毎年その季節に再生するので、機会を失ってもまた再チャレンジしましょう。完全に成熟していない作物を収穫すると種しか得られないので、食料が欲しい場合はしっかり成熟するまで待ちましょう。
果樹やベリーの茂みは野生に自生していることがあります。果実を収穫するには、実が生っているテクスチャの葉ブロックを![]() 右クリックしてください。ベリーの茂みは摘み取って別の場所に設置することもできます。
右クリックしてください。ベリーの茂みは摘み取って別の場所に設置することもできます。
こういった安定した食料源を見つけるのは難しいかもしれません。バニラではバイオーム毎に資源が生成されますが、TFC+では約1000ブロック離れた場合によってのみ気候が変わるので、バニラよりもずっと広いエリアを探索しなければなりません。バニラでキノコバイオームや荒野バイオームを探そうとしていると想像してみてください。――もしこれらの食料源が見つからない時は、見つかるまで各地を転々としながら生活するのもよいでしょう。身の丈に合った生活をすれば、それでも十分生き延びる事は可能です。
穀物はナイフで脱穀する必要があります。穀物を脱穀すると余った茎が藁になります。
| |
|
| |
| | |||
| |
落ち葉を掃くと得られるキノコは、ナイフで切ると食べられるようになります。生で食べても大丈夫なのは茶色いキノコだけで、赤いキノコは加熱しないと中ってしまいます。
注:間違っても果樹の葉は毟ってはいけません! 再生にかなりの時間がかかってしまいます。
種は畑に植えて育てることができ、安定した食料源となることでしょう。
食料を大量に持っている場合は、それらを一まとめにスタックすることができます。スタックを一緒にクラフトするか、スタックの上にカーソルを置いてSキーを押してまとめる事ができます。食べ物は現実世界のように時間が経つにつれて腐っていきます。ナイフを所持していて、Eでインベントリを開いている状態でDキーを押すと自動で食料の腐敗した部分を取り除く事ができます。食料を長持ちさせるには、相応の保存加工をする必要があります。保存方法については後述します。
養蜂
野生の蜂の巣は時折樹上に生成されます。蜂の巣からはハニカムを得られ、ハニカムからは蜂蜜や蝋を得られます。また、更に多くの蜂蜜を得るために人工的な蜂の巣を作る事もできます。
蜂の巣を見つけても直接触ってはいけません。蜂の巣を開けようとしたり壊したりすると、蜂が怒ってプレイヤーを刺してきます。蜂を落ち着かせて蜂の巣を開くには、蜂の巣の下で火を焚く必要があります。野生の蜂の巣には、肥えたハニカムがあります。そのまま中の蜂蜜を採集する事もできますが、人工的な蜂の巣を作るための土台にもできます。蜂の巣からハニカムを取り除くと、蜂の巣は崩れ、幾つかの空のハニカムをドロップします。これは後で溶かしてロウソクの材料である蝋にする事ができます。
| |
|
| |
| | |||
| | |||
ハチミツを掬うボウルを作る方法については後述しますが、養蜂箱を作る過程については養蜂の記事を参照してください。
焚き火
- Main article: Firepit
夜になれば、松明を作るための焚き火を作り、集めた食料を調理して食べられるようにしたいと思うでしょう。必要なものは少なくとも5本の棒と、燃料として使うための丸太と、必要に応じて藁です。
まず、クラフトグリッドに2本の棒を斜めに入れて火起こし器を作ります。
| |
| ||
| | |||
| |
|||
火起こし器ができたら、デフォルトで Qで3本以上の棒を地面や不燃性ブロックの上に投げます。棒が全て同じブロックの上にスタックされていることを確認してください。最初の数回は火が付かないかもしれません。お好みで藁を入れると、より火が付きやすくなります。焚き火が出来たら、素早く丸太などの燃料を入れます。火起こし器は、後に弓と一緒にクラフトすることでより高い着火性と耐久性を持つ弓火起こし器にアップグレードすることができます。
焚き火が消えたら、燃料を追加して火起こし器を手に持ち、![]() 右クリックして再点火する必要があります。再点火は必ず成功します。
右クリックして再点火する必要があります。再点火は必ず成功します。
焚き火を起こせるようになったら、松明をいくつか作っておくことをオススメします。消えた松明を持って火のついた焚き火を![]() 右クリックすると簡単に火を灯す事ができます。同じように設置されている明かりの付いた松明も、消えた松明に火を灯せます。
右クリックすると簡単に火を灯す事ができます。同じように設置されている明かりの付いた松明も、消えた松明に火を灯せます。
| |
|
| |
| | |||
| |
|||
| |
![]() Right Click on a lit torch or lit firepit, or place and
Right Click on a lit torch or lit firepit, or place and ![]() Right Click with a firestarter or flint and steel to light the torch.
Right Click with a firestarter or flint and steel to light the torch.
注意!:松明は火やマグマのような延焼効果を持ちます。拠点が木や藁で出来ている場合、その近くに置いてはいけません。代わりに焚き火で照らし、後で#ロウソクにアップグレードしましょう。屋外に置く際も、松明周りの葉や木、低木、落ち葉などは取り除きましょう。
藁
ナイフで草を刈ると藁が手に入ります。藁は拠点の建材や物をしまっておくかご、衣類、包帯、当て木、寝具などに利用できるので、ゲーム序盤では非常に役に立つアイテムです。
藁はナッピングと似たインターフェイスを使って編むことができます。藁を編むには5枚以上のの藁を持った状態で適当なブロックを![]() 右クリックします。
右クリックします。
藁かごには9個までものを入れられます。壊されると中のものをドロップします。 |
藁コートはそれなりに防寒効果があります。寒い地域にスポーンした時にはとても役に立つでしょう。 |
麦わら帽子は直射日光を遮り、少しだけ暑さに耐性を与えてくれます。 | |||||||||||||||||||||||||||||||||||||||||||||||||||||||||||||||||||||||||||||||||
藁シャツは若干の耐暑効果があります。 |
藁スカートは若干の耐暑効果があります。 |
藁サンダルは砂の上を歩く時に少しだけ速くなります。 |
藁はふきわらに加工することができ、夜間の一時的な拠点を作るのに便利です。
| |
|
| |
| | |||
| |
| ||
注意!:プレイヤーとMobはふきわらをそのまますり抜けてしまいます。ふきわらを使って安全な場所に壁や柱を建てる事はできません。モンスターはふきわら越しにプレイヤーを発見する事はできませんが、既に発見された状態でモンスターから逃げ隠れても彼らはふきわらを素通りして襲い掛かってきます。

大きい生皮を持っている場合、2つのふきわらを並べてその上に皮を![]() 右クリックで敷くことで、藁と生皮のベッドを作ることができます。その際ベッドの頭か足側に立って敷いて下さい。向きが合わないとベッドが作れません。これで夜に眠る事ができます。暑すぎたり寒すぎたりすると寝心地が悪くて眠れなくなるので、その場合は服を着て体温を調節してください。
右クリックで敷くことで、藁と生皮のベッドを作ることができます。その際ベッドの頭か足側に立って敷いて下さい。向きが合わないとベッドが作れません。これで夜に眠る事ができます。暑すぎたり寒すぎたりすると寝心地が悪くて眠れなくなるので、その場合は服を着て体温を調節してください。
もしあなたがここまで来れた時――おめでとうございます! あなたはTFC+のサバイバル一日目を生き延び、危険な夜をやり過ごす手段を手に入れました。TFC+ではモンスターのスポーン数が激増しているので、夜にうろついているのはよくありません。近くに粘土があれば、火を焚く事をお勧めします。あなたはもう長期的な生存のための方法を探求できます。さらには銅器時代へ歩を進めることすらも……。
一日目を終えて
初日を超えた日々は、生存のためにより多くの食料や道具を確保する事に重きを置くとよいでしょう。そのためにもいち早く石器時代を離れ、様々な金属製ツールを作れる銅器時代へ突入し、この厳しい世界を生き延びるさらなる足掛かりとして下さい。
季節と環境
バニラにおけるバイオームの代わりに、TFC+には気候システムを導入しています。降雨量、標高、赤道からの距離、時間帯によって、その地域にどんな種類の動物、植物、地形が発生するかを決定しています。プレイヤーは常に初夏の北半球にスポーンします。
TFC+はMinecraftに四季を追加します。季節は周囲の気温や動物の行動、夜明けや日没時刻に影響を与えます。寒い冬には収穫されていない作物は種に戻り、木々は葉を落とし、常緑ではない新しい苗木は成長を止めます。春になると、草や花、石、苗木などが再生します。夏になると、世界中のいたるところで作物がランダムに生え始め、その実や種を収穫できるようになります。秋には、木々の葉が紅く染まり、気温が下がり始めます。あなたは四季を迎えるにあたって相応の準備をしなければなりません。日差しの照る熱帯にいる場合は避暑のための建造物を建て、冬の厳しい冷帯にいるなら暖かい服を縫って冬の寒さに備える……。季節と環境が与える試練に人の知恵と知識をもって立ち向かいましょう。
赤道付近の地域は高温多湿な傾向があり、北、または南へ行くにつれ熱帯、温帯、亜寒帯、そして27000ブロック進むと最終的に極地へ辿りつきます。
河川はバイオームの境界に沿って生成され、バニラのものよりも遥かに大きいるかに大きいです。川底には粘土質の堆積物があり、粘土の手に入りにくい乾燥地域でスポーンした時には役に立つ事でしょう。
TFC+では地方の概念も導入されています。地方とはその地域に生成される木や植物、動物の種類を決めるものです。例えば、ササゲはアフリカ地方でしか見つかりません。そして地方の端に沿って、巨大な山脈が築かれます。
陶器

粘土は世界中の池の近くや川底で発生します。粘土の上でしか咲かない黄色いアキノキリンソウの花により、遠くからでも土との見分けがつきます。シャベルで掘って粘土を採取し、それを成形して焼き物にすることができます。陶器の作成はTFC+での大きな進歩であり、淡水を運んだり泥を作ったり、容器や選鉱皿を作ったりすることができます。
粘土は藁や小石と同じく、アイテムを形成するためのナッピングインターフェースを持っています。粘土を5個以上手に持って![]() 右クリックで開きます。
右クリックで開きます。
| |
||||||
水差しを持ち淡水源に向かって |
容器には4スロット分のインベントリがあり、小物を収納することができます。銅器時代への進行には欠かせません。この容器では食べ物は穀物のみ収納することができます。 |
バケツは泥を作るための水を汲むのに必要です。 | |||||||||||||||||||||||||||||||||||||||||||||||||||||||||||||||||||||||||||||||||||
|
大きい容器はゲーム序盤での樽の役割を果たします。液体の他に9つのアイテムを入れることができ、密封後は背中に背負って運ぶことができます。アイテムを溶かすために焚き火に取り付けることができます(例:空のハニカムを蝋に変える)。蒸留器にもなります。 |
粘土でアイテムの型を作ったら、それを焼成しなければなりません。そのためには穴窯を作る必要があります。
穴窯
穴窯を作るには、地面に穴を掘って底に⇧ Shift + ![]() 右クリックで焼きたいアイテムを置きます。そしてその上で
右クリックで焼きたいアイテムを置きます。そしてその上で![]() 右クリックで藁を8本、丸太を8本敷きます。
右クリックで藁を8本、丸太を8本敷きます。
- 下の写真では分かりやすいように周囲のブロックが取り除かれています。実際に作る際は周囲のブロックはしっかり埋めて下さい。
⇧ Shift+
 右クリックでアイテムを穴窯の底に置く
藁が敷かれた状態
丸太が敷かれ完成した状態


穴窯は火起こし器か松明をアイテムとしてドロップしてやつことで火をつけることができるようになりました。松明で火をつけると火花が弾け、近くの可燃性ブロックを燃やしてしまいます。穴窯を作る場所は気を付けてください。
穴窯の完成には8時間かかります。完成したら、⇧ Shift + ![]() 右クリックでアイテムを取り出せます。これでようやくアイテムを使えるようになりました
右クリックでアイテムを取り出せます。これでようやくアイテムを使えるようになりました
縫製

縫製により、アイテムをたくさん持ち歩くための生皮のバッグを作ったり、毛皮で上等な服を作ることができます。
裁縫には骨の針が必要です。骨を手に持って石系のブロックを殴ることで作れます。ただ必ずしも骨の針になるわけではないので、何本か用意しておくことをおすすめします。骨の針ができたら、糸や腱(動物を倒した時に出る糸のようなもの)を通すことができます。
| |
| ||
| | |||
| | |||
革や布を手に持って![]() 右クリックで服のパーツにカットすることができます。ナイフと糸を通した骨の針を用意し、服のパーツを手に持って
右クリックで服のパーツにカットすることができます。ナイフと糸を通した骨の針を用意し、服のパーツを手に持って![]() 右クリックで縫製のGUIを表示させます。スロットに必要な服のパーツを入れると服の画像が表示されます。糸を通した骨の針で画像の赤い線をなぞることで服を縫います。縫い過ぎた時はナイフで
右クリックで縫製のGUIを表示させます。スロットに必要な服のパーツを入れると服の画像が表示されます。糸を通した骨の針で画像の赤い線をなぞることで服を縫います。縫い過ぎた時はナイフで![]() 右クリックすることで糸を切ることができます。赤い部分が完全になくなったら、服が完成して出力スロットに出てきます。
右クリックすることで糸を切ることができます。赤い部分が完全になくなったら、服が完成して出力スロットに出てきます。
例えば生皮のバッグは生皮をカットして二つの生皮のバッグのパーツを作り、それを縫うことで作れます。
| |
| |||||
| |
|
|
| ||
怪我と薬
怪我は「切り傷」「出血」「刺し傷」「骨折」のステータス効果で表されます。これらを受けた時は医療器具で治療することができます。切り傷や刺し傷は包帯を使って治療するか、あるいは自然治癒に任せることもできます。しかし骨折は放置しても治りません。骨折したまま怪我を負うとさらに重症化してしまうので、当て木やギプスを使う必要があります。
藁と樹脂で簡易包帯を作れます。包帯を作ったら、それを手に持って![]() 右クリックを長押ししてください。傷が治癒するまでの時間が短縮され、軽度な傷の治療には十分耐えうるでしょう。
右クリックを長押ししてください。傷が治癒するまでの時間が短縮され、軽度な傷の治療には十分耐えうるでしょう。
| |
|
| |
| | |||
当て木は棒と糸を組み合わせることで作れます。また糸を用意できなくても、ゲーム序盤の救済措置として藁を編んで作れる藁ひもが実装されているのでご安心ください。包帯と同じように、![]() 右クリック長押しで治療します。軽度の骨折であれば一つで十分でしょう。また骨折による移動速度の低下は木の杖で緩和することができます。
右クリック長押しで治療します。軽度の骨折であれば一つで十分でしょう。また骨折による移動速度の低下は木の杖で緩和することができます。
| |
| |||||
| |
|
| |
| | |||
| |
| ||
| | |||
| | |||
インベントリのステータス効果パネルを見て怪我の治り具合を確認できます。 各医療アイテムは対応する怪我を一種類治すだけなので、もし刺し傷と切り傷を同時に負った場合は、包帯が2つ以上必要なことに注意してください。
収納
そろそろインベントリがアイテムでいっぱいになっているのではないでしょうか。バニラと違い、TFC+ではチェストを作るには金属製のノコギリが必要です。ゲーム序盤でアイテムを保管するには他の手段に頼る必要があります。
最も簡単に作れる収納アイテムの一つが藁かごです。固体のアイテムを9つのスロットに入れることができますが、液体を入れることはできません。陶製の器や大きな陶製の器は粘土で作ることができます。大きな陶製の容器は固体のアイテムを9スロット入れるられる他、液体を入れることができます。陶器の容器は小さなアイテムを4つ入れることができ、楽に持ち運べます。大きすぎるアイテムは入れられません。生皮のバッグは6スロット入れることができます。
拠点
道具や食べ物、そして水を確保した後は、夜を安全に過ごすための拠点が必要になってくるでしょう。
場所選び
拠点として最適なのは水差しで飲める真水と 食料を確保できる地点です。 ワールドをあちこち探索して最適な場所を見つけましょう。
石と金属
| Copper Ore | ||||
|---|---|---|---|---|
地表には鉱石の欠片が落ちていることがあります。その下(最大35ブロック)にはその鉱石の鉱脈があります。この欠片があった地点を覚えておけば、後々採掘する際にアクセスしやすくなります。
石の中には特に有用な種類のものがあります。フラックスストーンはその代表格です。これは石臼で挽くことで融剤にすることができます。融剤は金属の溶接に必要です。また砂利や砂、小石などフラックスストーン種からできたものであればなんでも融剤にすることができます。苦灰岩産の砂(チップにDolomiteとある)が砂浜にあった時などは、フラックスストーン探しに奔走しなくて済みます。
| Flux Stone | |||
|---|---|---|---|
| |
|
|
|
融剤作りのために貝殻を集めたり遠出をしていると時間がかかってしまうので、フラックスストーンの産地近くに定住することをおすすめします。
樹木
樹は木炭の材料として、また建築や工芸品の材料として重要な資源です。近くに樹がない場合乾燥した地域にいるということになり、粘土を見つけることすら苦労するかもしれません。
粘土
粘土は屋根瓦の材料になったり、道具やインゴットの型になったりします。重要な資源なので、粘土の産出しにくい乾燥した地域に定住するのはあまりおすすめしません。
水
TFC+では赤鋼のバケツでないと水源ブロックを置くことができません。そのため、淡水と海水の両方を入手できる地点を覚えておくことが重要になります。真水は飲むことができ、一部のクラフトに使います。また長期的な食料源となる農場を作るためにも必要です。海水は食べ物を貯蔵するためのブライン液にすることができます。
気候
寒冷地では冬の備えをする必要があります。冬には作物は育たず、衣服で体温を保たなければなりません。反対に熱帯域では夏の暑さを凌がなければなりません。それぞれの気候に適応するための服を作る必要があるでしょう。
泥
詳しくは泥を参照 TFC+では土と藁を水で混ぜて泥を作ることができます。泥から作られたブロックはしっかりしていて重力の影響を受けないので、ゲーム序盤の建材として非常に便利です。
泥を作るにはまずセラミックバケツを焼成して水を汲み、土や藁を1対1の割合で地面に落とし、その上に![]() 右クリックで水をかけると作ることができます。
右クリックで水をかけると作ることができます。
 泥レンガ
泥レンガ
泥レンガはインベントリで直接泥をクラフトすることで作れます。
| |
| ||
| | |||
泥レンガは使用する前にまず乾燥させる必要があります。手に持って![]() 右クリックすることで地面に置き、そこが天日に晒されていれば乾燥させることができます。泥レンガが乾いたら、それをクラフトして泥レンガブロックを作ることができます。
右クリックすることで地面に置き、そこが天日に晒されていれば乾燥させることができます。泥レンガが乾いたら、それをクラフトして泥レンガブロックを作ることができます。
| |
|
| |
| | |||
| |
| ||
注意点として、泥レンガは水に弱く、雨が降ると土に戻ってしまいます。そのため藁葺き屋根のようなブロックを上に置いて雨から守る必要があります。 84.0以降、泥レンガブロックは雨で土に戻らなくなりました。そのため安心して建築することができます。
 小舞壁
小舞壁
小舞壁も泥を使った建築材料です。泥レンガと違って雨にも溶けません。
小舞壁を作るにはまず泥を塗るための小舞を作ることから始めます。
{{{Recipe/Wattle}}}。
そしてブロックを配置したい場所に小舞を配置します。泥をもって![]() 右クリックすることで小舞が小舞壁になります。
右クリックすることで小舞が小舞壁になります。
まとめた丸太
通常の丸太4本をまとめた丸太にクラフトすることができます。これはインベントリの省スペースだけでなく、丸太小屋を作るための建材にもなります。
| |
|
| |
| | |||
| |
| ||
丸太の山
丸太を![]() 右クリックで地面に置く丸太の山も一応建材にできます。しかし下の段の山が満杯にならないとその上に新しく置くことはできないので効率は良くありません。
右クリックで地面に置く丸太の山も一応建材にできます。しかし下の段の山が満杯にならないとその上に新しく置くことはできないので効率は良くありません。
屋根
建物の屋根を作りくなるかもしれません。TFC+にはプレイヤーを外気から守る機能を備えた、斜面を持った特殊な屋根ブロックがあります。序盤は藁ブロック2つと棒でできた藁葺き屋根を作れます。屋根はまとめた丸太などの固体ブロックに取り付けられます。
| |
| ||
| | |||
| |
| ||
農業
農業を行うことで長期的な食料源を確保することができます。TFC+の農業はバニラからいくらか変更されています。まず農地は上で飛び跳ねても上にブロックが乗っても土に戻りません。そして養分システムが追加されています。作物の成長には養分が必要です。草ブロックは耕せば養分をたっぷり含んだ農地になりますが、土ブロックには栄養がありません。何か月か休耕して養分を回復する必要があります。作物によって必要な養分は異なります。プレイヤーの農業スキルによって農地の養分や、それぞれの作物が必要とする養分を確認することができます。作物は徐々に養分を消費していくので、収穫のたびに作物を植える場所を入れ替える(転作)ことをおすすめします。農地への給水は真水のみ使えます。そして作物と降雨量によって、植えられる水からの距離が異なります。
作物は食用の種類の他に、繊維作物と染色作物があります。リュウゼツラン、綿、亜麻、ジュートなどは繊維にすることができます。アカネ、モクセイソウ、アイは衣類を染色するための液体染料の作成に使用されています。
石製のクワは土を耕して農地にしたり、給水状況を確認したり、作物が収穫に適しているかどうかを確認したりすることができます。これらはツールモード切替キー(デフォルト:Mキー)を使ってモードを変えることで確認できます。農業スキルが十分に高ければ、金属製のクワを使って農地の栄養状態も確認できるようになります。
| |
| |||||
他の道具と同じように、クワも棒や骨に取り付ける必要があります。
![]() - モード表示
- モード表示
![]() 耕作 - 一般的な使い方。土を耕して農地にすることができます。
耕作 - 一般的な使い方。土を耕して農地にすることができます。
![]() 給水 - 対象の農地を「黒:給水なし」、「青:給水あり」のハイライトで表示します。給水量(降水量と水からの距離)によって青色の濃淡が変わります。
給水 - 対象の農地を「黒:給水なし」、「青:給水あり」のハイライトで表示します。給水量(降水量と水からの距離)によって青色の濃淡が変わります。
![]() 収穫 - 完熟した作物を緑で、成長中の作物を赤で表示します。
収穫 - 完熟した作物を緑で、成長中の作物を赤で表示します。
作物の種は野生の植物から採集することで入手できます。種を手に入れたら、種を持って![]() 右クリックで農地に植えることができます。作物が育ちきるまでゲーム内で数ヶ月かかります。収穫具合が分からない場合、クワの収穫モードで成熟しているかどうか確認できます。
右クリックで農地に植えることができます。作物が育ちきるまでゲーム内で数ヶ月かかります。収穫具合が分からない場合、クワの収穫モードで成熟しているかどうか確認できます。
畜産
詳細は畜産を参照
長期的な肉の供給源として、または羊毛、乳、皮を得るために動物を飼いならし、飼育することができます。詳しくは畜産のページを参照してください。
その他
このガイドで説明しているのはほんの基本的なことだけです。TFC+には他にもたくさんのことができます。例えば……
- 引火しない光源であるロウソクを作る。
- 割れない水差しを作るためのガラス細工を行う。ガラス瓶を作るために使う吹管は、焚き火の火勢を強めるために使うこともできます。
- 酢や経験値を得るための酒を作る。
- 生皮を革に変えるための革細工。
- 大量の陶器を焼成するための焼成窯を建築する。
- 屋根のアップグレード。
- 楽器を作る・演奏する。
- 建物に漆喰を塗る。
- 本格的な冶金。
- プロテクションメーターを作って周囲のスポーンプロテクションの量を測定する。
- 馬に乗るためのサドルを作る。
- 素早く歩くための木の杖を作る。
- 弓などのより強い武器を作る。
- 金属製のノコギリで木の板を作り、樽、チェストなどの木製アイテムを作る。
- 織機で布を織り、快適な衣服を作って冬や夏を乗り切る。
- ジュートやリュウゼツランの繊維で、穀物以外の食べ物を保存できる黄麻袋を作る。
- ジャベリンと矢を多く携行できる矢筒を作る。
- 弓をより強力な合成弓にアップグレードする。
- 蜂蜜やロウを得るために養蜂を行う。
石器時代からの卒業
おめでとうございます! あなたはもはや石器時代の終わりまで辿りついていることでしょう。次の目的は、銅を溶かしてツルハシを鋳造し、さらにより多くの銅を採掘し、金属製のツールを鍛造する金床を作ることです。もしあなたが場所選びガイドに従って拠点を作っていれば、近くに銅の鉱脈があるはずです。金属加工ガイドのページに飛び、ワクワクの銅器時代へ繰り出しましょう。