Difference between revisions of "Stone-Age Guide"
| (204 intermediate revisions by 9 users not shown) | |||
| Line 1: | Line 1: | ||
| − | + | <languages /> | |
| + | <translate> | ||
| + | == Welcome to TFC+! == <!--T:1--> | ||
| + | [[File:Flowchart.png|500px|right]] | ||
| + | Terrafirmacraft+ is an re-imagination of what Minecraft can be, with a emphasis on making the game more believable. It is suited for experienced players of vanilla Minecraft, whom feel that an amount of complexity and detail has been lacking in the vanilla game, and want a level of realism that vanilla Minecraft does not provide. | ||
| − | + | <!--T:2--> | |
| + | This guide will help new players through the early game, with a focus on the differences between TFC+ and vanilla Minecraft. Players who already have experience with the original TerraFirmaCraft might want to look at [[Differences from TFC]] instead. If you have an issue or question, you can visit the [https://discord.gg/GhqaFgQ Discord] or [https://reddit.com/r/TFCPlus Subreddit] for support. | ||
| − | + | <!--T:3--> | |
| + | A number of translations are available for Terrafirmacraft+, but most of these are not complete. You can help translate Terrafirmacraft+ - look at the [[Translation]] page. | ||
| − | + | <!--T:4--> | |
| − | + | This guide assumes you have installed Terrafirmacraft+; if you have not, visit the [[Installation]] page for help. ''Note: Make sure you have created a 1.7.10 instance, and have installed '''''Terrafirmacraft+''''', not "Terrafirmacraft". The "Terrafirmacraft" CurseForge project is '''not''' Terrafirmacraft+.'' | |
| − | + | '''Note:''' The current version (0.89.1) has a bug where hostile monsters do not spawn on the surface. This issue will be fixed in the next version. Until then, if you wish to play with hostile monsters, play the previous version (0.88.4) | |
| + | == Getting started == <!--T:5--> | ||
| + | |||
| + | === HUD and Statistics === <!--T:6--> | ||
| + | When you start a new world, you might notice that your HUD is quite different from what you are used to in vanilla Minecraft. This section will guide you through the various bars and menus of the Terrafirmacraft+ HUD. | ||
| + | |||
| + | ==== Health ==== <!--T:7--> | ||
[[File:HealthBar.png|link=]] | [[File:HealthBar.png|link=]] | ||
| − | Instead of hearts, HP is shown | + | <!--T:8--> |
| + | The first bar that is quite different from vanilla Minecraft is the health bar. Instead of hearts, in TFC+, HP is shown as a red bar. You start with 1000 max HP, and this will vary depending on various factors, such as [[nutrition]] and XP level. HP will regenerate very slowly over time, as long as your hunger is above 25%. Even on a full stomach, you cannot heal very quickly. Healing can be accelerated by wading in hot spring water or by using [[Wound#Sterile Bandages|sterile bandages]], which restore 100 HP for each bandage used. | ||
| − | + | <!--T:9--> | |
| + | Players can also be [[#Wounds and Medicine|wounded]], which has a variety of effects. You can only get wounded if you take 20% or more of your health in one hit. Having an untreated fractured bone slows the player's movement, while having a wound or a cut gradually damages the player for as long as the effect lasts. Specific wounds are inflicted by specific [[damage type]]s. Fractures are only caused by crushing damage or falling damage, while wounds are caused by piercing damage and cuts are caused by slashing damage. The effects of wounds can be managed through [[#Wounds and Medicine|medicine]]. | ||
| + | ==== Hunger ==== <!--T:10--> | ||
[[File:HungerBar.png|link=]] | [[File:HungerBar.png|link=]] | ||
| − | Instead of shanks of food, hunger is represented with a green bar. | + | <!--T:11--> |
| + | Instead of shanks of food, hunger is represented with a green bar. | ||
| + | |||
| + | Unlike vanilla Minecraft, which uses arbitrary "filling values", the hunger system in TerraFirmaCraft+ is based off of food weight. TerraFirmaCraft+ uses the imperial measurement of ounces. However, this measurement does not relate to any other measurement in the game, so if the concept of ounces confuses you, you are welcome to instead think of them as generic "food units" or "bites." Each stack of food in TerraFirmaCraft+ can weigh up to 160 ounces. | ||
| − | Players | + | <!--T:12--> |
| − | + | Players will slowly get hungrier over the course of a few days, even if they do not move. When a player is very hungry, they will begin to suffer negative effects, such as Mining Fatigue and Weakness, until they have eaten again. Once a player's hunger bar is depleted, they will begin suffering from starvation, and very quickly die. Please note that the hunger bar is not linear, but rather logarithmic. As such, the last portion of the bar lasts significantly longer than the first. If you are running low on food, consider not constantly eating. | |
| − | + | ||
| − | + | ||
| − | + | ||
| − | + | ||
| − | + | ||
| + | ==== Thirst ==== <!--T:13--> | ||
[[File:FreshwaterPond.png|thumb|150px|Freshwater pond]] | [[File:FreshwaterPond.png|thumb|150px|Freshwater pond]] | ||
[[File:ThirstBar.png|link=]] | [[File:ThirstBar.png|link=]] | ||
| − | Thirst is represented with a blue bar. | + | <!--T:14--> |
| + | Terrafirmacraft+ introduces the idea of Thirst. Players will slowly get more thirsty, eventually suffering from effects like Slowness and Weakness, and will suffer heat strokes if they are completely dehydrated. Thirst is represented with a blue bar. Like Hunger, Thirst will go down slowly, even if players are not moving. Players can only drink fresh water from pools scattered throughout the world, distinguished from the coastal seawater by cattails and lily pads. Thus, finding fresh, drinkable, water is very important for survival. The world generation always attempts to spawn the player near fresh water, even if it is a single block. | ||
| − | + | <!--T:15--> | |
| + | To drink water, players must {{key|RMB}} on the block under Fresh Water. You can hold {{key|RMB}} to continue drinking until you are no longer thirsty. If you are experiencing issues with drinking, relog into the world. | ||
| − | + | <!--T:16--> | |
| + | One of the main goals of the early game is to make a [[Ceramic Jug]] so that transporting fresh water - enabling exploration of large distances - is possible. | ||
| − | The experience system represents life experience, and so each level increases a player's maximum health, thirst, and [[alcohol]] tolerance, allowing them to take more hits, survive longer without drinking fresh water, and drink more alcohol before getting negative side effects. | + | ==== Experience ==== <!--T:17--> |
| + | The experience system represents life experience, and so each level increases a player's maximum health, thirst, hunger, and [[alcohol]] tolerance, allowing them to take more hits, survive longer without drinking fresh water or eating, and drink more alcohol before getting negative side effects. | ||
| + | <!--T:18--> | ||
Unlike vanilla, there is no enchanting or tool repairs to consume experience levels, so the only way to decrease your experience level is death. | Unlike vanilla, there is no enchanting or tool repairs to consume experience levels, so the only way to decrease your experience level is death. | ||
| − | === | + | ==== Body Temperature ==== <!--T:19--> |
| − | + | [[File:Body Temperature Bar.png|right|link=]] | |
| − | + | [[Body Temperature]] is shown by a thermometer on the bottom right side of the screen. The green area of the thermometer shows the player's comfort range. The player's body temperature is affected by the season, body exertion from sprinting, their local [[climate]], and certain blocks. If the player is too hot, or too cold, they will suffer negative effects such as Slowness and Mining Fatigue. They will also not be able to sleep in [[Straw & Hide Bed]]s. Being too hot, or too cold, will also cause the player to lose hunger and thirst faster, as their bodies will "sweat" to keep cool, or burn calories to warm themselves up. | |
| − | + | ||
| − | == | + | |
| − | + | ||
| − | [[File: | + | |
| − | + | ||
| − | + | ||
| − | + | ||
| − | + | ||
| − | + | ||
| − | + | ||
| − | + | ||
| − | + | ||
| − | + | ||
| − | + | ||
| − | + | ||
| − | + | ||
| − | + | ||
| − | + | ||
| − | + | ||
| − | + | ||
| − | + | ||
| − | + | ||
| − | + | ||
| − | + | ||
| − | + | ||
| − | + | ||
| − | + | ||
| − | + | ||
| − | + | ||
| − | + | ||
| − | + | ||
| − | + | ||
| − | + | ||
| − | + | ||
| − | + | ||
| − | + | ||
| − | + | ||
| − | + | ||
| − | + | ||
| − | + | ||
| − | + | ||
| − | + | ||
| − | + | ||
| − | + | ||
| − | + | ||
| − | + | ||
| − | + | ||
| − | + | ||
| − | + | ||
| − | + | ||
| − | + | ||
| − | + | ||
| − | + | ||
| − | + | ||
| − | [[ | + | <!--T:20--> |
| + | Body Temperature is primarily managed through the use of [[#Straw|Clothing]]. [[#Roofing|Roofs]] also provide moderate temperature protection, and standing in shade out of the sun (or wearing a hat underneath it), or being in a cave, will also protect the player from the elements. Drinking water will temporarily give players heat resistance, while standing near lit campfires will provide cold resistance. | ||
| − | + | ==== Inventory ==== <!--T:21--> | |
| + | The Inventory in Terrafirmacraft+ contains four tabs: the Inventory tab, which is like the vanilla Inventory, allowing you to interact with your items and craft, the Skills tab, displaying a player's proficiency in various skills, the Time tab, displaying the time of year, [[season]], and day of week, and the Nutrition tab, which displays the five categories of food a player must eat in other to maintain their maximum health. | ||
| − | + | <!--T:22--> | |
| + | Unlike Vanilla, all crafting is done directly in the inventory tab. Players start out with a 2x2 Inventory Table, which can later be expanded with a crafting table to unlock the 3x3 grid. Unlike Vanilla, the Crafting Table is not an actual block, but is immediately used up to unlock the 3x3 grid. | ||
| − | + | <!--T:23--> | |
| + | {{Grid/Inventory Table}} | ||
| − | === | + | === The First Day: Tools, Light, and Clothing === <!--T:24--> |
| + | The goal for the first day is to prepare for the night and for the player's long-term survival. It is important to look around you, and to see what resources are available to you. If you see yourself in a plain, with grass, shrubs, and boulders stretching to the horizon, you might be able to find metal nuggets and animals to hunt quite easily. If you see yourself on a coast of an ocean, seaweed and fresh water is easy to find. If you find yourself in the deep rain forest, clay, fresh water, and wood are plentiful. | ||
| − | + | ==== What You Can't Do ==== <!--T:25--> | |
| + | You might notice that you can't punch trees to get [[wood]]. This is because the tech-tree in Terrafirmacraft+ is completely different from that of vanilla Minecraft. This means that your first tools will be made from [[knapping|stone]]. There is no such thing as wooden tools in Terrafirmacraft+, and wasting your time to punch down a tree will yield you absolutely nothing. You cannot make [[planks]] in the same way as vanilla, and thus a crafting table in Terrafirmacraft+ - you will need a [[saw]], which can only be made from [[metals]]. | ||
| − | There is | + | <!--T:26--> |
| + | There is no such thing as a Wooden or Stone pickaxe in Terrafirmacraft. In the early game, you do not mine stone for [[ore]]. Instead, there are other ways to acquire metal ore and tools, without needing a pickaxe. This will be how you will make a [[pickaxe]] to mine more ore. | ||
| − | + | <!--T:27--> | |
| + | Punching dirt is not recommended, as even if you manage to break a block, it, in addition to [[sand]], [[gravel]], [[stone]] and [[cobblestone]], are affected by gravity in TerraFirmaCraft+. Unlike in Vanilla Minecraft, gravity-affected blocks are able to fall sideways, in addition to falling straight down. You will not be able to create a house out of these blocks. | ||
| − | + | <!--T:28--> | |
| + | Players used to vanilla Minecraft might wonder how one stores items in Terrafirmacraft+. Because planks as they are in vanilla are locked behind metal, early-game alternatives to the chest such as the [[#Straw|Straw Basket]], [[#Pottery|Large Vessel]], [[#Pottery|Ceramic Vessel]], and [[#Sewing|Raw Hide Bag]] are available. | ||
| − | + | <!--T:29--> | |
| + | Sprinting everywhere is not economical in TFC+ - your hunger and thirst declines much quicker. In addition sprinting for too long can cause exertion, which raises body temperature and makes clothing damp. Instead, the [[Wooden Staff]] can be used for a speed bonus that is half that of sprinting. Shoes and socks add additional speed bonuses. The Wooden Staff will be discussed later in this article. | ||
| − | + | <!--T:30--> | |
| + | [[Torches]] in TFC+ will light flammable blocks on fire. Before using a torch, it is recommended to clear the area of any flammable blocks, including grass, undergrowth, and fallen leaves. To light up your shelter, use a [[Firepit]], which will be discussed later in this article. Later, you will be able to craft a [[Candle]], which is a safe source of light. | ||
| + | ==== Sticks and Stones ==== <!--T:31--> | ||
| + | [[File:RockGen.png|link=|thumb|right|150px|Some [[rock]]s laying on the ground.]] | ||
{| | {| | ||
|{{GridImage|Rock (Andesite)}} | |{{GridImage|Rock (Andesite)}} | ||
| Line 145: | Line 123: | ||
|} | |} | ||
| − | + | <!--T:32--> | |
| + | In Terrafirmacraft+, the first thing you should do, instead of punching trees, is to gather the rocks laying scattered all across the ground. 64 rocks will last you through the first few days of gameplay. | ||
| − | + | <!--T:33--> | |
| + | Occasionally, you might find some ore nuggets. ''Be sure to take note of the location, as these are important later.'' | ||
| − | + | <!--T:34--> | |
| + | You will also want to find some sticks. Sticks can be found occasionally on the ground under trees and on shores, and can also be obtained by breaking leaf litter. Sticks can also be obtained by breaking undergrowth and shrubs with an axe. | ||
| + | ==== Knapping ==== <!--T:35--> | ||
| + | [[Knapping]] is the process of using two [[rock]]s to create heads for stone [[tools]]. {{key|RMB}} while holding a stack of two or more rocks to open the knapping interface. The process of knapping will produce stone flakes, which are also used in crafting and can be used like a knife to collect straw from grass. | ||
| + | |||
| + | <!--T:36--> | ||
| + | {{Knapping | ||
| + | |A1= terraRock 01 |B1= terraRock 01 |C1= terraRock 01 |D1= terraRock 01 |E1= terraRock 01 | ||
| + | |A2= terraRock 01 |B2= terraRock 01 |C2= terraRock 01 |D2= terraRock 01 |E2= terraRock 01 | ||
| + | |A3= terraRock 01 |B3= terraRock 01 |C3= terraRock 01 |D3= terraRock 01 |E3= terraRock 01 | ||
| + | |A4= terraRock 01 |B4= terraRock 01 |C4= terraRock 01 |D4= terraRock 01 |E4= terraRock 01 | ||
| + | |A5= terraRock 01 |B5= terraRock 01 |C5= terraRock 01 |D5= terraRock 01 |E5= terraRock 01 | ||
| + | |Output= | ||
| + | }} | ||
| + | |||
| + | <!--T:37--> | ||
| + | The knapping interface is a 5x5 grid. Clicking on a square of the grid will break off that piece of stone. Be careful where you click - if you make a mistake, you cannot undo it and you will have to start again. If you successfully create a specific shape, a tool head will appear to the right which can then be attached to a [[stick]] or a [[bone]] in the crafting grid to create a stone tool. While knapping, Stone Flakes might be produced, which can be used to craft arrows later on. | ||
| + | |||
| + | <!--T:38--> | ||
| + | ''Tip: Some of the tools can be knapped out differently than the below forms, feel free to experiment.'' | ||
{| | {| | ||
| − | | | + | |- style="vertical-align:top;" |
| − | | | + | | style="width: 200pt; padding-right: 10px"|{{Recipe/Stone Knife Blade}} |
| − | |{{ | + | Knives are a weak melee weapon, and a useful tool. With a knife, you can gather seaweed, turn furs and animal hides into leather or clothing, process grain into cereal, and remove decay from food. Knives have two attacking modes, Stab and Slash, which deal different damage types. They can be swapped between by pressing {{key|M}}. Two knives can be crafted at once by mirroring the recipe on the other side. |
| − | + | | style="width: 200pt; padding-right: 10px"|{{Recipe/Stone Axe Head}} | |
| − | | | + | Axes are useful for felling trees, and also serve as a good Slashing damage weapon. |
| − | |{{ | + | | style="width: 200pt; padding-right: 10px"|{{Recipe/Stone Shovel Head}} |
| − | + | Shovels can be used gather dirt, clay, gravel, and sand. | |
| − | | | + | |
| − | |{{ | + | |
| − | + | ||
| − | + | ||
| − | + | ||
| − | + | ||
| − | + | ||
| − | + | ||
| − | + | ||
| − | + | ||
| − | + | ||
|} | |} | ||
| − | + | <!--T:41--> | |
| + | ''Tip: Completed stone tools do not stack, but tool heads will stack up to 32. At night when you are hiding from monsters, you can knap a handful of each tool head to keep in your inventory. Then during the day when your tool breaks, you can quickly combine another head with a stick or bone for a new tool.'' | ||
| − | + | <!--T:42--> | |
| + | If you successfully create a specific shape, a tool head will appear to the right which can then be attached to a [[stick]] or a [[bone]] in the crafting grid to create a stone tool. | ||
| + | {| cellspacing=10 | ||
| + | |{{Recipe/Stone Knife}} | ||
| + | |{{Recipe/Stone Axe}} | ||
| + | |{{Recipe/Stone Shovel}} | ||
| + | |} | ||
| − | === | + | ==== Wood ==== <!--T:43--> |
| + | {| | ||
| + | |{{GridImage|Log (Acacia)}} | ||
| + | |{{GridImage|Log (Ash)}} | ||
| + | |{{GridImage|Log (Aspen)}} | ||
| + | |{{GridImage|Log (Birch)}} | ||
| + | |{{GridImage|Log (Chestnut)}} | ||
| + | |{{GridImage|Log (Douglas Fir)}} | ||
| + | |{{GridImage|Log (Hickory)}} | ||
| + | |{{GridImage|Log (Kapok)}} | ||
| + | |{{GridImage|Log (Maple)}} | ||
| + | |{{GridImage|Log (Oak)}} | ||
| + | |{{GridImage|Log (Pine)}} | ||
| + | |{{GridImage|Log (Sequoia)}} | ||
| + | |{{GridImage|Log (Spruce)}} | ||
| + | |{{GridImage|Log (Sycamore)}} | ||
| + | |{{GridImage|Log (White Cedar)}} | ||
| + | |{{GridImage|Log (White Elm)}} | ||
| + | |{{GridImage|Log (Willow)}} | ||
| + | |} | ||
| − | + | <!--T:44--> | |
| + | Wood is gathered by chopping down trees with an axe. If you break the bottom log of the tree with an axe, it will break the entire tree into logs and sticks. If your axe does not have enough durability to chop down the entire tree, only the top of the tree will be chopped, and the axe will break. | ||
| − | + | <!--T:45--> | |
| + | Trees come in two sizes: the normal tree that populates forests and grasslands, which drop regular-sized logs, and the rarer large trees which drop large logs. Large logs can be hewed into regular-sized logs; however, it is not recommended you do this, as large logs are comparatively rare, and can be used for building. 4 regular logs can be combined in the crafting grid in order to produce stacked logs, also used for building. | ||
| − | [[ | + | <!--T:46--> |
| + | Logs can be stored in a log pile by {{key|shift}} + {{key|RMB}} onto the ground. Only regular-sized logs can be used to start a log pile, however, once the log pile is created, it can be used to store large logs, as well. | ||
| + | |||
| + | <!--T:47--> | ||
| + | Logs can be crafted into poles with a knife, and poles can be snapped in half to make sticks. Poles can be further processed with an Axe to produce Wicker. | ||
| + | |||
| + | <!--T:48--> | ||
| + | {{Recipe/Pole}} | ||
| + | {{Grid/Inventory Table|A1=Pole|Output=Stick,2}} | ||
| + | {{Recipe/Wicker}} | ||
| + | |||
| + | As mentioned above, vanilla Planks cannot be made directly from logs (instead being made from 4 Lumber, which is only obtainable when the player has made a [[Saw]]). Thus, certain items like Boats and Beds are locked behind metal. In the early game, several alternatives, like the [[Straw & Hide Bed]] and the [[Coracle]] are available. | ||
| + | |||
| + | <!--T:49--> | ||
| + | Logs can be right clicked with a knife to receive Resin; this can be used to craft various items, such as the Wooden Staff, and the Primitive Bandage. The Wooden Staff is made from Resin combined with a Pole, and gives the player a 15% speed bonus while walking when it is held. This speed bonus is half of the sprinting speed. Because sprinting in Terrafirmacraft+ causes the player to become hungry and thirsty faster, it is recommended to use the Wooden Staff instead of sprinting whenever possible. The Primitive Bandage is used when the player gets wounded; see the [[#Wounds and Medicine|Wounds and Medicine]] section. | ||
| + | |||
| + | <!--T:50--> | ||
| + | {{Recipe/Wooden Staff}} | ||
| + | |||
| + | ==== Weapons ==== <!--T:51--> | ||
| + | |||
| + | <!--T:52--> | ||
| + | Weapons are important in order to hunt wild animals and defend yourself from monsters at night. Early game weapons, like tools, can be knapped from stone, or, in the case of the Wooden Spear, shaped from a pole. In Terrafirmacraft+, there are three types of damage: Slashing, Piercing, and Crushing. Slashing is effective against Endermen and Zombies. Piercing damage is effective against Bears, Creepers, Endermen, and Wolves, and Crushing is effective against Endermen and Skeletons. Axes deal Slashing damage, Javelins and Spears deal Piercing damage, and Hammers deal Crushing damage. The Knife has two modes, Stabbing and Slashing, which deal Piercing and Slashing damage respectively. | ||
| + | |||
| + | The [[Primitive Sling]] is an early-game ranged weapon. It is rather cheap and fires rocks which deal Crushing damage, making it useful against Skeletons and Wither Skeletons. Projectiles fired from a sling will go off slightly to the right of the crosshair, so to hit targets, aim slightly to the left. | ||
| + | |||
| + | <!--T:53--> | ||
| + | {| cellspacing=10 | ||
| + | ! Primitive Sling | ||
| + | ! Javelin Head (Stone) | ||
| + | ! Stone Hammer Head | ||
| + | |- | ||
| + | |{{Grid/Inventory Table | ||
| + | |A1= |B1= Straw Cordage | ||
| + | |A2= Straw Cordage |B2 = Straw | ||
| + | |Output= Primitive Sling | ||
| + | }} | ||
| + | |{{Recipe/Javelin Head (Stone)}} | ||
| + | |{{Recipe/Stone Hammer Head}} | ||
| + | |} | ||
| − | + | <!--T:54--> | |
| + | Javelin heads need to be crafted with a Pole in order to create the full Javelin, while Stone Hammers, like tools, need to be crafted with a Stick or a Bone. | ||
| − | + | <!--T:55--> | |
| + | Wooden Spears are an weaker version of the Stone Javelin. They can be crafted from a pole and a knife. | ||
| − | + | <!--T:56--> | |
| + | {{Recipe/Wooden Spear}} | ||
| − | + | <!--T:57--> | |
| + | Wooden Spears and Javelins will automatically refill from your inventory after one is thrown. | ||
| + | ==== Hunting and Foraging ==== <!--T:58--> | ||
| + | Finding a source of food and water is important for your long term survival. Only fresh water can be drunk; the process of finding and drinking fresh water is described in the [[#Thirst|Thirst]] section. | ||
| + | |||
| + | ===== Seaweed ===== <!--T:59--> | ||
| + | |||
| + | <!--T:60--> | ||
| + | A good source of early-game food - if you are near the shore - is seaweed. Seaweed can be harvested using {{key|RMB}} on the block below the seaweed while holding a knife. Once you have a few pieces of seaweed, you can stack them together by hovering over one piece of seaweed and pressing {{key|S}} to stack the seaweed together. Alternatively, the seaweed can be crafted together in the Inventory grid to stack them. | ||
| + | |||
| + | ===== Meat ===== <!--T:61--> | ||
| + | |||
| + | <!--T:62--> | ||
| + | If you cannot locate a shore, the next best source of food is meat. Animals can be found clustered in groups around the world. ''Do not attack them right away!'' In Terrafirmacraft+, animals are neutral mobs, and most will attack the player if the player attacks them (deers and pheasants will not retaliate). As animals are also much harder to kill than in Vanilla, you should prepare yourself before you attack an animal. | ||
| + | |||
| + | <!--T:63--> | ||
| + | ''Note: Do not underestimate animals! They have large amounts of knockback and damage. They are not harmless, like in Vanilla!'' | ||
| + | |||
| + | <!--T:64--> | ||
| + | Stand away some distance from the animal, and hold {{key|RMB}} to prepare your spear or javelin. ''Do not attack the animal directly with the javelin! Hitting an animal with a javelin deals far less damage than throwing it.'' Release in order to throw it. ''Be careful, as the animal will now try to attack you.'' Throw multiple spears in rapid succession, until the animal dies. In Terrafirmacraft+, animals drop as much meat as their body weight. This means that large animals will drop quite a lot of meat. You do not have to worry about picking up all the meat, as a few stacks will suffice for a few days. Be sure to pick up the [[Raw Hide]], too, as it is very useful later. The sinew from hunting can be used to make a bow, which can also aid you in future hunts. | ||
| + | |||
| + | <!--T:65--> | ||
| + | If you are wounded, jump to the [[#Wounds and Medicine|Wounds and Medicine]] section, then come back. | ||
| + | |||
| + | ===== Foraging ===== <!--T:66--> | ||
| + | [[File:WildRye.png|thumb|150px|A wild patch of [[rye]].]] | ||
{| | {| | ||
| + | |{{GridImage|Banana}} | ||
| + | |{{GridImage|Blackberry}} | ||
| + | |{{GridImage|Blueberry}} | ||
| + | |{{GridImage|Bunchberry}} | ||
| + | |{{GridImage|Cherry}} | ||
| + | |{{GridImage|Cloudberry}} | ||
| + | |{{GridImage|Cranberry}} | ||
| + | |{{GridImage|Elderberry}} | ||
| + | |{{GridImage|Gooseberry}} | ||
| + | |{{GridImage|Green Apple}} | ||
| + | |{{GridImage|Lemon}} | ||
| + | |{{GridImage|Olive}} | ||
| + | |{{GridImage|Orange}} | ||
| + | |{{GridImage|Peach}} | ||
| + | |{{GridImage|Plum}} | ||
| + | |{{GridImage|Raspberry}} | ||
| + | |{{GridImage|Red Apple}} | ||
| + | |{{GridImage|Snowberry}} | ||
| + | |{{GridImage|Strawberry}} | ||
| + | |{{GridImage|Wintergreen Berry}} | ||
| + | |- | ||
|{{GridImage|Barley (Harvest)}} | |{{GridImage|Barley (Harvest)}} | ||
|{{GridImage|Cabbage (Harvest)}} | |{{GridImage|Cabbage (Harvest)}} | ||
| Line 214: | Line 318: | ||
|} | |} | ||
| − | [[Agriculture|Crops]] spawn randomly in the wild between the [[season]]s of spring and late summer, and have a chance to regenerate during those seasons every year. Breaking a wild crop will give only seeds if it isn't fully mature, so you should wait until it has reached the last stage of growth before harvesting if you want [[food]]. | + | <!--T:67--> |
| + | [[Agriculture|Crops]] spawn randomly in the wild between the [[season]]s of spring and late summer, and have a chance to regenerate during those seasons every year. Breaking a wild crop will give only seeds if it isn't fully mature, so you should wait until it has reached the last stage of growth before harvesting if you want [[food]]. If you can find mature crops, they will serve as a good source of food. | ||
| − | + | <!--T:68--> | |
| + | Fruit trees and Berry Bushes can also be found in the wild. To harvest the fruit from a fruit tree or berry bush, {{key|RMB}} on their leaves. Berry bushes can be picked up by breaking them, and placed elsewhere later on. | ||
| − | + | <!--T:69--> | |
| + | These long-term food sources may be hard to find. Players are reminded that finding crops in Terrafirmacraft+ involves exploring a large area, much larger than required in vanilla - typically, the climate only changes if you travel about 1000 blocks away from an area. This may be confusing to players that are used to Vanilla, because Vanilla uses Biomes to determine the generation of resources, while Terrafirmacraft+ instead uses a climate system. Imagine that you are trying to find a different biome in Vanilla - if you cannot find these food sources, simply travel further, and rely on what you have to feed yourself while exploring. Despite this, it is completely possible to find these sources, and to sustain yourself for a long time. | ||
| − | + | <!--T:70--> | |
| − | + | Grain crops must be refined with a knife to make them into their edible version. This will also return straw. | |
| − | + | ||
| − | + | ||
| − | + | ||
| − | + | ||
| − | + | ||
| − | + | ||
| − | + | <!--T:71--> | |
| + | {{Grid/Inventory Table | ||
| + | |shapeless=1 | ||
| + | |A1={{Any Knife}} |B1= Wheat (Harvest); Barley (Harvest); Rice (Harvest); Oat (Harvest); Rye (Harvest) | ||
| + | |Output=Wheat (Grain); Barley (Grain); Rice (Grain); Oat (Grain); Rye (Grain) | ||
| + | }} | ||
| − | + | <!--T:72--> | |
| + | In a pinch, mushrooms found in leaf litter can be cut with a knife to make them edible. Only brown mushrooms are safe to eat raw; red mushrooms must first be cooked. | ||
| − | + | <!--T:73--> | |
| + | ''Note: Do not break the leaves of the fruit trees! They take a long time to regrow.'' | ||
| − | + | <!--T:74--> | |
| + | Seeds can later be [[#Agriculture|planted]] for a long-term food source. | ||
| − | + | <!--T:75--> | |
| + | If you have many stacks of food, you can stack them together. This can be done either by crafting the stacks of items together, or by hovering over one stack of food and pressing {{key|S}} (for "stack"). Food will eventually decay, and will have to be preserved for them to last longer. Decay can be cut off of food with a knife automatically by pressing {{key|D}} while your inventory is open, or by crafting the decayed food with the knife. Preservation methods will be discussed later on in this article. | ||
| − | + | ===== Beekeeping ===== <!--T:76--> | |
| + | {{main|Beekeeping}} | ||
| − | + | <!--T:77--> | |
| − | + | Wild Beehives occasionally generate on trees. Beehives are a source of Honeycombs, which are useful to make honey, which is a source of food, and also as a source of Wax for [[Candle|Candles]]. The player may also choose to make their own artificial beehives to gather more honey. | |
| − | + | ||
| − | + | ||
| − | + | ||
| − | + | ||
| − | + | ||
| − | + | ||
| − | + | ||
| − | + | ||
| − | + | ||
| − | + | ||
| − | + | ||
| − | + | ||
| − | + | ||
| − | + | ||
| − | + | ||
| − | + | ||
| − | + | ||
| − | + | ||
| − | + | ||
| − | | | + | |
| − | + | <!--T:78--> | |
| + | Players cannot open beehives directly. The bees will sting the player if they attempt to open or break the beehive. To calm the bees so that opening the beehive is possible, the player must light a Firepit underneath the beehive to calm the bees and allow the beehive to be opened. Wild Beehives have a Fertile Honeycomb in them; this can be used to create an artificial beehive, or can be cut to gather the honey inside. Once the Fertile Honeycomb is removed from the Wild Beehive, the beehive will collapse and drop some Empty Honeycombs; this can later be melted for Wax, which is an essential component of [[Candle|Candles]]. | ||
| − | + | <!--T:79--> | |
| + | {{Recipe/Honey Bowl}} | ||
| − | + | <!--T:80--> | |
| − | + | The making of bowls so that you can remove the honey from the honeycomb is discussed later in this article, and the process of creating an artificial hive can be found at the [[Beekeeping]] article. | |
| − | + | ||
| − | + | ||
| − | + | ==== Firepit ==== <!--T:81--> | |
| + | {{main|Firepit}} | ||
| − | + | <!--T:82--> | |
| + | At the end of the first day, you will probably want to create a [[firepit]] to make some [[torch]]es, and cook any meat you've collected so you can eat it. You'll need at least five [[stick]]s, some [[log]]s to use as fuel, and optionally a piece of [[straw]]. | ||
| − | + | <!--T:83--> | |
| − | + | First, you'll need to put two sticks in the grafting grid in a diagonal pattern to make a firestarter. | |
| − | + | {{Recipe/Firestarter}} | |
| − | |} | + | Once you have a firestarter, throw (Default: {{key|Q}}) three sticks on the ground or other non-flammable block. Make sure they are all stacked on the same block, preferably in the middle. It's possible that your first few tries to light the firepit will not work. You can optionally toss an extra piece of straw in order to make the process faster. Once the firepit appears, drop some logs on to it to quickly add fuel. You can {{key|RMB}} on the firepit as long as you aren't holding a firestarter or flint & steel to open its interface. The firestarter can later be upgraded by crafting it with a Bow to produce a Bow Drill, which has a higher effectiveness and durability. |
| − | + | <!--T:84--> | |
| + | If the firepit goes out, you'll need to add some fuel and then {{key|RMB}} on it with a firestarter to relight it. Relighting is instant. | ||
| − | + | <!--T:85--> | |
| + | Once you have a firepit, it is recommended that you make some torches. Torches can be easily lit by pressing {{key|RMB}} on a lit Firepit while holding an unlit torch. A placed lit Torch can be used to light unlit torches in the same way. | ||
| + | {{Recipe/Torch}} | ||
| − | + | A [[Containers#Large Ceramic Vessel|Large Ceramic Vessel]] can be mounted on a Firepit (by {{key|Shift}}+{{key|RMB}}ing) to process liquids; this is useful if you wish to make a Coracle, or simply want to evaporate Salt Water for [[Salt]] in order to preserve your [[Food]]. | |
| − | + | <!--T:86--> | |
| + | ''Warning: Torches can set nearby flammable blocks on fire! They are not meant for indoor use if your shelter is made of wood or straw. Clear the nearby area of grass, undergrowth, trees, and leaves before placing down a torch. Use a Firepit instead to light up your shelter, and later upgrade to [[#Candles|Candles]].'' | ||
| − | + | ==== Straw ==== <!--T:87--> | |
| + | Breaking tall grass with a knife yields straw. Straw is highly useful in the early game, as it can be made into shelter, storage, clothing, [[#Wounds and Medicine|bandages, splints]], and bedding. | ||
| − | + | <!--T:88--> | |
| − | + | Straw can be woven using the same knapping interface as rocks. To begin weaving straw, {{key|RMB}} while holding at least five pieces of straw. | |
| − | + | ||
| − | + | ||
| − | + | ||
| − | + | ||
| − | + | ||
| − | + | ||
| − | + | ||
| + | <!--T:89--> | ||
{| | {| | ||
| − | | | + | |- style="vertical-align:top;" |
| − | | | + | | style="width: 200pt; padding-right: 10px"|{{Recipe/Straw Basket}} |
| − | |{{ | + | The Basket has 9 slots of inventory space. It will drop its items when it is broken. |
| − | + | | style="width: 200pt; padding-right: 10px"|{{Recipe/Grass Cloak}} | |
| − | | | + | The Straw Cloak provides a moderate amount of cold protection. It is useful if you have spawned in a cold environment. |
| − | |{{ | + | | style="width: 200pt; padding-right: 10px"|{{Recipe/Straw Hat}} |
| − | + | The Straw Hat provides a slight amount of heat protection, and protects you from the heat of the sun. | |
| − | | | + | |- style="vertical-align:top;" |
| − | |{{ | + | | style="width: 200pt; padding-right: 10px"|{{Recipe/Grass Shirt}} |
| − | | | + | The Grass Shirt provides a slight amount of heat protection. |
| − | | | + | | style="width: 200pt; padding-right: 10px"|{{Recipe/Grass Skirt}} |
| − | |{{ | + | The Grass Skirt provides a slight amount of heat protection. |
| − | | | + | | style="width: 200pt; padding-right: 10px"|{{Recipe/Grass Sandals}} |
| − | |{{ | + | The Grass Sandals give a small speed bonus when on sand. |
| − | | | + | |
| − | |{{ | + | |
| − | + | ||
|} | |} | ||
| − | [[ | + | <!--T:90--> |
| + | Straw can also be crafted into [[Straw Block]]s, which are useful for building huts to hide from mobs at night. It is also used in a good number of early-game constructions and crafting recipes, such as Straw Roofs and Straw and Hide beds. | ||
| + | {{Recipe/Straw Block}} | ||
| − | '' | + | <!--T:91--> |
| + | ''Note: Players and mobs are able to move through straw blocks. You cannot use straw blocks to pillar up to safety, as you will simply fall through the block when you try to jump on it. Hostile mobs will not be able to spot you if you are already hiding in a straw block enclosure, but they are able to follow you through straw blocks if they have been aggro'd while you were outside of the straw block.'' | ||
| − | + | <!--T:92--> | |
| + | [[File:HideBedCreation.png|thumb|150px|Creating a [[Straw & Hide Bed]].]] | ||
| − | + | <!--T:93--> | |
| + | If you have a piece of Large [[Raw Hide]], you can craft a Straw and Hide bed by placing two Straw Blocks adjacent to each other. Then, {{key|RMB}} with the piece of Large Raw Hide in your hand while facing the straw blocks straight-on in order to create a Straw and Hide Bed. This can be used to skip the night. Be aware, through, that you might need to craft clothing in order to sleep in a Straw and Hide Bed, as it will be too uncomfortable to sleep in if you are too hot or too cold. | ||
| − | + | <!--T:94--> | |
| + | If you made it this far, congratulations. You have survived your first day in Terrafirmacraft+, and have the means to survive at night. Do take note that in TFC+, mob spawns are heavily increased, and it is not a good idea to be wandering around at night. It is recommended to stay near a firepit, and perhaps continue with Pottery, if you have a clay source nearby. You may now explore more long-term possibilities for survival, and progress towards the Copper Age. | ||
| − | == | + | == Beyond The First Day == <!--T:95--> |
| + | The days beyond the first day are focused on securing more tools for survival. You will also work your way towards leaving the Stone Age and entering the Copper Age, which will unlock more possibilities for long term survival. | ||
| − | + | === Environment and Seasons === <!--T:96--> | |
| − | + | <!--T:97--> | |
| − | + | Instead of vanilla biomes, in Terrafirmacraft+ there is a climate system. [[Rainfall]], elevation, distance from the equator, and time of year determine what types of animals, plants, and terrain will generate in an area. Players will always spawn in the northern half of the map, during the season of early summer. | |
| − | + | ||
| − | + | ||
| − | + | ||
| − | + | ||
| − | + | ||
| − | + | ||
| − | The | + | <!--T:98--> |
| + | Terrafirmacraft+ adds the four seasons to Minecraft. The seasons affect the ambient temperature, the behavior of animals, and the timing of sunrise and sunset. In winter, unharvested crops will turn back into seeds, trees will lose their leaves, and new saplings that are not evergreen will not grow. In spring, long grass, flowers, rocks, and saplings will regenerate. In summer, crops will respawn randomly over the world, and can be harvested for seeds. In autumn, trees will turn brown, and the ambient temperature will begin to fall. The player must prepare for the four seasons adequately, and the unique challenges that each provide, such as the heat of summer, especially if the player is in a tropical [[Region]], and preparing the cold of winter, by building shelter and sewing clothes. | ||
| − | + | <!--T:99--> | |
| − | + | Areas around the equator tend to be wetter and hotter, and eventually becomes tropical, then temperate, then boreal, and finally polar at 27000 blocks North or South. | |
| − | + | ||
| − | + | ||
| − | + | ||
| − | + | <!--T:100--> | |
| + | Rivers generate along biome borders, and are much larger than Vanilla. Their riverbeds will contain clay deposits that will be useful if one spawns in a climate too dry to spawn clay. | ||
| − | + | <!--T:101--> | |
| + | Terrafirmacraft+ also introduces the idea of [[Region]]s. Instead of biomes, [[Region]]s are what determines what trees, plants, and animals spawns in an area. For example, Black-Eyed Peas can only be found in Africa. Along the edges of [[Region]]s, huge mountain ranges will generate. | ||
| − | + | === Pottery === <!--T:102--> | |
| + | [[File:Clay Deposit.png|thumb|150px|Clay deposit on a hillside with goldenrod flowers.]] | ||
| − | + | <!--T:103--> | |
| + | Clay generates near ponds and in riverbeds across the world. It can be distinguished from dirt from a distance by the existence of yellow Goldenrod flowers which only grow on clay. It can be dug with a shovel to obtain clay balls, which can then be shaped into clay items, and fired to make Pottery. Pottery is an important step of progression in Terrafirmacraft+, as it allows fresh water to be transported, [[#Mud|Mud]] to be made, and to create vessels and [[Gold Pan]]s. | ||
| − | + | <!--T:104--> | |
| + | Clay, like Straw and Rocks, has a knapping interface for forming clay items. Hold five clay balls in your hand, and {{key|RMB}} to access it. | ||
| − | + | <!--T:105--> | |
| + | {{Grid/Knapping | ||
| + | |A1= CFL|B1= CFL|C1= CFL|D1= CFL |E1= CFL | ||
| + | |A2= CFL|B2= CFL|C2= CFL|D2= CFL |E2= CFL | ||
| + | |A3= CFL|B3= CFL|C3= CFL|D3= CFL |E3= CFL | ||
| + | |A4= CFL|B4= CFL|C4= CFL|D4= CFL |E4= CFL | ||
| + | |A5= CFL|B5= CFL|C5= CFL|D5= CFL |E5= CFL | ||
| + | |Output= | ||
| + | }} | ||
| − | {| | + | <!--T:106--> |
| − | |{{ | + | {| |
| − | | | + | |- style="vertical-align:top;" |
| − | | | + | | style="width: 200pt; padding-right: 10px"|{{Recipe/Clay Jug}} |
| − | + | The Ceramic Jug allows you to pick up water using {{key|RMB}} on any fresh water pool. The water can then be drunk by holding {{key|RMB}} with the Ceramic Jug in your hand. | |
| − | | | + | | style="width: 200pt; padding-right: 10px"|{{Recipe/Clay Vessel}} |
| − | | | + | The Ceramic Vessel has four slots of inventory space for small items. It is essential for progression to the Copper Age. Ceramic Vessels can only hold grains. |
| − | | | + | | style="width: 200pt; padding-right: 10px"|{{Recipe/Clay Bucket}} |
| − | + | The Ceramic Bucket is necessary for picking up water to create Mud. | |
| − | + | |- style="vertical-align:top;" | |
| − | | | + | | style="width: 200pt; padding-right: 10px"|{{Recipe/Clay Bowl}} |
| − | | | + | Ceramic Bowls can be used for the creation of [[Food#Preparation|Salads]], or to craft a [[Gold Pan]]. |
| − | | | + | | style="width: 200pt; padding-right: 10px"|{{Recipe/Clay Large Vessel}} |
| − | }} | + | Large Vessels are an early game [[Barrel]]. Large Vessels can contain 9 items, as well as liquids, and can be carried on the player's back. They can be mounted on a Firepit in order to melt items, such as Empty Honeycombs into Wax. Large Vessels are also a part of the [[Still]]. |
|} | |} | ||
| − | + | <!--T:107--> | |
| + | After you have made a clay item, it must be fired before it can be used. To do this, you will need to make a Pit Kiln. | ||
| − | + | ==== Pit Kiln ==== <!--T:108--> | |
| − | + | <!--T:109--> | |
| + | To make a Pit Kiln, dig a pit in the ground, and {{key|Shift}} + {{key|RMB}} the items to be fired into the pit. Then, add eight straw, then eight logs, by right clicking on the pottery. | ||
| − | + | <!--T:110--> | |
| − | |{{ | + | <gallery mode="packed" caption="The pit kiln will not work as pictured below. These images are in cross section, with the required surrounding blocks removed for visibility." widths=225px> |
| − | | | + | File:PitKiln_items_cross.png|{{key|Shift}}+{{key|RMB}} the items into the pit |
| − | + | File:PitKiln_straw_cross.png|Pit kiln with added straw | |
| − | + | File:PitKiln_logs_cross.png|Complete pit kiln | |
| − | + | </gallery> | |
| − | + | ||
| − | + | ||
| − | }} | + | |
| − | + | ||
| − | | | + | |
| − | | | + | |
| − | | | + | |
| − | + | ||
| − | + | ||
| − | + | <!--T:111--> | |
| + | The Pit Kiln can now be lit with either a [[#Firepit|Firestarter]] or a dropped torch. Lighting a pit kiln using a torch will produce sparks that might burn flammable blocks nearby, so be careful where you build your pit kilns. | ||
| − | + | <!--T:112--> | |
| + | The Pit Kiln will take eight hours to complete. Once it is complete, you can {{key|Shift}} + {{key|RMB}} the items out of the pit kiln. The items can now be used. | ||
| − | [[File: | + | === Sewing === <!--T:113--> |
| + | [[File:Sewing Example.png|thumb|right|The Sewing GUI]] | ||
| − | + | <!--T:114--> | |
| + | Sewing can be used to craft Raw Hide Bags for carrying around more items, and to create more advanced clothing from materials like Fur. | ||
| − | + | <!--T:115--> | |
| + | To begin sewing, one needs a Bone Needle. Bone Needles can be made by repeatedly punching a Stone Block with a bone in your hand. It is recommended to have several bones, as not every bone will drop a Bone Needle. Once a Bone Needle is produced, it can be threaded with a thread, such as Sinew (from killing animals). | ||
| − | + | <!--T:116--> | |
| + | {{Recipe/Threaded Bone Needle}} | ||
| − | + | <!--T:117--> | |
| − | + | Leather and the various cloths can be cut into clothing pieces. {{key|RMB}} with the clothing pieces with a threaded bone needle in the inventory to show the sewing GUI. Place the necessary clothing pieces into the slots. An image of the clothing will appear. Use the Threaded Bone Needle to trace the thread around the red lines in the image. Using {{key|RMB}} with a knife on the image will remove a section of thread. Once the red lines on the image is completely traced correctly, and all incorrect parts of the tracing are removed, the completed clothing will appear in the output slot. | |
| − | | | + | |
| − | + | ||
| − | + | ||
| − | + | ||
| − | + | ||
| − | + | ||
| − | }} | + | |
| − | + | ||
| − | | | + | |
| − | + | ||
| − | + | ||
| − | }} | + | |
| − | + | ||
| − | + | <!--T:118--> | |
| + | A Raw Hide Bag is crafted with two Hide Bag Pieces, which can be cut from Raw Hide. | ||
| − | + | <!--T:119--> | |
| + | {{Recipe/Bag Piece Hide}} | ||
| − | + | <!--T:120--> | |
| + | {{Recipe/Hide Bag}} | ||
| − | + | === Wounds and Medicine === <!--T:121--> | |
| − | + | <!--T:122--> | |
| − | + | In the course of playing, you may get [[Wound|wounded]]. These are represented by the Cut, Bleeding, Wound, and Fracture status effects. These wounds can be mitigated through the use of [[medicine]]. There are several types of medicines. Cuts and Wounds can be healed with bandages but will eventually heal on their own, while Fractures require splints to heal, and will never heal without them. Getting hurt while wounded might make the wounds you already have more severe. | |
| − | + | ||
| − | + | ||
| − | + | ||
| − | + | ||
| − | + | ||
| − | + | ||
| − | + | ||
| − | + | ||
| − | + | ||
| − | + | ||
| − | + | ||
| − | + | ||
| − | | | + | |
| − | + | <!--T:123--> | |
| + | To craft some crude bandages, you will need some [[#Straw|straw]] and some [[#Wood|tree resin]]. Once you've crafted the bandages, hold them in your hand and hold right click to start applying them. A single crude bandage will set the time remaining on the wound to 30 seconds, and is enough to treat minor wounds and bleeding. | ||
| + | {{Recipe/Primitive Bandage}} | ||
| − | + | <!--T:124--> | |
| + | To craft a splint, you need a stick and a piece of any [[string]]. A early-game version of string, Straw Cordage, can be made by weaving straw. Alternatively, any kind of string will do, even sinew from an animal. Once you've crafted a splint, hold it in your hand and hold right click to start splinting your fracture. A single splint should be enough for minor fractures, and will remove the movement penalty from the fracture itself while allowing the timer on that fracture to tick down. A fracture's movement speed reduction can also be mitigated through the use of a [[Wooden Staff|wooden staff]], which can be crafted with a pole and a piece of [[resin]]. Holding the staff while walking will allow you to walk normally, ignoring the movement speed reduction as long as the staff is held. | ||
| − | + | <!--T:125--> | |
| + | {{Recipe/Straw Cordage}} | ||
| + | {{Recipe/Splint}} | ||
| + | {{Recipe/Wooden Staff}} | ||
| − | + | <!--T:126--> | |
| − | + | You can check if a wound has been healed by opening your inventory and looking at the status effect panel: if it displays a lowercase "t" near the wound, it means the wound has been treated and is healing. | |
| − | + | In case your wounds are more severe and a single bandage or splint is not enough, you can just keep applying bandages or splints as needed. Note that each medical item will only heal one wound, so if you had a Wound and a Cut at the same time you'd need to use at least two bandages. | |
| − | + | ||
| − | + | ||
| − | + | ||
| − | + | ||
| − | + | ||
| − | + | ||
| − | + | ||
| − | + | ||
| − | + | ||
| − | + | ||
| − | + | ||
| − | + | ||
| − | + | === Storage === <!--T:127--> | |
| − | + | <!--T:128--> | |
| + | You may now have gathered too many items to carry around in your inventory. Unlike Vanilla, in TFC+, chests are locked behind metal saws. In the early game, one must resort to alternatives. | ||
| − | [[ | + | <!--T:129--> |
| + | One of the easiest to make storage items is the [[#Straw|Straw Basket]]. It can contain 9 slots of solid items, but cannot contain liquids. Large Ceramic Vessels and Ceramic Vessels can be crafted from [[#Pottery|Clay]]. The Large Ceramic Vessel can contain liquids or 9 slots of solid items. Ceramic Vessels are portable, and can contain four slots of small items, meaning items that are too big for it will not fit. The Raw Hide Bag can contain six slots of items. | ||
| − | + | === Coracles === | |
| − | + | [[Coracle|Coracles]] are a type of early-game boat made from Pitch and Wicker. In the early game, Pitch can be obtained by melting Resin in a mounted [[Containers#Large Ceramic Vessel|Large Ceramic Vessel]]. Coracles must be rowed with a Paddle in order to move. Coracles can be used to traverse large expanses of water in the early-game. | |
| − | + | ||
| − | | | + | |
| − | + | ||
| − | + | ||
| − | + | ||
| − | + | ||
| − | + | ||
| − | + | ||
| − | + | ||
| − | + | ||
| − | + | ||
| − | + | ||
| − | | | + | |
| − | + | {{Recipe/Pitch}} | |
| − | + | === Shelter === <!--T:130--> | |
| + | By now, you will have established your tools, have some food, and have portable fresh water to explore the world. You will now want to establish your shelter so you have somewhere to hide at night. | ||
| − | + | ==== Choosing a Site ==== <!--T:131--> | |
| − | + | You will want to equip yourself with a few [[#Pottery|jugs]] of water and some [[#Hunting and Foraging|Food]]. Explore the world for a suitable site. The best sites have certain traits that you may want to look out for. | |
| − | + | ||
| − | | | + | |
| − | + | ||
| − | + | ===== Stone and Metal ===== <!--T:132--> | |
| + | {{InfoTable/CopperOre}} | ||
| − | + | <!--T:133--> | |
| + | On the surface, ore nuggets will spawn. These indicate the existence of a ore vein underground (up to 35 blocks deep). Settling close to these ore nuggets will allow easy access to metal to mine later on. | ||
| − | + | <!--T:134--> | |
| + | Several stone types spawn materials that are more useful. One consideration is [[Flux|Flux Stone]], which turn into Flux. Flux is necessary for binding metal ingots together while smithing. Any material made of Flux Stone, such as Gravel, Sand, or Rock, can be made into Flux. Thus, if a beach spawns Dolomite sand, you will be able to make that into Flux Stone. | ||
| − | {{ | + | <!--T:135--> |
| − | + | {{InfoTable/Flux Stone}} | |
| − | + | ||
| − | + | ||
| − | + | ||
| − | }} | + | |
| − | + | <!--T:136--> | |
| + | If you do not settle near flux stone, you will need to gather seashells in order to make flux. This might be time consuming. | ||
| − | + | ===== Trees ===== <!--T:137--> | |
| − | + | <!--T:138--> | |
| − | + | Wood is important for charcoal and as building and crafting material. Proximity to trees is almost necessary. Not settling near trees also means you might be in a dry area, which might not spawn clay. | |
| − | + | ||
| − | + | ||
| − | + | ===== Clay ===== <!--T:139--> | |
| − | + | <!--T:140--> | |
| + | Clay is important to create molds for tools and ingots, as well as Ceramic Roof Tiles. An area not having clay also means you are in a dry area, and there likely will not be easily accessible clay anywhere nearby. | ||
| − | + | ===== Water ===== <!--T:141--> | |
| − | + | <!--T:142--> | |
| − | + | In Terrafirmacraft+, one cannot place water source blocks unless they have a Red Steel Bucket. This makes access to both fresh water and sea water important. Fresh water can be drunk and is important in certain crafting recipes. Seawater can be made into Brine to preserve food. Both types of water can be used to create farms, which are an important long-term source of food. | |
| − | + | ||
| − | + | ||
| − | + | ||
| − | + | ||
| − | + | ||
| − | + | ||
| − | + | ===== Climate ===== <!--T:143--> | |
| − | In | + | <!--T:144--> |
| + | In cold climates, you will need to prepare for Winter. In Winter, crops will not grow, and you will have to deal with the body temperature by crafting clothes. Likewise, in hot climates, you will need to prepare for the heat of Summer. It is recommended to settle in a cold climate, as cold protection clothing is easier to craft. | ||
| − | + | <!-- Remove specific mentions to materials and use a paragraph describing what can be used instead --> | |
| − | + | ==== Teepees ==== | |
| − | + | {{main|Teepee}} | |
| − | + | ||
| − | + | ||
| − | + | ||
| − | + | [[Teepee|Teepees]] are a type of tent that can be made from [[Hide|Hides]] or [[Wicker]]. Teepees can be slept in to skip the night. Thus, they are good for portable shelter and are very useful in the early game. | |
| − | + | As mentioned above, poles can be obtained directly from Logs by crafting them with a knife, and wicker can be obtained from Poles by crafting them with an axe. This makes Wicker teepees easy to construct. | |
| + | To make a Wicker teepee, place seven Wooden Spears (by crouching and {{key|RMB}}ing) in a upside-down U shape on the ground, and right click the center of the seven spears with 20 Wicker. | ||
| − | [[ | + | If you have obtained [[Hide|Hides]] or [[Fur|Furs]] from killing large animals, you can build a Hide Teepee. Unlike the Wicker teepee, Hide Teepees can be used in cold environments, and do not consume as much hunger and thirst when used. To build a Hide teepee, place 4 wooden spears in the ground, then right click the center of the spears with two large hides or four medium hides. |
| − | + | <gallery mode="packed"> | |
| + | File:Teepee Construction.png|Wooden Spears placed in ground to build Teepee | ||
| + | File:Teepee Complete.png|Completed Teepee | ||
| + | File:Teepee Storage.png|Grass Baskets in the three storage spaces | ||
| + | File:Complete wicker.png|Completed Wicker Teepee | ||
| + | File:Teepee construction wicker.png|Wicker Teepee wooden spears layout | ||
| + | </gallery> | ||
| − | + | ==== Beds ==== | |
| + | In Terrafirmacraft+, typical Vanilla beds are made with [[Cloth]]. Cloth is substantially harder to obtain in Terrafirmacraft+, as any type of fiber (such as Wool, Linen, Cotton, and Silk) must be processed before they can be used to craft. Therefore, in the early game, the most plausible type of bed that the player can build is the [[Straw & Hide Bed|Straw and Hide Bed]]. Like the vanilla Bed, the Straw and Hide Bed allows the player to sleep to skip the night as well as set their spawn. This comes with the disadvantage of consuming more Hunger and Thirst than the Cloth bed.{{verify}} | ||
| − | + | The Straw and Hide Bed can be obtained by placing down two Straw Blocks, then right clicking with one Large [[Hide]] while the player is looking straight down the two straw blocks. | |
| − | + | ||
| − | + | ||
| − | + | ||
| − | + | ||
| − | + | ||
| − | + | ||
| − | + | ||
| − | + | ||
| − | + | ||
| − | + | ||
| − | + | ||
| − | + | ||
| − | + | ||
| − | ==== | + | ==== Mud ==== <!--T:145--> |
| + | {{main|Mud}} | ||
| + | Mud in Terrafirmacraft+ is a mixture of wet dirt and straw. The blocks made from mud are very useful for early-game shelter, as they are solid, and not affected by gravity. This makes mud one of the most versatile early game building materials. | ||
| − | [[Ceramic | + | <!--T:146--> |
| + | Making mud requires a fired [[#Pottery|Ceramic Bucket]]. Collect dirt and straw, and drop it on the ground in a one-to-one ratio, then {{key|RMB}} with a ceramic bucket on the items to create Mud. | ||
| − | + | ===== {{GridImage|Mudbrick}} Mudbrick ===== <!--T:147--> | |
| − | + | <!--T:148--> | |
| + | Mud brick is created from crafting the mud directly in the inventory crafting table. | ||
| − | + | <!--T:149--> | |
| − | + | {{Recipe/Mud Brick}} | |
| − | + | ||
| − | + | ||
| − | + | ||
| − | + | ||
| − | + | ||
| − | + | ||
| − | } | + | |
| − | + | ||
| − | + | ||
| − | + | ||
| − | + | ||
| − | + | ||
| − | + | <!--T:150--> | |
| + | Mud brick must be dried before it can be used to build. Mud bricks can be dried by placing them using {{key|RMB}} on the ground exposed to the sun during the day. Once the mud brick is dried, craft them into Mudbricks, which can then be used to build. | ||
| − | + | <!--T:151--> | |
| + | {{Recipe/Mudbrick}} | ||
| − | + | ===== {{GridImage|Wattle and Daub}} Wattle and Daub ===== <!--T:153--> | |
| − | + | <!--T:154--> | |
| + | Wattle and daub is another way of building with mud. | ||
| − | + | <!--T:155--> | |
| + | To make wattle and daub, start by making the wattle upon which you will daub the mud: | ||
| + | {{Recipe/Wattle}} | ||
| + | Then, place the Wattle where you want the blocks to be. {{key|RMB}} with the mud to daub the mud over the wattle, and the wattle will turn into Wattle and Daub. | ||
| − | + | ==== Stacked Logs ==== <!--T:156--> | |
| − | + | <!--T:157--> | |
| − | + | Four regular logs can be crafted into one stacked log. This can be used to build log cabins. | |
| − | + | ||
| − | + | ||
| − | + | ||
| − | + | ||
| − | + | ||
| − | + | ||
| − | + | ||
| − | + | ||
| − | + | ||
| − | + | ||
| − | + | ||
| − | + | ||
| − | + | <!--T:158--> | |
| + | {{Recipe/Stacked Logs}} | ||
| − | + | ==== Log Piles ==== <!--T:159--> | |
| − | + | <!--T:160--> | |
| − | + | Log Piles can also be used as construction blocks. However, another log pile cannot be placed above another log pile that is not full. This makes Log Piles a rather expensive construction block. | |
| − | + | ||
| − | + | ||
| − | + | ||
| − | + | ||
| − | + | ||
| − | + | ||
| − | + | ||
| − | + | ||
| − | + | ||
| − | + | ||
| − | + | ||
| − | + | ||
| − | == | + | ==== Roofing ==== <!--T:161--> |
| − | + | <!--T:162--> | |
| + | You may want to make a roof for your building. TFC+ provides specialized roof blocks, which are solid diagonal blocks that also provide protection from the climate when a player is under them. An early game roof block is the [[Thatch Roof]], made using two straw blocks and a stick. Roofs attach to solid blocks, such as log piles. | ||
| − | + | <!--T:163--> | |
| + | {{Recipe/Thatch Roof}} | ||
| − | === | + | === Agriculture === <!--T:164--> |
| − | + | <!--T:165--> | |
| + | Farming is a good long term food source. In Terrafirmacraft+, agriculture is slightly different from vanilla. Crops will not be destroyed if you jump on them. Terrafirmacraft+ introduces the idea of nutrients. Crops require nutrients in order to grow. Grass blocks that are tilled will turn into farmland with full nutrients, while dirt blocks will have to be fallowed for a while before crops can be grown on them. Different crops use nutrients at different rates. The nutrient each plant needs can be checked once a player is skilled enough in Agriculture. Crops will gradually use up their particular nutrient - thus, it is recommended to switch the places of where in the farm you grow a certain crop every harvest. Freshwater and rain are used to hydrate soil. Every crop has its own hydration requirement, as such in places like rainforests you may be able to plant crops without the use of water irrigation. | ||
| − | + | <!--T:166--> | |
| + | Along with Food crops, there are Fiber crops and Dye crops. Fiber Crops, such as Agave, Cotton, Flax, and Jute, can be made into Fiber, which in turn can be made into String. Dye Crops, such as Madder, Weld, and Woad, are used for creating liquid Dye that can be used to dye clothing. | ||
| − | + | <!--T:167--> | |
| + | In the Stone Age, a hoe can be used to turn dirt into farmland, check the hydration status, and the harvest state of the crop. These three modes can be cycled using the mode key (Default: {{key|M}}). Once a player is skilled enough in Agriculture, they will be able to check the nutrient status of the farmland, as well. | ||
| − | {{ | + | <!--T:168--> |
| − | + | {{Recipe/Stone Hoe Head}} | |
| − | + | ||
| − | + | ||
| − | }} | + | |
| − | + | <!--T:169--> | |
| + | Like every other tool, a Stone Hoe must be attached to a Stick or Bone before it can be used. | ||
| − | + | <!--T:170--> | |
| + | [[File:Hoe Mode Toolbar.png]] - Mode Indicator | ||
| − | + | <!--T:171--> | |
| + | [[File:Toolmode_1-1.png]] '''Preparation''' - Standard use, tilling soil into farm-plot. | ||
| − | [[File: | + | <!--T:172--> |
| + | [[File:Toolmode_1-3.png]] '''Water''' - Highlights the target farmland with black: no water access, and blue: water access. | ||
| − | + | <!--T:173--> | |
| + | [[File:Toolmode_1-4.png]] '''Harvest''' - Highlights the farmland with a green display for ''finished'' crops and red for those whom are still growing into maturity. | ||
| − | + | <!--T:174--> | |
| + | Seeds can be [[#Foraging|Foraged]] from wild plants by breaking them. Once you have the seeds for a particular crop, they can be planted on farmland by {{key|RMB}}ing while holding the seeds. The crop will take a few in-game months to grow. You can ascertain that a crop can be harvested with the Harvest mode of the Hoe. | ||
| − | + | === Animal Husbandry === <!--T:175--> | |
| + | {{main|Animal Husbandry}} | ||
| − | + | <!--T:176--> | |
| − | + | In order for a long term source of meat, as well as to obtain Wool, Milk, and Hide, animals can be tamed and bred in Terrafirmacraft+. Refer to the [[Animal Husbandry]] page for more. | |
| − | == | + | == Extras == <!--T:177--> |
| − | There are | + | <!--T:178--> |
| + | There are many other things you can do in Terrafirmacraft+. This guide only covers the essentials. In the new player's interest, here are other things you can do: | ||
| − | + | <!--T:179--> | |
| + | * Make [[Candle|Candles]], for a safe source of light that does not pose a fire risk; | ||
| + | * [[Glassworking]], in order to create unbreakable* drinking bottles. The Blowpipe, used to make Glass Bottles from Molten Glass, can also be used to make a fire hotter. | ||
| + | * [[Alcohol]], for creating Vinegar and for experience levels; | ||
| + | * [[Leather|Leatherworking]], to convert Raw Hide into Leather | ||
| + | * Build an [[Walk-in Kiln]] to kiln more items at once | ||
| + | * Upgrade to better [[Roof]]s | ||
| + | * Make and play [[Musical Instruments]] | ||
| + | * Make [[Plaster of Paris]] | ||
| + | * [[Metalworking Guide|Smithing]] | ||
| + | * Make a [[Protection Meter]] to measure the amount of Spawn Protection around you | ||
| + | * Make a [[Saddle]] to ride Horses | ||
| + | * Make better [[Weapons]] such as the [[Bow]]. | ||
| + | * With a Saw made of Metal, make Lumber, which can be used to craft many wooden items, such as Wooden Planks, Barrels, and Chests. | ||
| + | * Craft a [[Loom]], weave [[Cloth]], and craft better [[Clothing]] in order to survive winter. | ||
| + | * Craft a [[Burlap Sack]] from Jute or Sisal (Agave) fiber, to preserve non-grain food. | ||
| + | * Craft a [[Quiver]] to store many Javelins and Arrows | ||
| + | * Craft a [[Composite Bow]], an upgraded and more powerful bow | ||
| + | * Do [[Beekeeping]] for honey | ||
| − | == | + | == Leaving the Stone Age == <!--T:180--> |
| − | + | Congratulations! You have made it to the end of the Stone Age. The next step will be to cast a pickaxe using molten copper, mining more copper, and creating a copper anvil that you can smith copper tools on. If you have followed the [[#Choosing a Site|Choosing a Site]] guide, you will have settled near a source of copper. The [[Metalworking Guide]] will aid you through the Copper Age and beyond. | |
| − | + | ||
| + | <!--T:181--> | ||
| + | {{Guides}} | ||
{{Blocks}} | {{Blocks}} | ||
| − | + | ||
| − | + | </translate> | |
Latest revision as of 23:40, 13 December 2022
Contents
- 1 Welcome to TFC+!
- 2 Getting started
- 3 Beyond The First Day
- 4 Extras
- 5 Leaving the Stone Age
Welcome to TFC+!

Terrafirmacraft+ is an re-imagination of what Minecraft can be, with a emphasis on making the game more believable. It is suited for experienced players of vanilla Minecraft, whom feel that an amount of complexity and detail has been lacking in the vanilla game, and want a level of realism that vanilla Minecraft does not provide.
This guide will help new players through the early game, with a focus on the differences between TFC+ and vanilla Minecraft. Players who already have experience with the original TerraFirmaCraft might want to look at Differences from TFC instead. If you have an issue or question, you can visit the Discord or Subreddit for support.
A number of translations are available for Terrafirmacraft+, but most of these are not complete. You can help translate Terrafirmacraft+ - look at the Translation page.
This guide assumes you have installed Terrafirmacraft+; if you have not, visit the Installation page for help. Note: Make sure you have created a 1.7.10 instance, and have installed Terrafirmacraft+, not "Terrafirmacraft". The "Terrafirmacraft" CurseForge project is not Terrafirmacraft+.
Note: The current version (0.89.1) has a bug where hostile monsters do not spawn on the surface. This issue will be fixed in the next version. Until then, if you wish to play with hostile monsters, play the previous version (0.88.4)
Getting started
HUD and Statistics
When you start a new world, you might notice that your HUD is quite different from what you are used to in vanilla Minecraft. This section will guide you through the various bars and menus of the Terrafirmacraft+ HUD.
Health
![]()
The first bar that is quite different from vanilla Minecraft is the health bar. Instead of hearts, in TFC+, HP is shown as a red bar. You start with 1000 max HP, and this will vary depending on various factors, such as nutrition and XP level. HP will regenerate very slowly over time, as long as your hunger is above 25%. Even on a full stomach, you cannot heal very quickly. Healing can be accelerated by wading in hot spring water or by using sterile bandages, which restore 100 HP for each bandage used.
Players can also be wounded, which has a variety of effects. You can only get wounded if you take 20% or more of your health in one hit. Having an untreated fractured bone slows the player's movement, while having a wound or a cut gradually damages the player for as long as the effect lasts. Specific wounds are inflicted by specific damage types. Fractures are only caused by crushing damage or falling damage, while wounds are caused by piercing damage and cuts are caused by slashing damage. The effects of wounds can be managed through medicine.
Hunger
![]()
Instead of shanks of food, hunger is represented with a green bar.
Unlike vanilla Minecraft, which uses arbitrary "filling values", the hunger system in TerraFirmaCraft+ is based off of food weight. TerraFirmaCraft+ uses the imperial measurement of ounces. However, this measurement does not relate to any other measurement in the game, so if the concept of ounces confuses you, you are welcome to instead think of them as generic "food units" or "bites." Each stack of food in TerraFirmaCraft+ can weigh up to 160 ounces.
Players will slowly get hungrier over the course of a few days, even if they do not move. When a player is very hungry, they will begin to suffer negative effects, such as Mining Fatigue and Weakness, until they have eaten again. Once a player's hunger bar is depleted, they will begin suffering from starvation, and very quickly die. Please note that the hunger bar is not linear, but rather logarithmic. As such, the last portion of the bar lasts significantly longer than the first. If you are running low on food, consider not constantly eating.
Thirst

![]()
Terrafirmacraft+ introduces the idea of Thirst. Players will slowly get more thirsty, eventually suffering from effects like Slowness and Weakness, and will suffer heat strokes if they are completely dehydrated. Thirst is represented with a blue bar. Like Hunger, Thirst will go down slowly, even if players are not moving. Players can only drink fresh water from pools scattered throughout the world, distinguished from the coastal seawater by cattails and lily pads. Thus, finding fresh, drinkable, water is very important for survival. The world generation always attempts to spawn the player near fresh water, even if it is a single block.
To drink water, players must ![]() Right Click on the block under Fresh Water. You can hold
Right Click on the block under Fresh Water. You can hold ![]() Right Click to continue drinking until you are no longer thirsty. If you are experiencing issues with drinking, relog into the world.
Right Click to continue drinking until you are no longer thirsty. If you are experiencing issues with drinking, relog into the world.
One of the main goals of the early game is to make a Ceramic Jug so that transporting fresh water - enabling exploration of large distances - is possible.
Experience
The experience system represents life experience, and so each level increases a player's maximum health, thirst, hunger, and alcohol tolerance, allowing them to take more hits, survive longer without drinking fresh water or eating, and drink more alcohol before getting negative side effects.
Unlike vanilla, there is no enchanting or tool repairs to consume experience levels, so the only way to decrease your experience level is death.
Body Temperature
Body Temperature is shown by a thermometer on the bottom right side of the screen. The green area of the thermometer shows the player's comfort range. The player's body temperature is affected by the season, body exertion from sprinting, their local climate, and certain blocks. If the player is too hot, or too cold, they will suffer negative effects such as Slowness and Mining Fatigue. They will also not be able to sleep in Straw & Hide Beds. Being too hot, or too cold, will also cause the player to lose hunger and thirst faster, as their bodies will "sweat" to keep cool, or burn calories to warm themselves up.
Body Temperature is primarily managed through the use of Clothing. Roofs also provide moderate temperature protection, and standing in shade out of the sun (or wearing a hat underneath it), or being in a cave, will also protect the player from the elements. Drinking water will temporarily give players heat resistance, while standing near lit campfires will provide cold resistance.
Inventory
The Inventory in Terrafirmacraft+ contains four tabs: the Inventory tab, which is like the vanilla Inventory, allowing you to interact with your items and craft, the Skills tab, displaying a player's proficiency in various skills, the Time tab, displaying the time of year, season, and day of week, and the Nutrition tab, which displays the five categories of food a player must eat in other to maintain their maximum health.
Unlike Vanilla, all crafting is done directly in the inventory tab. Players start out with a 2x2 Inventory Table, which can later be expanded with a crafting table to unlock the 3x3 grid. Unlike Vanilla, the Crafting Table is not an actual block, but is immediately used up to unlock the 3x3 grid.
| | |||
The First Day: Tools, Light, and Clothing
The goal for the first day is to prepare for the night and for the player's long-term survival. It is important to look around you, and to see what resources are available to you. If you see yourself in a plain, with grass, shrubs, and boulders stretching to the horizon, you might be able to find metal nuggets and animals to hunt quite easily. If you see yourself on a coast of an ocean, seaweed and fresh water is easy to find. If you find yourself in the deep rain forest, clay, fresh water, and wood are plentiful.
What You Can't Do
You might notice that you can't punch trees to get wood. This is because the tech-tree in Terrafirmacraft+ is completely different from that of vanilla Minecraft. This means that your first tools will be made from stone. There is no such thing as wooden tools in Terrafirmacraft+, and wasting your time to punch down a tree will yield you absolutely nothing. You cannot make planks in the same way as vanilla, and thus a crafting table in Terrafirmacraft+ - you will need a saw, which can only be made from metals.
There is no such thing as a Wooden or Stone pickaxe in Terrafirmacraft. In the early game, you do not mine stone for ore. Instead, there are other ways to acquire metal ore and tools, without needing a pickaxe. This will be how you will make a pickaxe to mine more ore.
Punching dirt is not recommended, as even if you manage to break a block, it, in addition to sand, gravel, stone and cobblestone, are affected by gravity in TerraFirmaCraft+. Unlike in Vanilla Minecraft, gravity-affected blocks are able to fall sideways, in addition to falling straight down. You will not be able to create a house out of these blocks.
Players used to vanilla Minecraft might wonder how one stores items in Terrafirmacraft+. Because planks as they are in vanilla are locked behind metal, early-game alternatives to the chest such as the Straw Basket, Large Vessel, Ceramic Vessel, and Raw Hide Bag are available.
Sprinting everywhere is not economical in TFC+ - your hunger and thirst declines much quicker. In addition sprinting for too long can cause exertion, which raises body temperature and makes clothing damp. Instead, the Wooden Staff can be used for a speed bonus that is half that of sprinting. Shoes and socks add additional speed bonuses. The Wooden Staff will be discussed later in this article.
Torches in TFC+ will light flammable blocks on fire. Before using a torch, it is recommended to clear the area of any flammable blocks, including grass, undergrowth, and fallen leaves. To light up your shelter, use a Firepit, which will be discussed later in this article. Later, you will be able to craft a Candle, which is a safe source of light.
Sticks and Stones
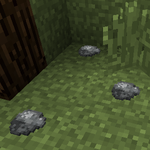
In Terrafirmacraft+, the first thing you should do, instead of punching trees, is to gather the rocks laying scattered all across the ground. 64 rocks will last you through the first few days of gameplay.
Occasionally, you might find some ore nuggets. Be sure to take note of the location, as these are important later.
You will also want to find some sticks. Sticks can be found occasionally on the ground under trees and on shores, and can also be obtained by breaking leaf litter. Sticks can also be obtained by breaking undergrowth and shrubs with an axe.
Knapping
Knapping is the process of using two rocks to create heads for stone tools. ![]() Right Click while holding a stack of two or more rocks to open the knapping interface. The process of knapping will produce stone flakes, which are also used in crafting and can be used like a knife to collect straw from grass.
Right Click while holding a stack of two or more rocks to open the knapping interface. The process of knapping will produce stone flakes, which are also used in crafting and can be used like a knife to collect straw from grass.
| |
||||||
The knapping interface is a 5x5 grid. Clicking on a square of the grid will break off that piece of stone. Be careful where you click - if you make a mistake, you cannot undo it and you will have to start again. If you successfully create a specific shape, a tool head will appear to the right which can then be attached to a stick or a bone in the crafting grid to create a stone tool. While knapping, Stone Flakes might be produced, which can be used to craft arrows later on.
Tip: Some of the tools can be knapped out differently than the below forms, feel free to experiment.
Knives are a weak melee weapon, and a useful tool. With a knife, you can gather seaweed, turn furs and animal hides into leather or clothing, process grain into cereal, and remove decay from food. Knives have two attacking modes, Stab and Slash, which deal different damage types. They can be swapped between by pressing M. Two knives can be crafted at once by mirroring the recipe on the other side. |
Axes are useful for felling trees, and also serve as a good Slashing damage weapon. |
Shovels can be used gather dirt, clay, gravel, and sand. |
Tip: Completed stone tools do not stack, but tool heads will stack up to 32. At night when you are hiding from monsters, you can knap a handful of each tool head to keep in your inventory. Then during the day when your tool breaks, you can quickly combine another head with a stick or bone for a new tool.
If you successfully create a specific shape, a tool head will appear to the right which can then be attached to a stick or a bone in the crafting grid to create a stone tool.
|
|
|
Wood
Wood is gathered by chopping down trees with an axe. If you break the bottom log of the tree with an axe, it will break the entire tree into logs and sticks. If your axe does not have enough durability to chop down the entire tree, only the top of the tree will be chopped, and the axe will break.
Trees come in two sizes: the normal tree that populates forests and grasslands, which drop regular-sized logs, and the rarer large trees which drop large logs. Large logs can be hewed into regular-sized logs; however, it is not recommended you do this, as large logs are comparatively rare, and can be used for building. 4 regular logs can be combined in the crafting grid in order to produce stacked logs, also used for building.
Logs can be stored in a log pile by ⇧ Shift + ![]() Right Click onto the ground. Only regular-sized logs can be used to start a log pile, however, once the log pile is created, it can be used to store large logs, as well.
Right Click onto the ground. Only regular-sized logs can be used to start a log pile, however, once the log pile is created, it can be used to store large logs, as well.
Logs can be crafted into poles with a knife, and poles can be snapped in half to make sticks. Poles can be further processed with an Axe to produce Wicker.
| |
| ||
| | |||
| | |||
| |
| ||
| | |||
| Wicker | ||||||||||||
|---|---|---|---|---|---|---|---|---|---|---|---|---|
|
As mentioned above, vanilla Planks cannot be made directly from logs (instead being made from 4 Lumber, which is only obtainable when the player has made a Saw). Thus, certain items like Boats and Beds are locked behind metal. In the early game, several alternatives, like the Straw & Hide Bed and the Coracle are available.
Logs can be right clicked with a knife to receive Resin; this can be used to craft various items, such as the Wooden Staff, and the Primitive Bandage. The Wooden Staff is made from Resin combined with a Pole, and gives the player a 15% speed bonus while walking when it is held. This speed bonus is half of the sprinting speed. Because sprinting in Terrafirmacraft+ causes the player to become hungry and thirsty faster, it is recommended to use the Wooden Staff instead of sprinting whenever possible. The Primitive Bandage is used when the player gets wounded; see the Wounds and Medicine section.
| |
| ||
| | |||
| | |||
Weapons
Weapons are important in order to hunt wild animals and defend yourself from monsters at night. Early game weapons, like tools, can be knapped from stone, or, in the case of the Wooden Spear, shaped from a pole. In Terrafirmacraft+, there are three types of damage: Slashing, Piercing, and Crushing. Slashing is effective against Endermen and Zombies. Piercing damage is effective against Bears, Creepers, Endermen, and Wolves, and Crushing is effective against Endermen and Skeletons. Axes deal Slashing damage, Javelins and Spears deal Piercing damage, and Hammers deal Crushing damage. The Knife has two modes, Stabbing and Slashing, which deal Piercing and Slashing damage respectively.
The Primitive Sling is an early-game ranged weapon. It is rather cheap and fires rocks which deal Crushing damage, making it useful against Skeletons and Wither Skeletons. Projectiles fired from a sling will go off slightly to the right of the crosshair, so to hit targets, aim slightly to the left.
| Primitive Sling | Javelin Head (Stone) | Stone Hammer Head | ||||||||||||||||||||||||||||||||||||||||||||||||||||||||||||||||||
|---|---|---|---|---|---|---|---|---|---|---|---|---|---|---|---|---|---|---|---|---|---|---|---|---|---|---|---|---|---|---|---|---|---|---|---|---|---|---|---|---|---|---|---|---|---|---|---|---|---|---|---|---|---|---|---|---|---|---|---|---|---|---|---|---|---|---|---|---|
|
|
|
Javelin heads need to be crafted with a Pole in order to create the full Javelin, while Stone Hammers, like tools, need to be crafted with a Stick or a Bone.
Wooden Spears are an weaker version of the Stone Javelin. They can be crafted from a pole and a knife.
| |
| ||
| | |||
| | |||
Wooden Spears and Javelins will automatically refill from your inventory after one is thrown.
Hunting and Foraging
Finding a source of food and water is important for your long term survival. Only fresh water can be drunk; the process of finding and drinking fresh water is described in the Thirst section.
Seaweed
A good source of early-game food - if you are near the shore - is seaweed. Seaweed can be harvested using ![]() Right Click on the block below the seaweed while holding a knife. Once you have a few pieces of seaweed, you can stack them together by hovering over one piece of seaweed and pressing S to stack the seaweed together. Alternatively, the seaweed can be crafted together in the Inventory grid to stack them.
Right Click on the block below the seaweed while holding a knife. Once you have a few pieces of seaweed, you can stack them together by hovering over one piece of seaweed and pressing S to stack the seaweed together. Alternatively, the seaweed can be crafted together in the Inventory grid to stack them.
Meat
If you cannot locate a shore, the next best source of food is meat. Animals can be found clustered in groups around the world. Do not attack them right away! In Terrafirmacraft+, animals are neutral mobs, and most will attack the player if the player attacks them (deers and pheasants will not retaliate). As animals are also much harder to kill than in Vanilla, you should prepare yourself before you attack an animal.
Note: Do not underestimate animals! They have large amounts of knockback and damage. They are not harmless, like in Vanilla!
Stand away some distance from the animal, and hold ![]() Right Click to prepare your spear or javelin. Do not attack the animal directly with the javelin! Hitting an animal with a javelin deals far less damage than throwing it. Release in order to throw it. Be careful, as the animal will now try to attack you. Throw multiple spears in rapid succession, until the animal dies. In Terrafirmacraft+, animals drop as much meat as their body weight. This means that large animals will drop quite a lot of meat. You do not have to worry about picking up all the meat, as a few stacks will suffice for a few days. Be sure to pick up the Raw Hide, too, as it is very useful later. The sinew from hunting can be used to make a bow, which can also aid you in future hunts.
Right Click to prepare your spear or javelin. Do not attack the animal directly with the javelin! Hitting an animal with a javelin deals far less damage than throwing it. Release in order to throw it. Be careful, as the animal will now try to attack you. Throw multiple spears in rapid succession, until the animal dies. In Terrafirmacraft+, animals drop as much meat as their body weight. This means that large animals will drop quite a lot of meat. You do not have to worry about picking up all the meat, as a few stacks will suffice for a few days. Be sure to pick up the Raw Hide, too, as it is very useful later. The sinew from hunting can be used to make a bow, which can also aid you in future hunts.
If you are wounded, jump to the Wounds and Medicine section, then come back.
Foraging

Crops spawn randomly in the wild between the seasons of spring and late summer, and have a chance to regenerate during those seasons every year. Breaking a wild crop will give only seeds if it isn't fully mature, so you should wait until it has reached the last stage of growth before harvesting if you want food. If you can find mature crops, they will serve as a good source of food.
Fruit trees and Berry Bushes can also be found in the wild. To harvest the fruit from a fruit tree or berry bush, ![]() Right Click on their leaves. Berry bushes can be picked up by breaking them, and placed elsewhere later on.
Right Click on their leaves. Berry bushes can be picked up by breaking them, and placed elsewhere later on.
These long-term food sources may be hard to find. Players are reminded that finding crops in Terrafirmacraft+ involves exploring a large area, much larger than required in vanilla - typically, the climate only changes if you travel about 1000 blocks away from an area. This may be confusing to players that are used to Vanilla, because Vanilla uses Biomes to determine the generation of resources, while Terrafirmacraft+ instead uses a climate system. Imagine that you are trying to find a different biome in Vanilla - if you cannot find these food sources, simply travel further, and rely on what you have to feed yourself while exploring. Despite this, it is completely possible to find these sources, and to sustain yourself for a long time.
Grain crops must be refined with a knife to make them into their edible version. This will also return straw.
| |
|
| |
| | |||
| |
In a pinch, mushrooms found in leaf litter can be cut with a knife to make them edible. Only brown mushrooms are safe to eat raw; red mushrooms must first be cooked.
Note: Do not break the leaves of the fruit trees! They take a long time to regrow.
Seeds can later be planted for a long-term food source.
If you have many stacks of food, you can stack them together. This can be done either by crafting the stacks of items together, or by hovering over one stack of food and pressing S (for "stack"). Food will eventually decay, and will have to be preserved for them to last longer. Decay can be cut off of food with a knife automatically by pressing D while your inventory is open, or by crafting the decayed food with the knife. Preservation methods will be discussed later on in this article.
Beekeeping
- Main article: Beekeeping
Wild Beehives occasionally generate on trees. Beehives are a source of Honeycombs, which are useful to make honey, which is a source of food, and also as a source of Wax for Candles. The player may also choose to make their own artificial beehives to gather more honey.
Players cannot open beehives directly. The bees will sting the player if they attempt to open or break the beehive. To calm the bees so that opening the beehive is possible, the player must light a Firepit underneath the beehive to calm the bees and allow the beehive to be opened. Wild Beehives have a Fertile Honeycomb in them; this can be used to create an artificial beehive, or can be cut to gather the honey inside. Once the Fertile Honeycomb is removed from the Wild Beehive, the beehive will collapse and drop some Empty Honeycombs; this can later be melted for Wax, which is an essential component of Candles.
| |
|
| |
| | |||
| | |||
The making of bowls so that you can remove the honey from the honeycomb is discussed later in this article, and the process of creating an artificial hive can be found at the Beekeeping article.
Firepit
- Main article: Firepit
At the end of the first day, you will probably want to create a firepit to make some torches, and cook any meat you've collected so you can eat it. You'll need at least five sticks, some logs to use as fuel, and optionally a piece of straw.
First, you'll need to put two sticks in the grafting grid in a diagonal pattern to make a firestarter.
| |
| ||
| | |||
| |
|||
Once you have a firestarter, throw (Default: Q) three sticks on the ground or other non-flammable block. Make sure they are all stacked on the same block, preferably in the middle. It's possible that your first few tries to light the firepit will not work. You can optionally toss an extra piece of straw in order to make the process faster. Once the firepit appears, drop some logs on to it to quickly add fuel. You can ![]() Right Click on the firepit as long as you aren't holding a firestarter or flint & steel to open its interface. The firestarter can later be upgraded by crafting it with a Bow to produce a Bow Drill, which has a higher effectiveness and durability.
Right Click on the firepit as long as you aren't holding a firestarter or flint & steel to open its interface. The firestarter can later be upgraded by crafting it with a Bow to produce a Bow Drill, which has a higher effectiveness and durability.
If the firepit goes out, you'll need to add some fuel and then ![]() Right Click on it with a firestarter to relight it. Relighting is instant.
Right Click on it with a firestarter to relight it. Relighting is instant.
Once you have a firepit, it is recommended that you make some torches. Torches can be easily lit by pressing ![]() Right Click on a lit Firepit while holding an unlit torch. A placed lit Torch can be used to light unlit torches in the same way.
Right Click on a lit Firepit while holding an unlit torch. A placed lit Torch can be used to light unlit torches in the same way.
| |
|
| |
| | |||
| |
|||
| |
![]() Right Click on a lit torch or lit firepit, or place and
Right Click on a lit torch or lit firepit, or place and ![]() Right Click with a firestarter or flint and steel to light the torch.
Right Click with a firestarter or flint and steel to light the torch.
A Large Ceramic Vessel can be mounted on a Firepit (by ⇧ Shift+![]() Right Clicking) to process liquids; this is useful if you wish to make a Coracle, or simply want to evaporate Salt Water for Salt in order to preserve your Food.
Right Clicking) to process liquids; this is useful if you wish to make a Coracle, or simply want to evaporate Salt Water for Salt in order to preserve your Food.
Warning: Torches can set nearby flammable blocks on fire! They are not meant for indoor use if your shelter is made of wood or straw. Clear the nearby area of grass, undergrowth, trees, and leaves before placing down a torch. Use a Firepit instead to light up your shelter, and later upgrade to Candles.
Straw
Breaking tall grass with a knife yields straw. Straw is highly useful in the early game, as it can be made into shelter, storage, clothing, bandages, splints, and bedding.
Straw can be woven using the same knapping interface as rocks. To begin weaving straw, ![]() Right Click while holding at least five pieces of straw.
Right Click while holding at least five pieces of straw.
The Basket has 9 slots of inventory space. It will drop its items when it is broken. |
The Straw Cloak provides a moderate amount of cold protection. It is useful if you have spawned in a cold environment. |
The Straw Hat provides a slight amount of heat protection, and protects you from the heat of the sun. | |||||||||||||||||||||||||||||||||||||||||||||||||||||||||||||||||||||||||||||||||
The Grass Shirt provides a slight amount of heat protection. |
The Grass Skirt provides a slight amount of heat protection. |
The Grass Sandals give a small speed bonus when on sand. |
Straw can also be crafted into Straw Blocks, which are useful for building huts to hide from mobs at night. It is also used in a good number of early-game constructions and crafting recipes, such as Straw Roofs and Straw and Hide beds.
| |
|
| |
| | |||
| |
| ||
Note: Players and mobs are able to move through straw blocks. You cannot use straw blocks to pillar up to safety, as you will simply fall through the block when you try to jump on it. Hostile mobs will not be able to spot you if you are already hiding in a straw block enclosure, but they are able to follow you through straw blocks if they have been aggro'd while you were outside of the straw block.

If you have a piece of Large Raw Hide, you can craft a Straw and Hide bed by placing two Straw Blocks adjacent to each other. Then, ![]() Right Click with the piece of Large Raw Hide in your hand while facing the straw blocks straight-on in order to create a Straw and Hide Bed. This can be used to skip the night. Be aware, through, that you might need to craft clothing in order to sleep in a Straw and Hide Bed, as it will be too uncomfortable to sleep in if you are too hot or too cold.
Right Click with the piece of Large Raw Hide in your hand while facing the straw blocks straight-on in order to create a Straw and Hide Bed. This can be used to skip the night. Be aware, through, that you might need to craft clothing in order to sleep in a Straw and Hide Bed, as it will be too uncomfortable to sleep in if you are too hot or too cold.
If you made it this far, congratulations. You have survived your first day in Terrafirmacraft+, and have the means to survive at night. Do take note that in TFC+, mob spawns are heavily increased, and it is not a good idea to be wandering around at night. It is recommended to stay near a firepit, and perhaps continue with Pottery, if you have a clay source nearby. You may now explore more long-term possibilities for survival, and progress towards the Copper Age.
Beyond The First Day
The days beyond the first day are focused on securing more tools for survival. You will also work your way towards leaving the Stone Age and entering the Copper Age, which will unlock more possibilities for long term survival.
Environment and Seasons
Instead of vanilla biomes, in Terrafirmacraft+ there is a climate system. Rainfall, elevation, distance from the equator, and time of year determine what types of animals, plants, and terrain will generate in an area. Players will always spawn in the northern half of the map, during the season of early summer.
Terrafirmacraft+ adds the four seasons to Minecraft. The seasons affect the ambient temperature, the behavior of animals, and the timing of sunrise and sunset. In winter, unharvested crops will turn back into seeds, trees will lose their leaves, and new saplings that are not evergreen will not grow. In spring, long grass, flowers, rocks, and saplings will regenerate. In summer, crops will respawn randomly over the world, and can be harvested for seeds. In autumn, trees will turn brown, and the ambient temperature will begin to fall. The player must prepare for the four seasons adequately, and the unique challenges that each provide, such as the heat of summer, especially if the player is in a tropical Region, and preparing the cold of winter, by building shelter and sewing clothes.
Areas around the equator tend to be wetter and hotter, and eventually becomes tropical, then temperate, then boreal, and finally polar at 27000 blocks North or South.
Rivers generate along biome borders, and are much larger than Vanilla. Their riverbeds will contain clay deposits that will be useful if one spawns in a climate too dry to spawn clay.
Terrafirmacraft+ also introduces the idea of Regions. Instead of biomes, Regions are what determines what trees, plants, and animals spawns in an area. For example, Black-Eyed Peas can only be found in Africa. Along the edges of Regions, huge mountain ranges will generate.
Pottery

Clay generates near ponds and in riverbeds across the world. It can be distinguished from dirt from a distance by the existence of yellow Goldenrod flowers which only grow on clay. It can be dug with a shovel to obtain clay balls, which can then be shaped into clay items, and fired to make Pottery. Pottery is an important step of progression in Terrafirmacraft+, as it allows fresh water to be transported, Mud to be made, and to create vessels and Gold Pans.
Clay, like Straw and Rocks, has a knapping interface for forming clay items. Hold five clay balls in your hand, and ![]() Right Click to access it.
Right Click to access it.
| |
||||||
The Ceramic Jug allows you to pick up water using |
The Ceramic Vessel has four slots of inventory space for small items. It is essential for progression to the Copper Age. Ceramic Vessels can only hold grains. |
The Ceramic Bucket is necessary for picking up water to create Mud. | |||||||||||||||||||||||||||||||||||||||||||||||||||||||||||||||||||||||||||||||||||
Ceramic Bowls can be used for the creation of Salads, or to craft a Gold Pan. |
Large Vessels are an early game Barrel. Large Vessels can contain 9 items, as well as liquids, and can be carried on the player's back. They can be mounted on a Firepit in order to melt items, such as Empty Honeycombs into Wax. Large Vessels are also a part of the Still. |
After you have made a clay item, it must be fired before it can be used. To do this, you will need to make a Pit Kiln.
Pit Kiln
To make a Pit Kiln, dig a pit in the ground, and ⇧ Shift + ![]() Right Click the items to be fired into the pit. Then, add eight straw, then eight logs, by right clicking on the pottery.
Right Click the items to be fired into the pit. Then, add eight straw, then eight logs, by right clicking on the pottery.
- The pit kiln will not work as pictured below. These images are in cross section, with the required surrounding blocks removed for visibility.
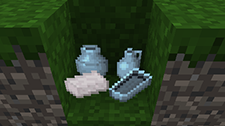
⇧ Shift+
 Right Click the items into the pit
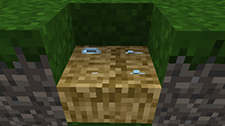
Pit kiln with added straw
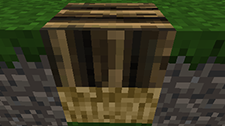
Complete pit kiln


The Pit Kiln can now be lit with either a Firestarter or a dropped torch. Lighting a pit kiln using a torch will produce sparks that might burn flammable blocks nearby, so be careful where you build your pit kilns.
The Pit Kiln will take eight hours to complete. Once it is complete, you can ⇧ Shift + ![]() Right Click the items out of the pit kiln. The items can now be used.
Right Click the items out of the pit kiln. The items can now be used.
Sewing

Sewing can be used to craft Raw Hide Bags for carrying around more items, and to create more advanced clothing from materials like Fur.
To begin sewing, one needs a Bone Needle. Bone Needles can be made by repeatedly punching a Stone Block with a bone in your hand. It is recommended to have several bones, as not every bone will drop a Bone Needle. Once a Bone Needle is produced, it can be threaded with a thread, such as Sinew (from killing animals).
| |
| ||
| | |||
| | |||
Leather and the various cloths can be cut into clothing pieces. ![]() Right Click with the clothing pieces with a threaded bone needle in the inventory to show the sewing GUI. Place the necessary clothing pieces into the slots. An image of the clothing will appear. Use the Threaded Bone Needle to trace the thread around the red lines in the image. Using
Right Click with the clothing pieces with a threaded bone needle in the inventory to show the sewing GUI. Place the necessary clothing pieces into the slots. An image of the clothing will appear. Use the Threaded Bone Needle to trace the thread around the red lines in the image. Using ![]() Right Click with a knife on the image will remove a section of thread. Once the red lines on the image is completely traced correctly, and all incorrect parts of the tracing are removed, the completed clothing will appear in the output slot.
Right Click with a knife on the image will remove a section of thread. Once the red lines on the image is completely traced correctly, and all incorrect parts of the tracing are removed, the completed clothing will appear in the output slot.
A Raw Hide Bag is crafted with two Hide Bag Pieces, which can be cut from Raw Hide.
| |
| |||||
| |
|
|
| ||
Wounds and Medicine
In the course of playing, you may get wounded. These are represented by the Cut, Bleeding, Wound, and Fracture status effects. These wounds can be mitigated through the use of medicine. There are several types of medicines. Cuts and Wounds can be healed with bandages but will eventually heal on their own, while Fractures require splints to heal, and will never heal without them. Getting hurt while wounded might make the wounds you already have more severe.
To craft some crude bandages, you will need some straw and some tree resin. Once you've crafted the bandages, hold them in your hand and hold right click to start applying them. A single crude bandage will set the time remaining on the wound to 30 seconds, and is enough to treat minor wounds and bleeding.
| |
|
| |
| | |||
To craft a splint, you need a stick and a piece of any string. A early-game version of string, Straw Cordage, can be made by weaving straw. Alternatively, any kind of string will do, even sinew from an animal. Once you've crafted a splint, hold it in your hand and hold right click to start splinting your fracture. A single splint should be enough for minor fractures, and will remove the movement penalty from the fracture itself while allowing the timer on that fracture to tick down. A fracture's movement speed reduction can also be mitigated through the use of a wooden staff, which can be crafted with a pole and a piece of resin. Holding the staff while walking will allow you to walk normally, ignoring the movement speed reduction as long as the staff is held.
| |
| |||||
| |
|
| |
| | |||
| |
| ||
| | |||
| | |||
You can check if a wound has been healed by opening your inventory and looking at the status effect panel: if it displays a lowercase "t" near the wound, it means the wound has been treated and is healing. In case your wounds are more severe and a single bandage or splint is not enough, you can just keep applying bandages or splints as needed. Note that each medical item will only heal one wound, so if you had a Wound and a Cut at the same time you'd need to use at least two bandages.
Storage
You may now have gathered too many items to carry around in your inventory. Unlike Vanilla, in TFC+, chests are locked behind metal saws. In the early game, one must resort to alternatives.
One of the easiest to make storage items is the Straw Basket. It can contain 9 slots of solid items, but cannot contain liquids. Large Ceramic Vessels and Ceramic Vessels can be crafted from Clay. The Large Ceramic Vessel can contain liquids or 9 slots of solid items. Ceramic Vessels are portable, and can contain four slots of small items, meaning items that are too big for it will not fit. The Raw Hide Bag can contain six slots of items.
Coracles
Coracles are a type of early-game boat made from Pitch and Wicker. In the early game, Pitch can be obtained by melting Resin in a mounted Large Ceramic Vessel. Coracles must be rowed with a Paddle in order to move. Coracles can be used to traverse large expanses of water in the early-game.
| Pitch | |||||||||||
|---|---|---|---|---|---|---|---|---|---|---|---|
| |||||||||||
Shelter
By now, you will have established your tools, have some food, and have portable fresh water to explore the world. You will now want to establish your shelter so you have somewhere to hide at night.
Choosing a Site
You will want to equip yourself with a few jugs of water and some Food. Explore the world for a suitable site. The best sites have certain traits that you may want to look out for.
Stone and Metal
| Copper Ore | ||||
|---|---|---|---|---|
On the surface, ore nuggets will spawn. These indicate the existence of a ore vein underground (up to 35 blocks deep). Settling close to these ore nuggets will allow easy access to metal to mine later on.
Several stone types spawn materials that are more useful. One consideration is Flux Stone, which turn into Flux. Flux is necessary for binding metal ingots together while smithing. Any material made of Flux Stone, such as Gravel, Sand, or Rock, can be made into Flux. Thus, if a beach spawns Dolomite sand, you will be able to make that into Flux Stone.
| Flux Stone | |||
|---|---|---|---|
| |
|
|
|
If you do not settle near flux stone, you will need to gather seashells in order to make flux. This might be time consuming.
Trees
Wood is important for charcoal and as building and crafting material. Proximity to trees is almost necessary. Not settling near trees also means you might be in a dry area, which might not spawn clay.
Clay
Clay is important to create molds for tools and ingots, as well as Ceramic Roof Tiles. An area not having clay also means you are in a dry area, and there likely will not be easily accessible clay anywhere nearby.
Water
In Terrafirmacraft+, one cannot place water source blocks unless they have a Red Steel Bucket. This makes access to both fresh water and sea water important. Fresh water can be drunk and is important in certain crafting recipes. Seawater can be made into Brine to preserve food. Both types of water can be used to create farms, which are an important long-term source of food.
Climate
In cold climates, you will need to prepare for Winter. In Winter, crops will not grow, and you will have to deal with the body temperature by crafting clothes. Likewise, in hot climates, you will need to prepare for the heat of Summer. It is recommended to settle in a cold climate, as cold protection clothing is easier to craft.
Teepees
- Main article: Teepee
Teepees are a type of tent that can be made from Hides or Wicker. Teepees can be slept in to skip the night. Thus, they are good for portable shelter and are very useful in the early game.
As mentioned above, poles can be obtained directly from Logs by crafting them with a knife, and wicker can be obtained from Poles by crafting them with an axe. This makes Wicker teepees easy to construct.
To make a Wicker teepee, place seven Wooden Spears (by crouching and ![]() Right Clicking) in a upside-down U shape on the ground, and right click the center of the seven spears with 20 Wicker.
Right Clicking) in a upside-down U shape on the ground, and right click the center of the seven spears with 20 Wicker.
If you have obtained Hides or Furs from killing large animals, you can build a Hide Teepee. Unlike the Wicker teepee, Hide Teepees can be used in cold environments, and do not consume as much hunger and thirst when used. To build a Hide teepee, place 4 wooden spears in the ground, then right click the center of the spears with two large hides or four medium hides.
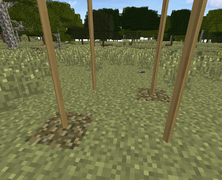
Wooden Spears placed in ground to build Teepee
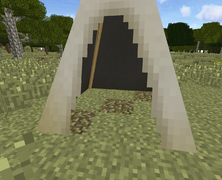
Completed Teepee
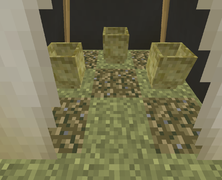
Grass Baskets in the three storage spaces

Completed Wicker Teepee
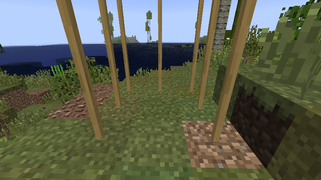
Wicker Teepee wooden spears layout


Beds
In Terrafirmacraft+, typical Vanilla beds are made with Cloth. Cloth is substantially harder to obtain in Terrafirmacraft+, as any type of fiber (such as Wool, Linen, Cotton, and Silk) must be processed before they can be used to craft. Therefore, in the early game, the most plausible type of bed that the player can build is the Straw and Hide Bed. Like the vanilla Bed, the Straw and Hide Bed allows the player to sleep to skip the night as well as set their spawn. This comes with the disadvantage of consuming more Hunger and Thirst than the Cloth bed.Verify
The Straw and Hide Bed can be obtained by placing down two Straw Blocks, then right clicking with one Large Hide while the player is looking straight down the two straw blocks.
Mud
- Main article: Mud
Mud in Terrafirmacraft+ is a mixture of wet dirt and straw. The blocks made from mud are very useful for early-game shelter, as they are solid, and not affected by gravity. This makes mud one of the most versatile early game building materials.
Making mud requires a fired Ceramic Bucket. Collect dirt and straw, and drop it on the ground in a one-to-one ratio, then ![]() Right Click with a ceramic bucket on the items to create Mud.
Right Click with a ceramic bucket on the items to create Mud.
 Mudbrick
Mud brick is created from crafting the mud directly in the inventory crafting table.
| |
| ||
| | |||
Mud brick must be dried before it can be used to build. Mud bricks can be dried by placing them using ![]() Right Click on the ground exposed to the sun during the day. Once the mud brick is dried, craft them into Mudbricks, which can then be used to build.
Right Click on the ground exposed to the sun during the day. Once the mud brick is dried, craft them into Mudbricks, which can then be used to build.
| |
|
| |
| | |||
| |
| ||
 Wattle and Daub
Wattle and daub is another way of building with mud.
To make wattle and daub, start by making the wattle upon which you will daub the mud:
| |
|
| |
| | |||
| |
| ||
Then, place the Wattle where you want the blocks to be. ![]() Right Click with the mud to daub the mud over the wattle, and the wattle will turn into Wattle and Daub.
Right Click with the mud to daub the mud over the wattle, and the wattle will turn into Wattle and Daub.
Stacked Logs
Four regular logs can be crafted into one stacked log. This can be used to build log cabins.
| |
|
| |
| | |||
| |
| ||
Log Piles
Log Piles can also be used as construction blocks. However, another log pile cannot be placed above another log pile that is not full. This makes Log Piles a rather expensive construction block.
Roofing
You may want to make a roof for your building. TFC+ provides specialized roof blocks, which are solid diagonal blocks that also provide protection from the climate when a player is under them. An early game roof block is the Thatch Roof, made using two straw blocks and a stick. Roofs attach to solid blocks, such as log piles.
| |
| ||
| | |||
| |
| ||
Agriculture
Farming is a good long term food source. In Terrafirmacraft+, agriculture is slightly different from vanilla. Crops will not be destroyed if you jump on them. Terrafirmacraft+ introduces the idea of nutrients. Crops require nutrients in order to grow. Grass blocks that are tilled will turn into farmland with full nutrients, while dirt blocks will have to be fallowed for a while before crops can be grown on them. Different crops use nutrients at different rates. The nutrient each plant needs can be checked once a player is skilled enough in Agriculture. Crops will gradually use up their particular nutrient - thus, it is recommended to switch the places of where in the farm you grow a certain crop every harvest. Freshwater and rain are used to hydrate soil. Every crop has its own hydration requirement, as such in places like rainforests you may be able to plant crops without the use of water irrigation.
Along with Food crops, there are Fiber crops and Dye crops. Fiber Crops, such as Agave, Cotton, Flax, and Jute, can be made into Fiber, which in turn can be made into String. Dye Crops, such as Madder, Weld, and Woad, are used for creating liquid Dye that can be used to dye clothing.
In the Stone Age, a hoe can be used to turn dirt into farmland, check the hydration status, and the harvest state of the crop. These three modes can be cycled using the mode key (Default: M). Once a player is skilled enough in Agriculture, they will be able to check the nutrient status of the farmland, as well.
| |
| |||||
Like every other tool, a Stone Hoe must be attached to a Stick or Bone before it can be used.
![]() - Mode Indicator
- Mode Indicator
![]() Preparation - Standard use, tilling soil into farm-plot.
Preparation - Standard use, tilling soil into farm-plot.
![]() Water - Highlights the target farmland with black: no water access, and blue: water access.
Water - Highlights the target farmland with black: no water access, and blue: water access.
![]() Harvest - Highlights the farmland with a green display for finished crops and red for those whom are still growing into maturity.
Harvest - Highlights the farmland with a green display for finished crops and red for those whom are still growing into maturity.
Seeds can be Foraged from wild plants by breaking them. Once you have the seeds for a particular crop, they can be planted on farmland by ![]() Right Clicking while holding the seeds. The crop will take a few in-game months to grow. You can ascertain that a crop can be harvested with the Harvest mode of the Hoe.
Right Clicking while holding the seeds. The crop will take a few in-game months to grow. You can ascertain that a crop can be harvested with the Harvest mode of the Hoe.
Animal Husbandry
- Main article: Animal Husbandry
In order for a long term source of meat, as well as to obtain Wool, Milk, and Hide, animals can be tamed and bred in Terrafirmacraft+. Refer to the Animal Husbandry page for more.
Extras
There are many other things you can do in Terrafirmacraft+. This guide only covers the essentials. In the new player's interest, here are other things you can do:
- Make Candles, for a safe source of light that does not pose a fire risk;
- Glassworking, in order to create unbreakable* drinking bottles. The Blowpipe, used to make Glass Bottles from Molten Glass, can also be used to make a fire hotter.
- Alcohol, for creating Vinegar and for experience levels;
- Leatherworking, to convert Raw Hide into Leather
- Build an Walk-in Kiln to kiln more items at once
- Upgrade to better Roofs
- Make and play Musical Instruments
- Make Plaster of Paris
- Smithing
- Make a Protection Meter to measure the amount of Spawn Protection around you
- Make a Saddle to ride Horses
- Make better Weapons such as the Bow.
- With a Saw made of Metal, make Lumber, which can be used to craft many wooden items, such as Wooden Planks, Barrels, and Chests.
- Craft a Loom, weave Cloth, and craft better Clothing in order to survive winter.
- Craft a Burlap Sack from Jute or Sisal (Agave) fiber, to preserve non-grain food.
- Craft a Quiver to store many Javelins and Arrows
- Craft a Composite Bow, an upgraded and more powerful bow
- Do Beekeeping for honey
Leaving the Stone Age
Congratulations! You have made it to the end of the Stone Age. The next step will be to cast a pickaxe using molten copper, mining more copper, and creating a copper anvil that you can smith copper tools on. If you have followed the Choosing a Site guide, you will have settled near a source of copper. The Metalworking Guide will aid you through the Copper Age and beyond.
| Guides | Stone-Age Guide • Metalworking Guide • Installation • Shader Setup • Differences from TFC • List of Changes from TFC • Performance Optimization • Addon Development • Translation |
|---|---|
| Lists | Addons • Crafting Index • Planned Features • Commands • Mod Compatibility |